Browsed by
Author: Elizabeth Smillie

Hello there! I'm Elizabeth. Welcome to my website and blog space. All the products in my little shop are hand crafted and stem from my desire to provide creative and high quality products that make people feel lovely. I believe the little moments of life matter, every day should be celebrated, and that the beauty all around us is a gift from the Creator to be enjoyed. I'm married to a wonderful guy who happens to be my greatest cheerleader and best friend, mama to three little ones and currently reside in the heartland of America.
the office, version 2.0

the office, version 2.0

As promised, here are photos of what our second office space looked like when we moved from “version 1.0“{I loved so many things about this one!}.

After a couple of years in our first studio {really it was “my” studio, since John’s role in the business at this point was mostly childcare, moral support and a listening ear}, the business was growing to the point that it was clear we needed a bigger space! So the next logical spot was this room swap with Emma Grace and Ian:
our studio tour | the Path Less TraveledThe doorway into the room. I decorated this entry wall with gold foil vinyl decals and loved the faux wallpaper look they created. our studio tour | the Path Less TraveledThe room we used for this larger version {it was twice as big as the room moved it from – which shows just how small that room is!} is the same one the our oldest two were sharing in this blog post. And then we swapped them over into that tiny room where the first office had been – they were super flexible! And this time period made me grateful time and time again for just how well our children get along together.our office 2.0 tour, behind the door | the Path Less Traveled
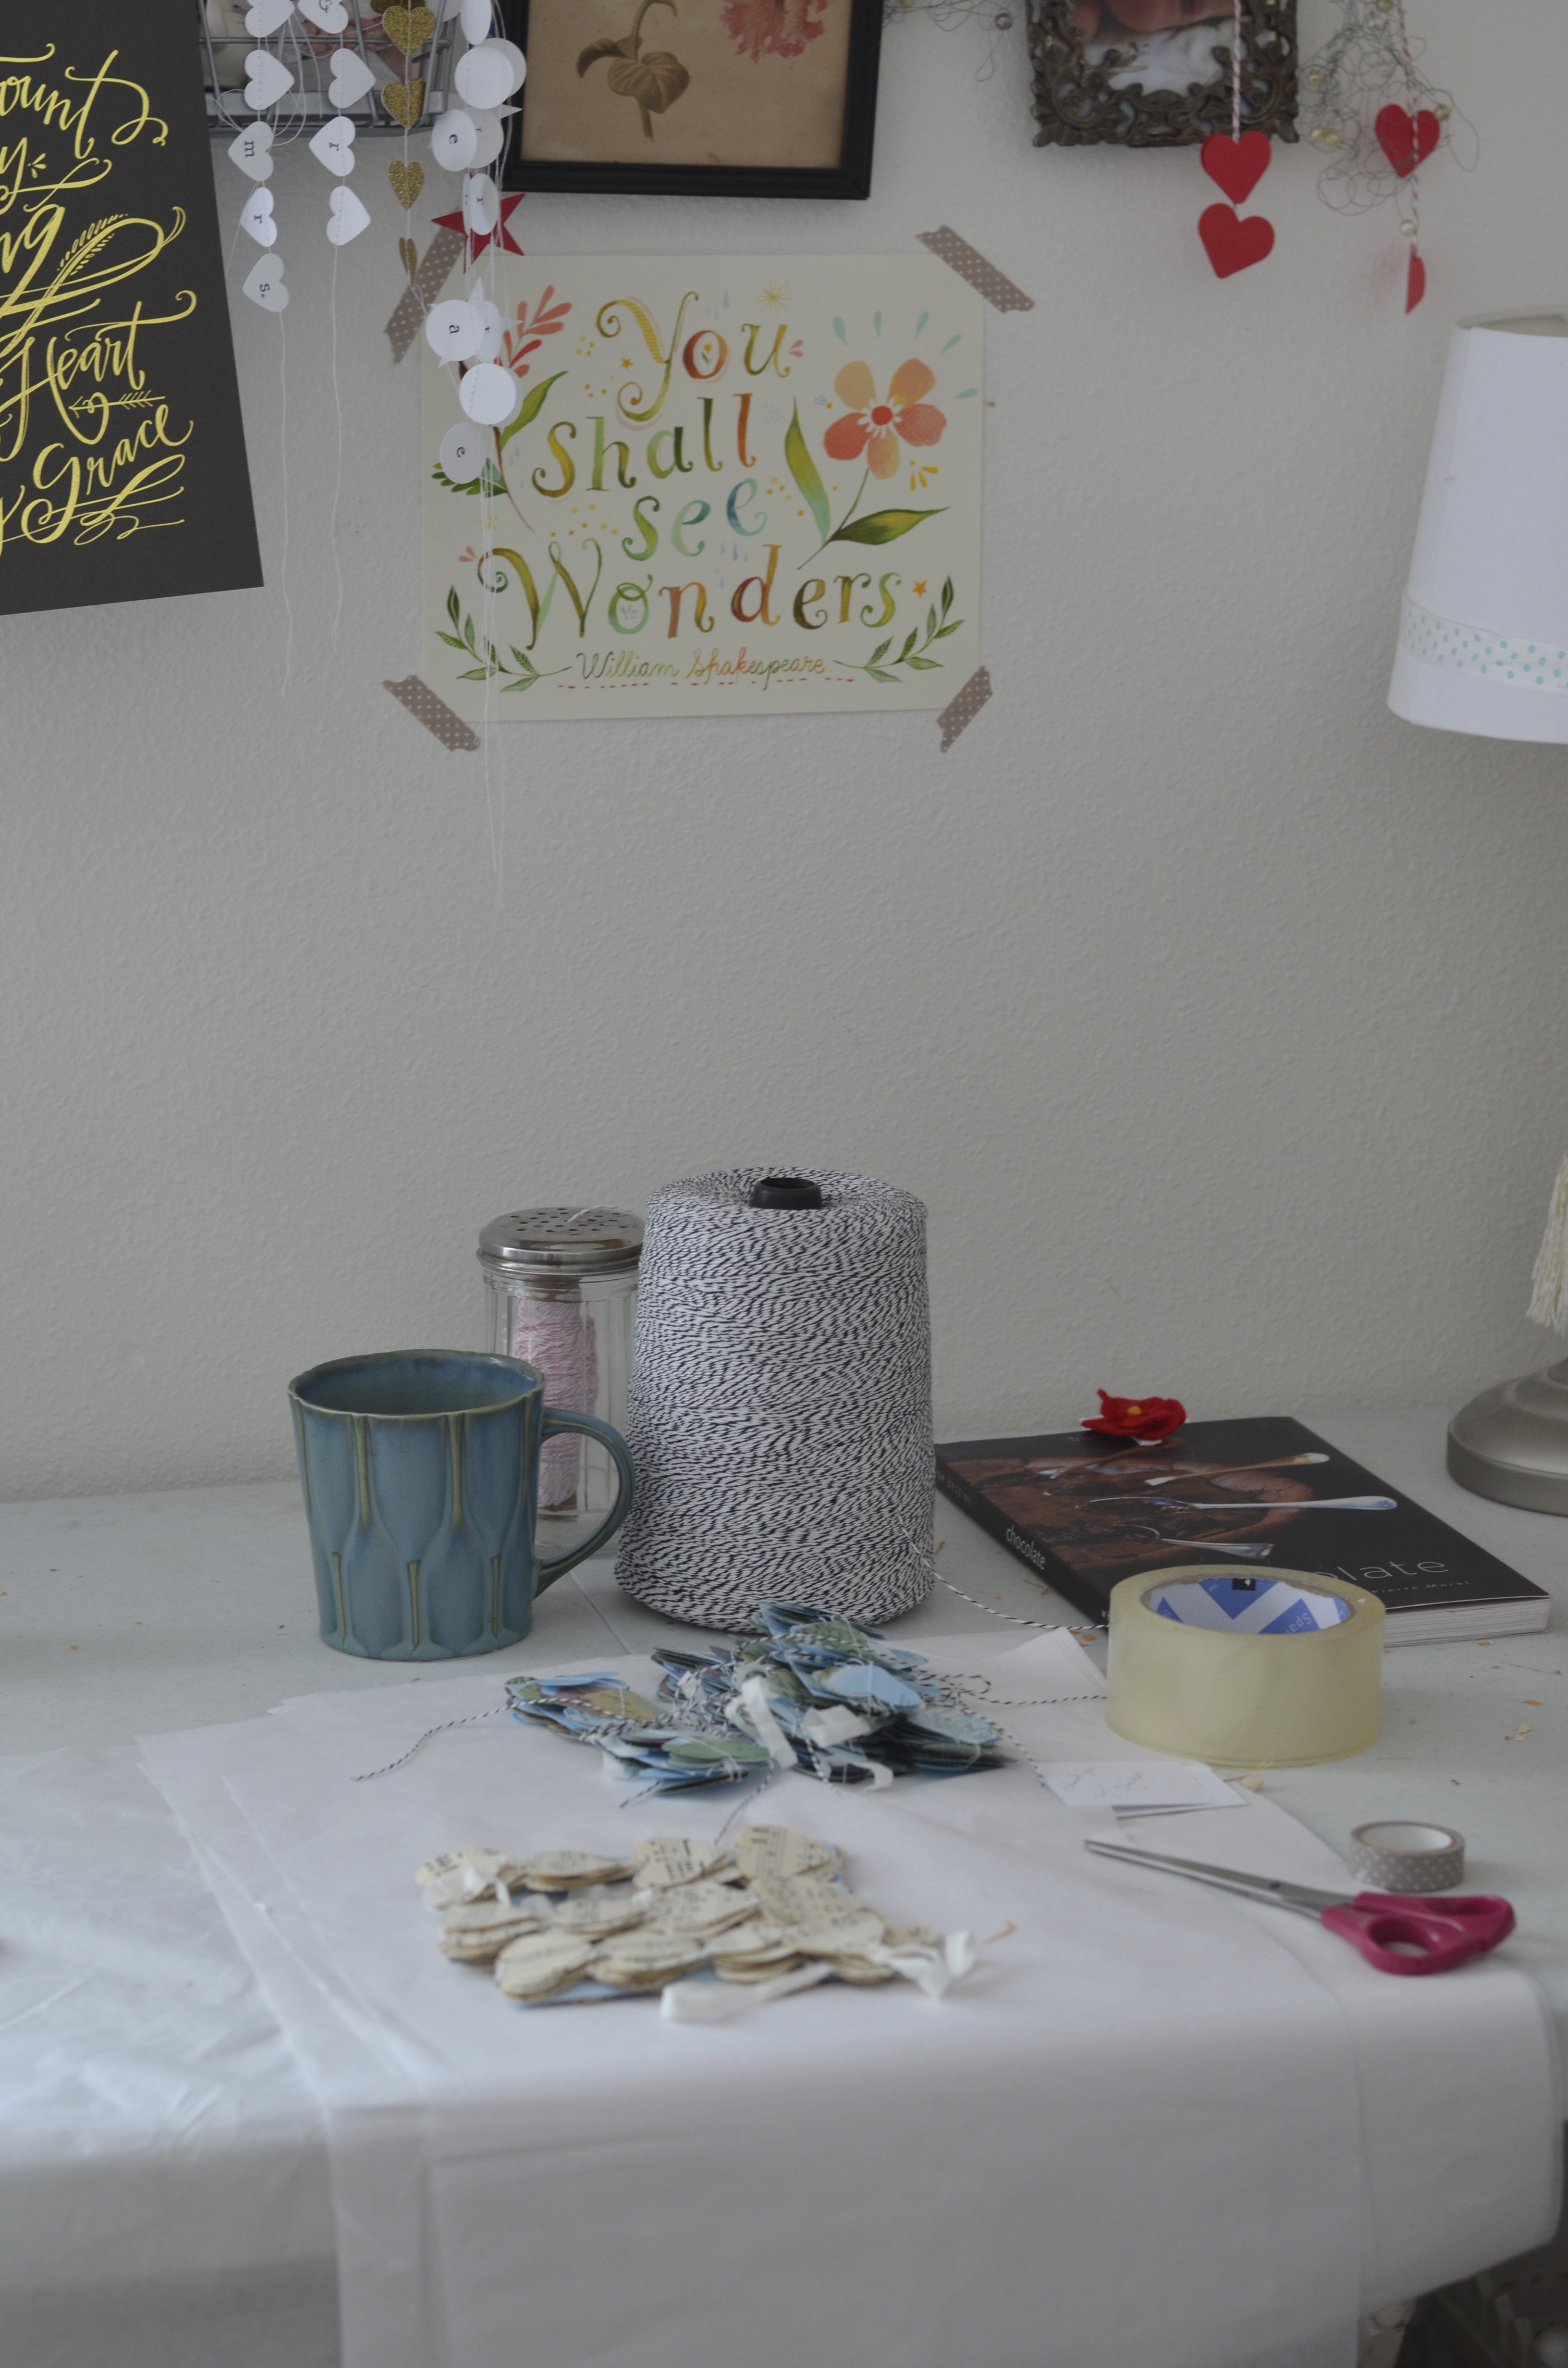
Just behind the door. I spray painted a thrift store bulletin silver, covered the cork part with some decorative wrapping paper {from the Dollar Tree!} and then stretched bakers twine back and forth across it to provide a place where I could pin up the extras I had on hand. {“coffee” print from recipeforcrazy} Kept them tangle-free and filled my need for visual order!pretty, tidy paper racks! | the Path Less Traveled Speaking of a need for order …. :)DSC_0044 the office studio tour, version 2.0 | the Path Less TraveledI had been using some large bins and boxes to corral the papers I was using for a while – and for a while, it worked just fine. Of course, with a bit of growth in the shop, our need for paper selection and “on hand” amounts grew, and we were able to fine these terrific store-style paper racks. They have been amazing!
the packaging station| the Path Less Traveled the shipping station – this is where all your lovely packages get wrapped in tissue, tied with pretty twine and sent on their way!the office studio tour, version 2.0 | the Path Less Traveledthe office studio tour, version 2.0 | the Path Less Traveled The lovely work spaces that John build, as well as one of my favorite deals from Sam’s Club ever – I scooped these metal bar stools up for under $10 each! a rainbow of thread | the Path Less Traveled the office studio tour, version 2.0 | the Path Less Traveled 
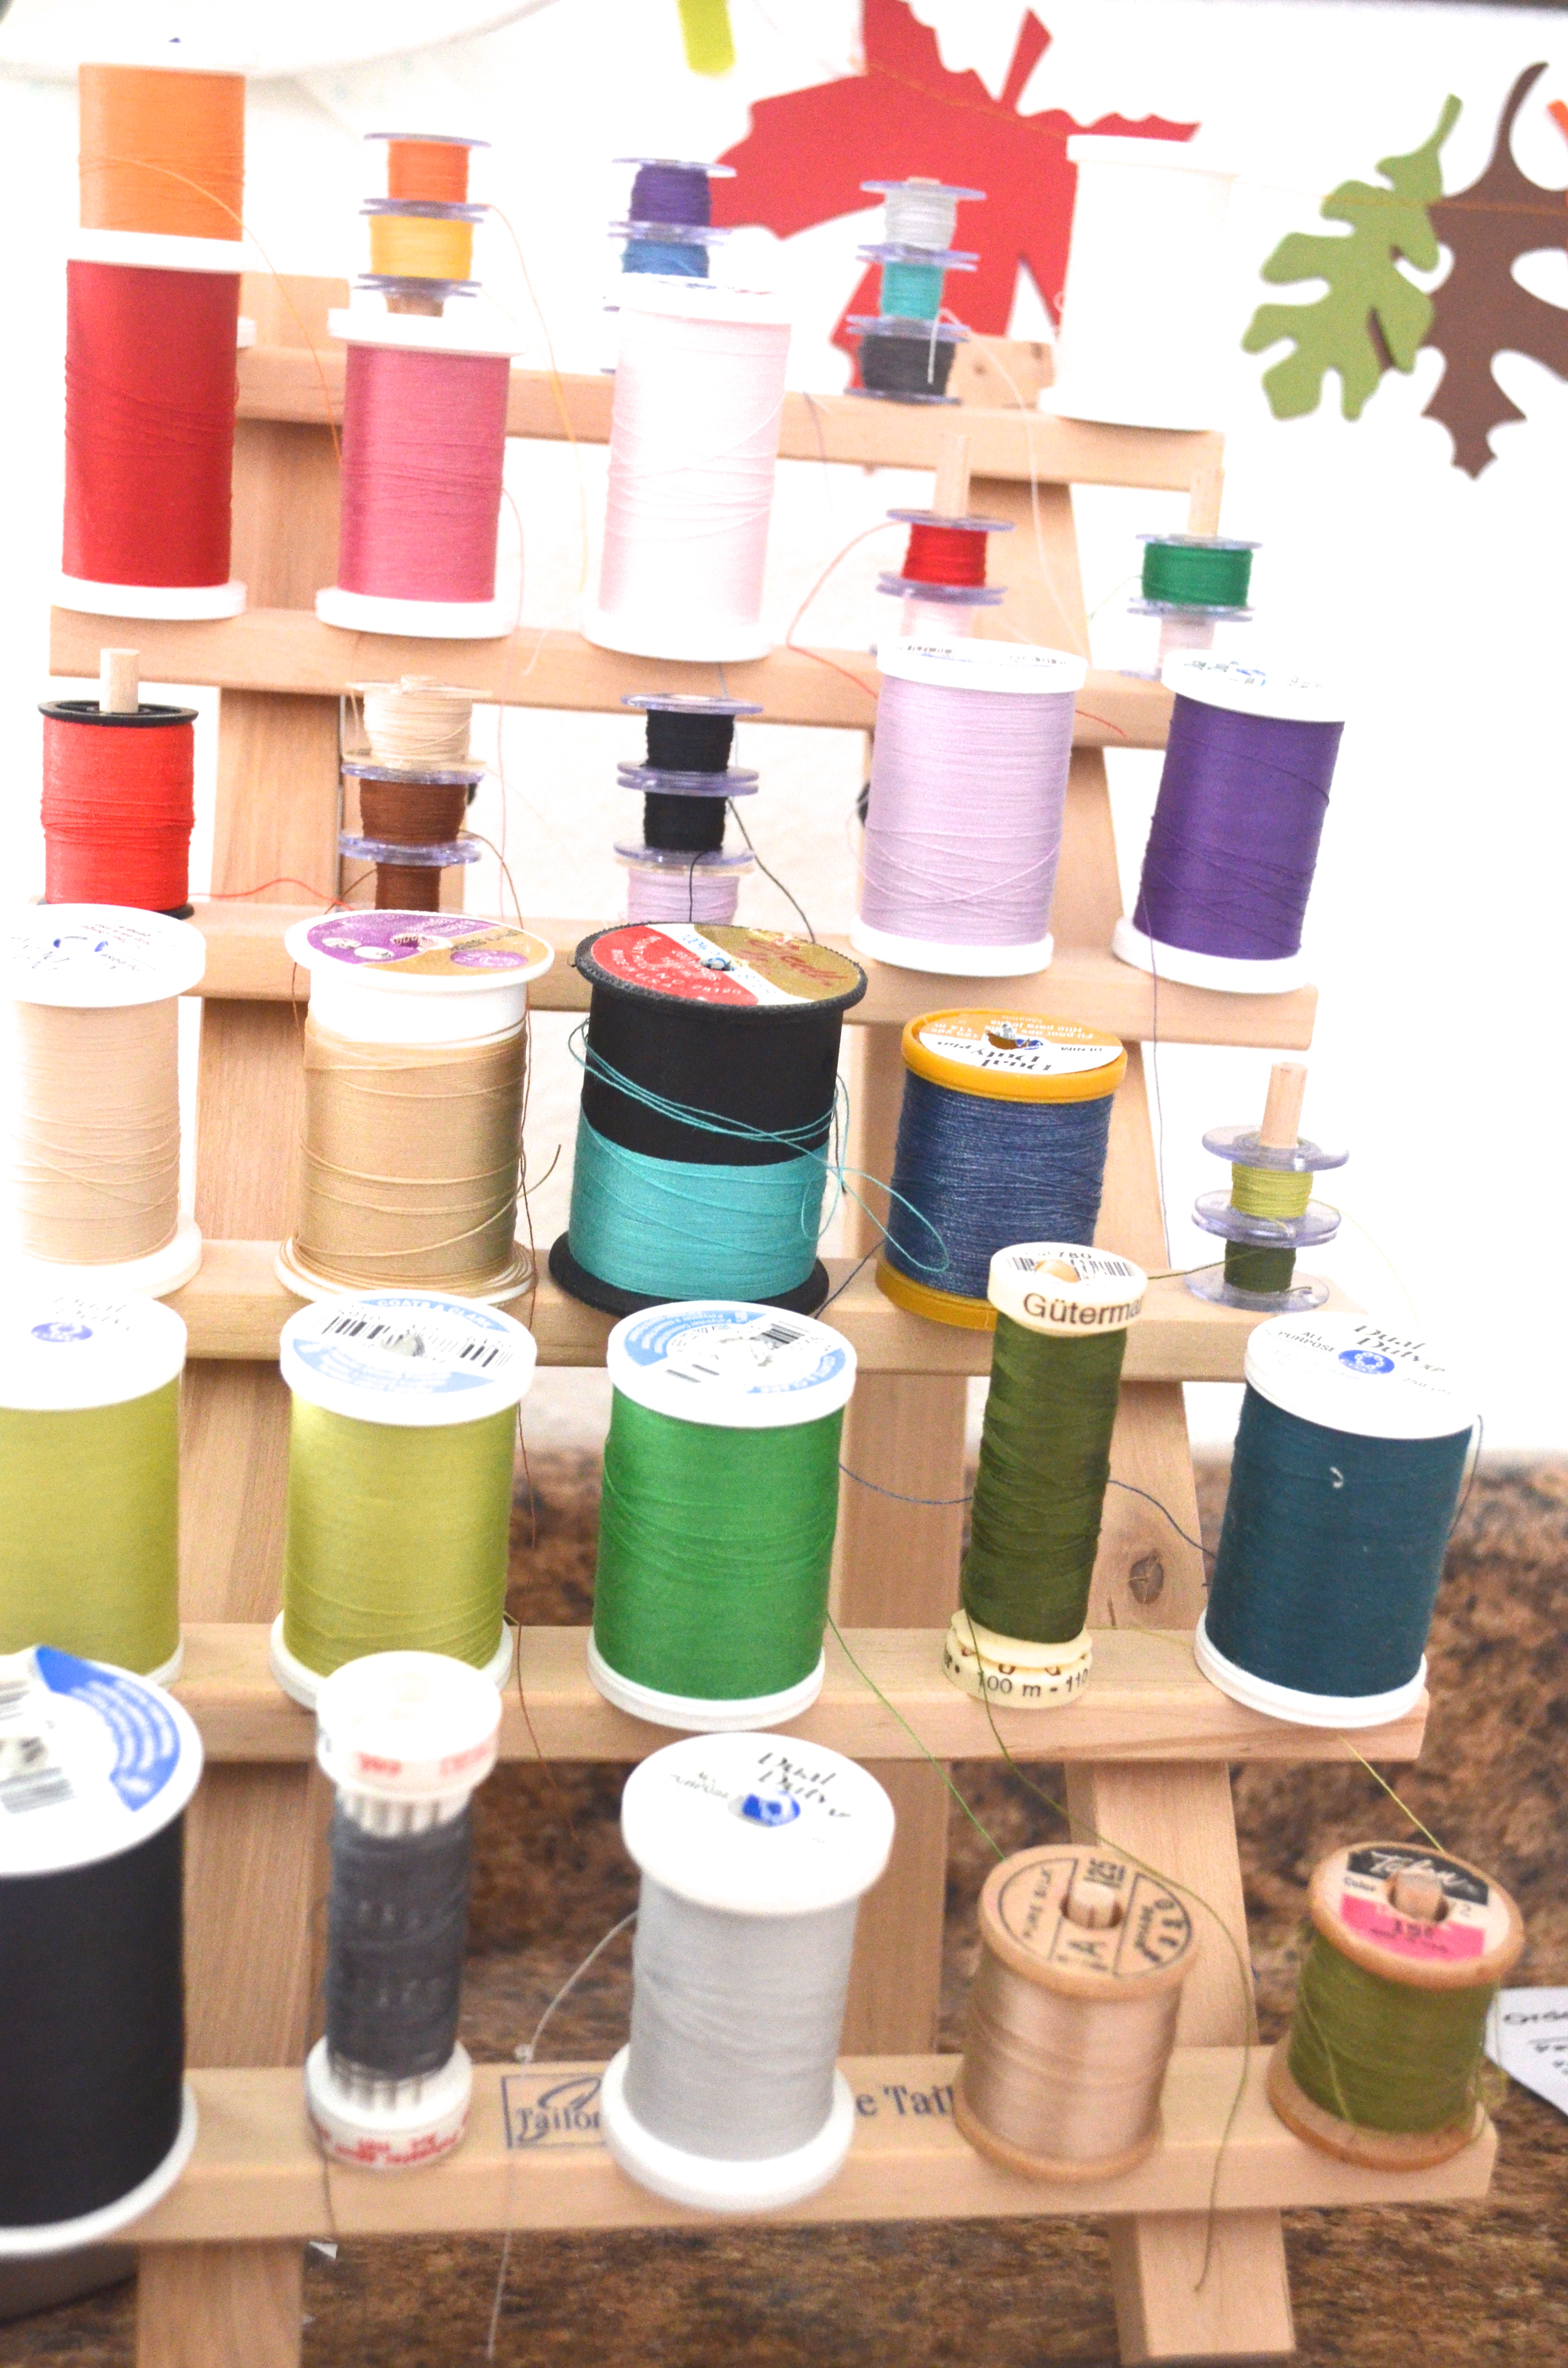
And the sewing machine where “sew” much of our business was built.the office studio tour, version 2.0 | the Path Less Traveled Two printers {and yes, we use them both!} – a color Canon for custom work and a work horse b&w Brother for everything else. John made the stand so we could maximize the counter space on top of the dresser, and it has worked quite well.the office studio tour, version 2.0 | the Path Less Traveled the office studio tour, version 2.0 | the Path Less Traveled the office studio tour, version 2.0 | the Path Less Traveled the office studio tour, version 2.0 | the Path Less TraveledAnd then of course, what would a post about our office be with a few photos of it “in real life” {i.e. messy and being used :D}the office studio tour, version 2.0 | the Path Less TraveledOne of my favorite things about this room is the way the sun streams through the window throughout the day – in the late afternoon, the packing table gets bathed in light. Always so lovely!the office studio tour, version 2.0 | the Path Less TraveledA package getting all its pieces put together {note the stack of packages on the left? Those were all on their way out the door to you!}a little helper | the Path Less Traveleda toddler selfie :) that shows some more of our storage in usethe office studio tour, version 2.0 | the Path Less TraveledOne of the older kids wanted to “take a picture of YOU, Mommy!” and it came out just of my hands. I kind of like it :)the office studio tour, version 2.0 | the Path Less Traveled

Little did we know that when we started this business over 5 years ago where it would take us! We are humbled when we see what God has done, and you haven’t even seen version 3.0 {you’ll love it!} and heard about our ride of the last year yet – it really is amazing to see where this path has led.

the office, version 1.0

the office, version 1.0

If you’ve been following along with us on Facebook for a while, you might have heard that we have a new office space! Before I show it to you though, I thought you might like to see where we moved from {before we moved to what was our first “new” office :)}. I promise it won’t take too long!DSC_0024 When we first moved into this house back in 2011 {hard to believe it has been that long already!} our shop was just starting to really picked up momentum and make its value felt, and John kindly set up our “guest” room as a work room for me to putter around in and fill orders. Little did we that the shop would quickly grown beyond what this small room could handle!DSC_0026 Having a space to work in that wasn’t our kitchen table or our bedroom made “the Path Less Traveled” seem much more of a reality, that the thing I was doing during the kiddos’ nap time and in the evenings was an actual business, and not just me playing with the sewing machine. And it was also great{!} to have a place where I could leave a project out past mealtime or bedtime, and close the door when I wanted to keep little hands from helping.DSC_0027

Having the pretty prints from Katie Daisy and Lindsay Letters {and some vintage ones as well} and photos of our babies and John was a way that I kept my spirit refreshed when things got a bit hectic. Also, this room is one of the bedrooms in the house that gets the best light – I found that the combination of pretty things and lots of natural light was essential for me to deal with stress! {have you found the same to be true for you?}

little helper in the office | the Path Less TraveleldAnd the office usually looked a bit more like this: well used, full of projects, orders to filled and little “helpers” {and this photo of Olivia shows just how long ago it was since our office was in this room!}.

Coming soon – photos of where we moved this office too! {it was the kids’ room I showed you here}


customer love – celebrating wedding Anniversaries in style

customer love – celebrating wedding Anniversaries in style

It’s no secret that we love seeing the photos our customers take with their purchases, and especially when it involves celebrating milestones like wedding Anniversaries!5 year anniversary photo shoot | the Path Less Traveled This lovely couple ordered a custom version of our Gold Glitter Banner to use as a prop as they had a photo shoot to celebrate 5 years of wedded bliss {and the bride and groom still fit in their wedding clothes!}.One Year Anniversary Cake | the Path Less Traveled And you have heard of the tradition of saving the top layer of your wedding cake to eat on your first anniversary? This couple took it to the next level with these gorgeous photos featuring a custom cake banner, their wedding rings and the serving pieces from their wedding – gorgeous!

One Year Anniversary Photo | the Path Less Traveled


Thank you {and congratulations on your anniversaries!!!} to both of these couples for allowing us to share these photos with you!


Do you have photos that you’d like to share? If so, you can either email them to me at elizabeth@pltmarket.com or tag them with #thepathlesstraveledmarket on Instagram {as long as you have a public profile :)} – we’d all love to see your ideas! Also, I often send “thank you” coupons to the lovelies who let me share their photos with you – so if you’re looking for a coupon for your next order, sharing photos is a great way to get a discount!


<3

Grandma’s Molasses Cookies

Grandma’s Molasses Cookies

I’ve told you about the fruit salad {Ambrosia} that my mom’s mom used to make, and about her Lemon Curd, too. But I don’t think I’ve told you about some of the things my Dad’s mom used to make – and that is a definite shortcoming, since she was an amazing cook! Grandma was know for many dishes, but one of the ones she made every few weeks {and that I remember best} was her Molasses Cookies. Grandma's Molasses Cookies | the Path Less Traveled They were soft, yet firm, just the right texture to accompany a glass of milk {or cup of coffee, if you were old enough}. She used Blackstrap molasses when she made them, which resulted in a rich flavor that balanced the spices perfectly.Grandma's Chewy Molasses Cookies | the Path Less TraveledGrandma's Chewy Molasses Cookies | the Path Less Traveled

Molasses Crinkles

  • 1 cup packed brown sugar
  • 3/4 cup shortening
  • 1/4 cup molasses
  • 1 egg
  • 2 1/4 cups all purpose flour
  • 2 teaspoons baking soda
  • 1 teaspoon cinnamon
  • 1 teaspoon ground ginger
  • 1/2 teaspoon cloves
  • 1/4 teaspoon salt
  • granulated sugar

Mix brown sugar, shortening, molasses and egg. Mix in flour, baking soda, cinnamon, ginger, cloves and salt. Cover and refrigerate at least 1 hour.

Heat oven to 375. Shape dough by rounded teaspoonfuls into balls. Dip tops in granulated sugar. Place balls, sugared side up, about 2-3 inches apart on lightly greased cookie sheet. Bake just until set, 10 to 12 minutes. Immediately remove from cookie sheet. Makes about 4 dozen cookies.

Grandma's Spicy and Chewy Molasses Cookies | the Path Less Traveled Grandma's Chewy Molasses Cookies | the Path Less Traveled Grandma's Chewy Molasses Cookies | the Path Less Traveled


These come together quickly – the longest, most patience requiring part is waiting for the dough to firm up in the fridge! As they bake their aroma fills the whole house, making it smell amazing. And yes, they are pretty wonderful warm from the oven, too. :)

customer love – American theme party!

customer love – American theme party!

Sometimes your custom order requests are just the little extra “push” we need to create a new product, and sometimes we end up loving the new thing so much that we carry it full time in our shop.

This a story of one of those things. :) We started offering our Hanging Paper Stars {see them here} about 3 years ago, and found that many of you really enjoy using them for your events and in your homes! However, because they are large and a bit fragile, they have been a total bear to ship, and the shipping fees can be a bit high. So, John and I have talked on and off about creating a DIY Kit version of the stars with the idea that you would be able to purchase all of the materials needed, all of them pre-folded so that you would only need to assemble them {meaning, very little skill required!}. But life was busy, the shop was growing quickly, and it was something that kept getting set aside for “when things slow down”. Until – someone in Australia emailed to ask about possibly getting 12-20 of the white stars!

American themed party decor | the Path Less TraveledShe was in charge of her corporate Christmas party, and they wanted to have an American theme to it – and have a bunch of our stars hanging from the ceiling! We knew that shipping that many of the stars to Australia {a location where shipping fees from the US were already high} would cost an enormous amount, and realized that this was the push we needed to finally get the kits made.

American themed party star garlands and decor | the Path Less TraveledThe gal sent us these photos to share after the event, and it looks like it was a terrific party! She also used our Red, White and Blue Stars Garlands in custom 60 foot lengths to string across the space, bunches of our Red, White and Blue Star Dessert Toppers in little glass vases as centerpieces on the tables and our Star Cupcake Picks in Patriotic Colors to top the desserts – it all came together so well!
Servers in costume at a Vintage America theme party | the Path Less TraveledSo there you have it! An idea that was stuck in the concept phase for far too long was brought to life {and now is a top seller! you can find them here} by a customer’s special request. You guys really are what keep our little shop going, in so many ways!

Do you have photos that you’d like to share? If so, you can either email them to me at elizabeth@pltmarket.com or tag them with #thepathlesstraveledmarket on Instagram – we’d all love to see your ideas! Also, I often send “thank you” coupons to the lovelies who let me share their photos with you – so if you’re looking for a coupon for your next order, sharing photos is a great way to get a discount!


<3

Items featured:

Large Folded Hanging Paper Stars

DIY Hanging Origami Star Kits

Red, White and Blue Stars Garlands

Red, White and Blue Large Stars Garlands

Red, White and Blue Star Dessert Toppers

Star Cupcake Picks in Patriotic Colors

an engagement party for a bride-to-be

an engagement party for a bride-to-be

{I originally posted this this a few weeks ago, but it got lost in the Great Blog Erase of 2015 – thankfully, most of the blog content was recovered after about a week, but a few of the most recent posts were gone for good. So here it is again!}

One of my husband’s brothers is getting married this fall {yay!}, and several weeks ago his mom, sister and sister’s-in-law and I had the privilege of throwing the bride-to-be a “welcome to the family” brunch. It was so fun! We had lots of ideas of ways to make the engagement party special without breaking the bank, and we kept track of them on a group Pinterest board {have you ever tried using a group board for something like this? It’s so handy!}.

an engagement party for a bride-to-be | the Path Less TraveledWe used our home as the location on a Saturday morning, and for decorations were able to stick almost entirely to things I already had in my stash, and I made a few banners and personalized cake toppers for a special touch.
a tea party brunch for a bride-to-be | the Path Less Traveled an engagement party brunch for a bride-to-be - layers of lace and lots of pink and gold make it a romance filled event! | the Path Less Traveled Over the table, I had John {he so graciously offered to help with the decorating as I was pulling together the last minute details!} hang up a few of these pink lanterns, mixed with white lace lanterns and some white honeycomb balls, all of which were in my party decoration box. I’ve had all of them for a while now, and they’ve been used over and over and held up so well!

party planning tip: Having re-usable party decoration items in your hostess arsenal is a great way to keep costs down, allowing you to focus your party budget on other areas!DSC_0004 Each place setting had one of these gilded frames on it as a favor for the girls to take home – I found the frames in the dollar bin at Michaels, and then personalized them with little prints {that I made on our computer, and then “dry stamped” a large heart over the text} and some lace trim in a bow.A "Bride-To-Be" banner sets the bride's seat at the party apart | the Path Less TraveledOne of the things I made up just for the party was this pair of Bride To Be banners – we have a version in our shop, but I wanted them to be even a little bit more special, and in two layers since I had this vision in my head of decorating her chair with them. I used doilies that I dyed a light pink to back the white letters, and the resulting effect was quite romantic!
a vintage-style tea party brunch for a bride-to-be | the Path Less Traveled  #BecomingASmillie banner to celebrate a bride-to-be | the Path Less Traveled I made a #BecomingASmillie {her new last name} banner for over the window in the same style, and everyone loved it! It was quite cute, and the hashtag may even get used as the one for her wedding prep. :)dress up the chairs with vintage pillow cases and some satin ribbon - so romantic! | the Path Less TraveledFor the chair decor, we took my stash of vintage embroidered pillowcases and slipped on over the back of each chair, and then tied each with a pink satin bow.
Decorate the chairs with vintage embroidered pillow cases and satin ribbon | the Path Less Traveled It was John’s idea {don’t tell him I told you!}, and was gorgeous!!!a feminine tea party style brunch for a bride-to-be | the Path Less Traveled The table came together beautifully. I used a white, every day table cloth layered with a vintage pink damask table cloth and vintage damask napkins. For the table settings, I layered our white every day plates {these} with some vintage salad plates, and used the vintage silver plated table ware I inherited from a family member. The goblets were find at Marshall’s a while ago, and the tea set was from my grandma. It all came together so beautifully!DSC_0014 a feminine tea party style brunch for a bride-to-be | the Path Less TraveledTo accent the rest of the room, I had John hang up a Lace Doily Garland {looping back and forth across the room}, a Glitter Gold Confetti Garland {in the area over the table} and a Large Paper Hearts Garland in pink around the doorway. The garlands added an additional air of romance and festivity, taking the room from feeling like I had just set the table for the party to feeling like this party was an event. Such a difference!
a feminine tea party style brunch for a bride-to-be | the Path Less Traveled I loved having a reason to get out my special tea set! My sister-in-law made the Strawberry Iced Tea, and – wow. It was good!DSC_0017 My mother-in-law, sister-in-law and I each made a few dishes share, and the resulting buffet was delicious!personalize a tray of desserts with the initials of the couple-to-be! Engagement party on the Path Less Traveled The future Mr. and Mrs.’s initials are E and T, so a pair of glittery gold monogram dessert toppers {with a darling ampersand in a vintage style print!} seemed the perfect choice to top off the platter of Mango Scones. To the left there was a platter of {delicious!} Asian Salad Wonton Cups, and to the right a dish of Grapefruit Curd to accompany the scones.Donut holes on heart tipped bamboo skewers | the Path Less TraveledAs we were planning I came across this picture of donut holes on heart-tipped skewers, and quickly added it to the must try list!
mini BLT sandwiches, topped with heart and flag shaped cupcake picks | the Path Less Traveled The tea sandwich size BLTs were cute and scrumptious.mini BLT sandwiches, topped with heart and flag shaped cupcake picks | the Path Less Traveled DSC_0025 The little girl cousins had their own table :)DSC_0026 DSC_0028


It was a special time to welcome Tessa to the family. We all had full, hectic weeks leading up to the day, but taking the time to prepare for a special, out of the ordinary occasion and to visit with each other for a few hours was a blessing to each of the girls. Times like a wedding only come along a few times in a family’s history, and making them with a little fanfare is worth it!

Have you had a chance to celebrate your family recently? I’d love to hear about it!

<3

Items featured:

Bride To Be Banner

Paper Lace Doily Banner

Glitter Gold Confetti Garland

Large Paper Hearts Garland {in pink}

Monogram Cake Toppers

Gold Heart Cupcake Toppers

Vintage Floral Cupcake Flags


{ you can see more photos of the party here}

customer love – a golden safari themed first birthday

customer love – a golden safari themed first birthday

This golden safari themed first birthday party was just too darling – when the mama shared the photos with us, I was amazed at how fabulous it had all come together, and immediately asked if I could share the photos with you, too!

This little fellow had a golden safari themed first birthday, and it was, well, can I just say fabulous again? I LOVE it!
 a golden safari themed first birthday | the Path Less TraveledChrista chose our Happy Birthday Banner in white, and got the extra characters for the ends in gold glitter – she chose a pair of elephants and a pair of giraffes to go with the safari theme. {Did you know you can get animals, hearts, flowers and all sorts of other things added to your banner? It adds a wonderful custom look!} a golden safari themed first birthday | the Path Less Traveled She also chose our ONE Highchair Banner in gold glitter, and then ended up using it as a banner for the table instead – it worked perfectly!  a golden safari themed first birthday | the Path Less TraveledShe loved the “ONE” banner so much that she said they’ll be using it for her little guy’s one year photos as well. :) Christa did an amazing job on the party, and I’m so glad she shared the photos with us! It looks like it was a perfect day to celebrate their little one!!!


Do you have photos that you’d like to share? If so, you can either email them to me at elizabeth@pltmarket.com or tag them with #thepathlesstraveledmarket on Instagram {as long as you have a public profile :)} – we’d all love to see your ideas! Also, I often send “thank you” coupons to the lovelies who let me share their photos with you – so if you’re looking for a coupon for your next order, sharing photos is a great way to get a discount!

<3

products featured:

Happy Birthday Banner

ONE Highchair Banner

customer love: a golden garden wedding

customer love: a golden garden wedding

Customer love time again! I love a wedding, don’t you? For today’s customer love edition, I have a lovely customer’s wedding to share with you! This time it’s a gorgeous golden garden wedding from a sweet bride. Alicia contacted us asking if we could make some custom versions of our Triangle Bunting Chair Garlands, and of course I said yes. :) an intimate golden garden wedding | the Path Less TraveledShe was interested in getting them in a glitter gold to use as an accent in her intimate garden wedding, and we were able to make them exactly as she had in mind {I always love it when that happens!}.  Her wedding was so lovely that I wanted to just crawl inside the photos when I saw them – gorgeous.

{by the way, if you have an idea for a custom item you would like us to make for you, contact us! Most of the time we can accommodate your request, and we are always happy to try.}chair banners at a golden garden wedding | the Path Less Traveled

Thank you so much for sharing these lovely images, Alycia! Your wedding was lovely, and I hope you and your new husband are enjoying a wonderful season as newlyweds, and that you will be blessed with a lifetime of joy.

Do you have photos that you’d like to share? If so, you can either email them to me at elizabeth@pltmarket.com or tag them with #thepathlesstraveledmarket on Instagram {as long as you have a public profile :)} – we’d all love to see your ideas! Also, I often send “thank you” coupons to the lovelies who let me share their photos with you – so if you’re looking for a coupon for your next order, sharing photos is a great way to get a discount!

<3

Items featured: Gold Glitter Bunting Chair Garlands

*Pictures by Michael Simonitsch Photography, used by permission

crafting for a baby

crafting for a baby

Crafting for a sweet new baby is always a joy! A few weeks ago I had the privilege of making this entirely custom, delicate name banner for my precious new niece, and I had so much fun. Her mama is decorating the baby Cora’s new space in blush and glittery gold, so I even got to use some of my current favorite papers. :)a personalized name banner for a baby - perfect for both a baby shower and a birthday party! | the Path Less Traveled

Her mama is decorating the nursery for this babe in gold and pink, so I had a ton of fun making a sweet, girly and glittery name banner for baby Cora using some of my favorite papers and ribbons. I went with scalloped circles in a vintage rose print for the background and gold glitter for the letters, all strung on a light rose satin ribbon. So feminine, and suitable for both a baby and a growing girl.

I am experimenting in making our the name banners in our shop in this double-layered look, and enjoyed doing the same for little Miss Cora, giving her special garland an extra bit of style and texture. The glitter gold played so beautifully off of the vintage rose print!
crafting a glitter and rose name banner for a baby | the Path Less Traveled

These multilayered banners are something I love making, and there are so many options!!! We are planning to add a variety of them to the shop in the next little while, and are just having a bit of trouble deciding exactly which options to offer {there are soooooo many!}. If you have something in mind that you’d like to see, we’d love to hear about it. :)

What do you think? Would you like to see more of this rich, layered look in our pieces? I’d love to hear!


<3

one of my favorite comfort foods

one of my favorite comfort foods

Have I mentioned this recipe here before? Maybe? Oh wait, I have. Oh well! The photos I took this time around are a little prettier :)

My Gramma used to make this for Easter every year {and also most summer events}, and now when I think of spring, or my Gramma, this is one dish that is always in the front of my mind. Shetaught me the recipe when I was staying with her for a few weeks one summer and it is so simple that even a 10-12 year old can remember it. And it’s really yummy, too.

ingredients for Ambrosia, A.K.A. "5 Cup Salad" | the Path Less Traveled

So here you go (ready? you might want to write it down ….. ;) ):

Combine:
1 cup chunked pineapple
1 cup mandarin oranges
1 cup miniature marshmallows
1 cup flaked coconut
1 cup sour cream

ingredients for Ambrosia, A.K.A. "5 Cup Salad" | the Path Less Traveled my favorite comfort food: Ambrosia, A.K.A. "5 Cup Salad" | the Path Less Traveled Ambrosia, A.K.A. "5 Cup Salad" | the Path Less Traveled Stir. Cover and refrigerate for at least an hour to let the flavors meld together {although you can eat it right away, it tastes better if you let it rest} and then serve!