Browsed by
Tag: glitter

customer love – celebrating wedding Anniversaries in style

customer love – celebrating wedding Anniversaries in style

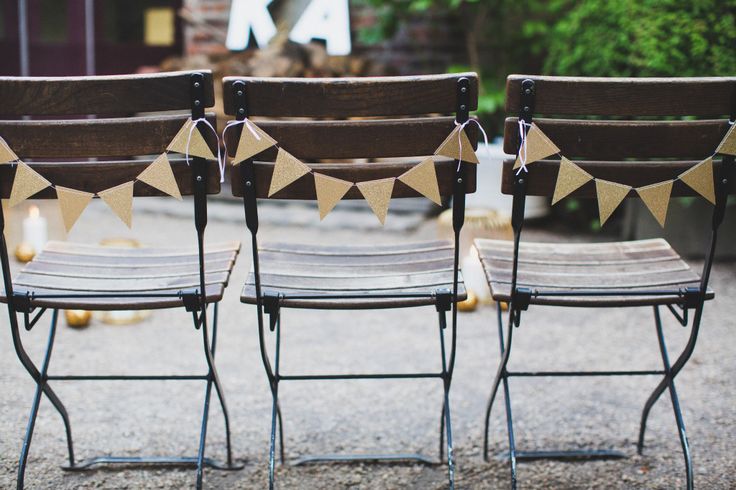
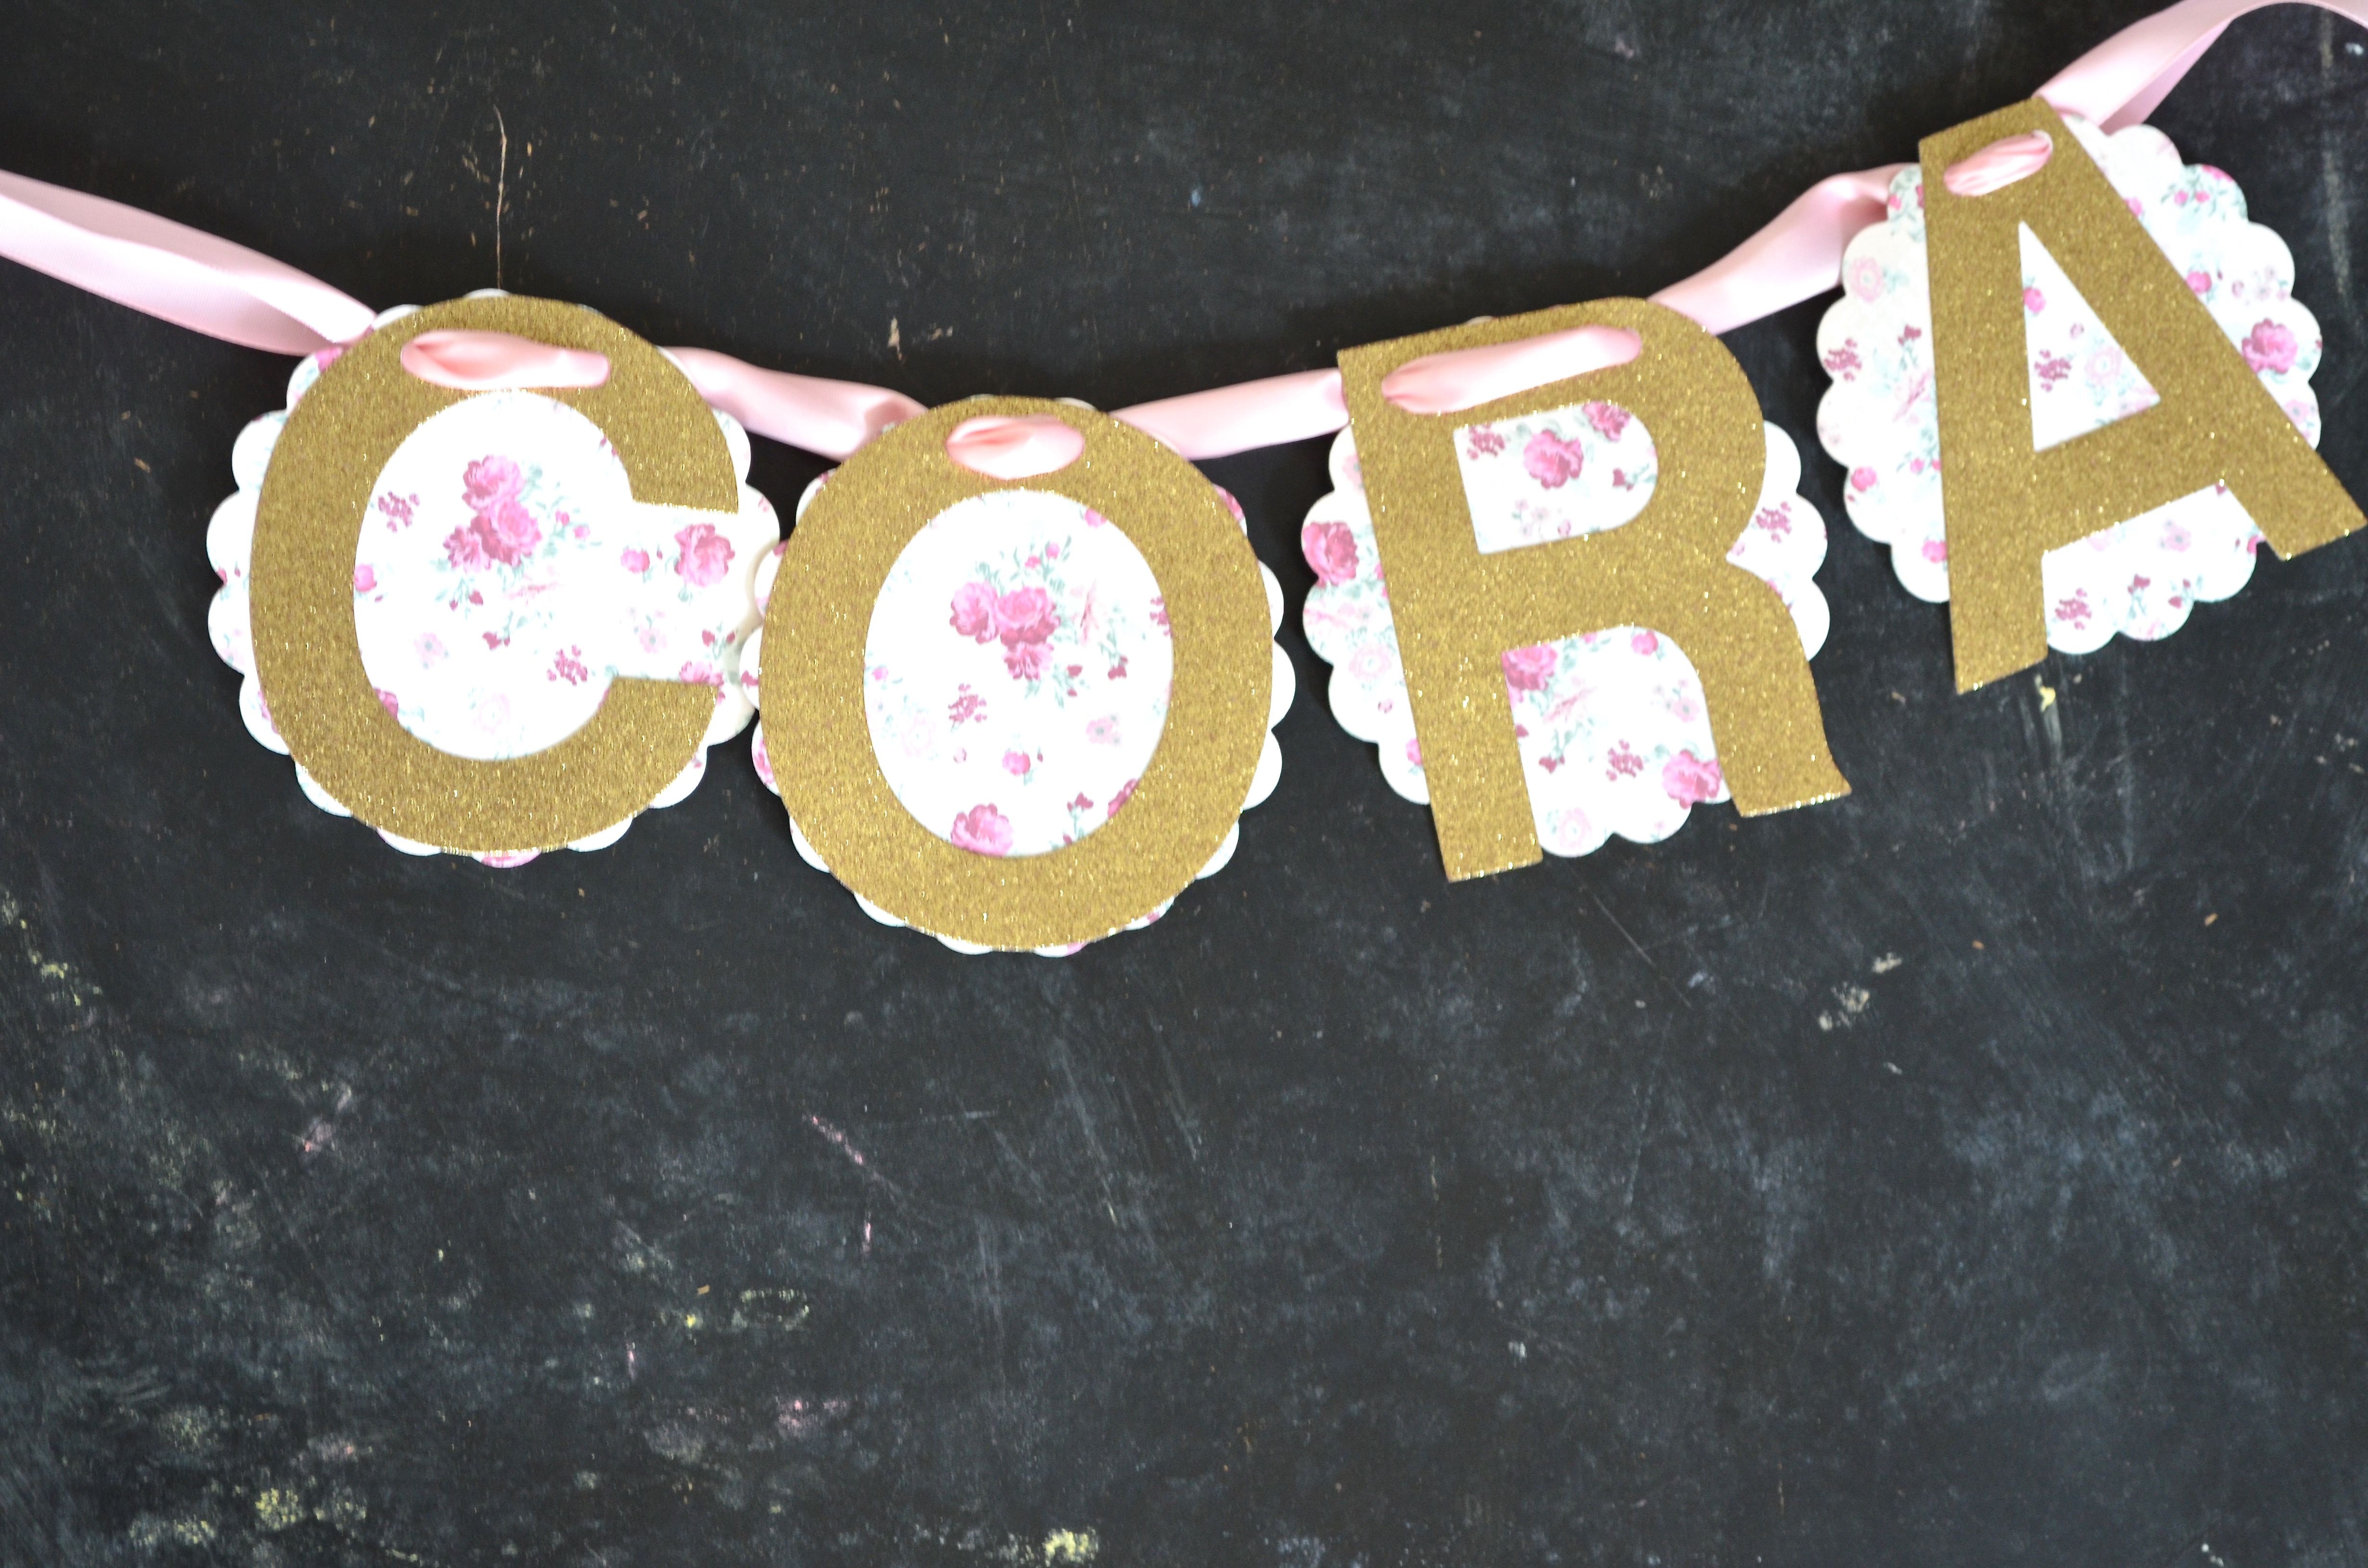
It’s no secret that we love seeing the photos our customers take with their purchases, and especially when it involves celebrating milestones like wedding Anniversaries!5 year anniversary photo shoot | the Path Less Traveled This lovely couple ordered a custom version of our Gold Glitter Banner to use as a prop as they had a photo shoot to celebrate 5 years of wedded bliss {and the bride and groom still fit in their wedding clothes!}.One Year Anniversary Cake | the Path Less Traveled 
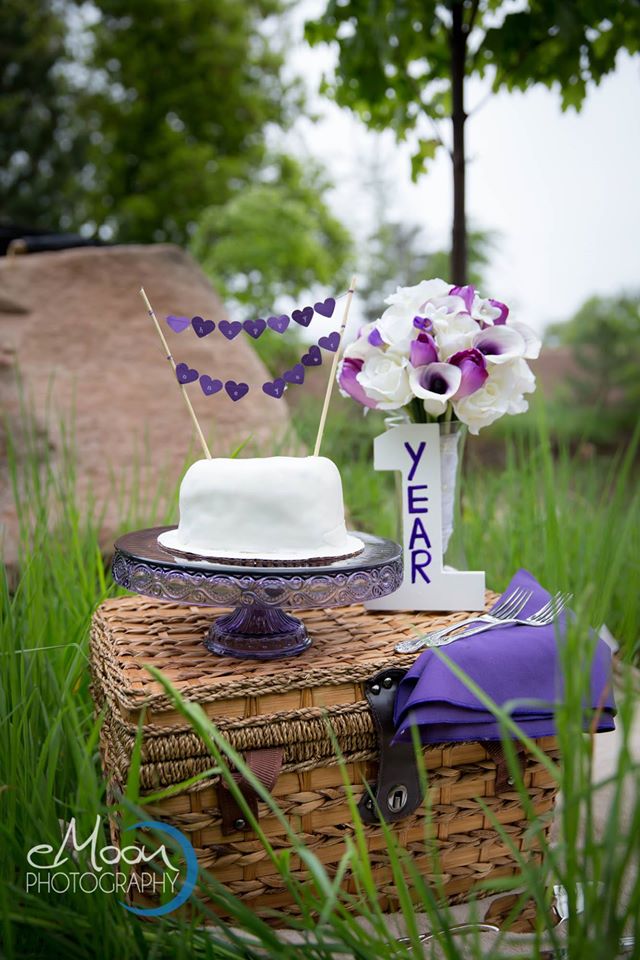
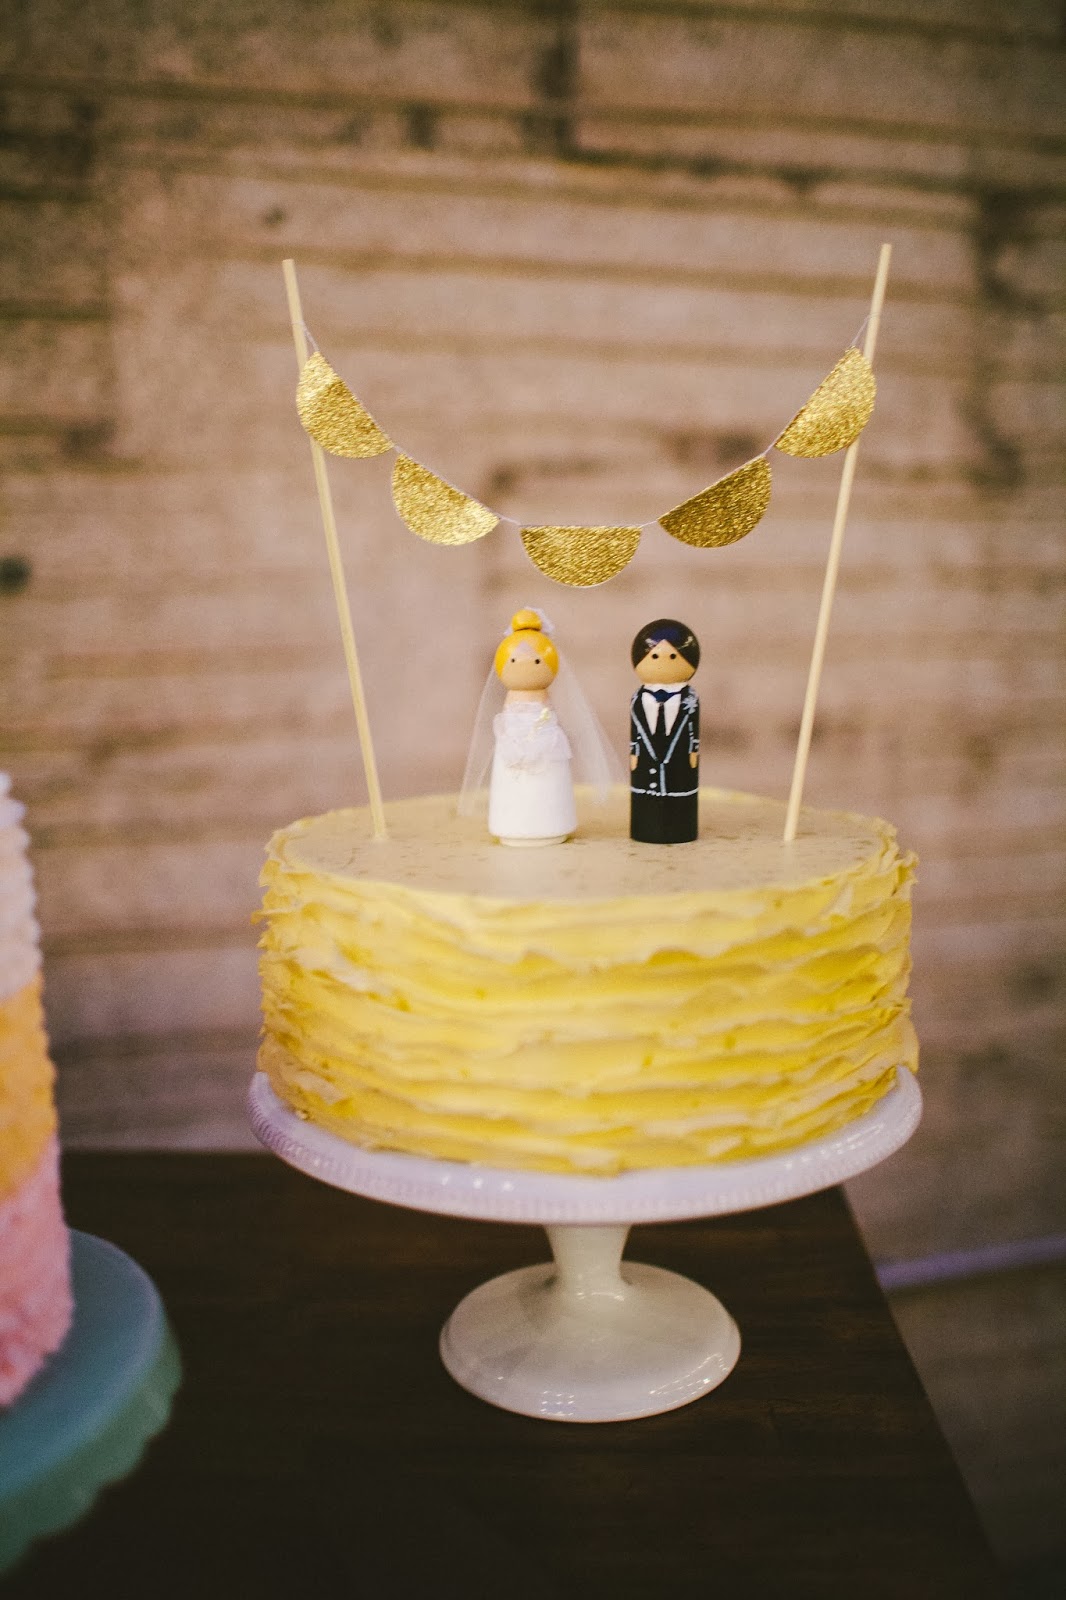
And you have heard of the tradition of saving the top layer of your wedding cake to eat on your first anniversary? This couple took it to the next level with these gorgeous photos featuring a custom cake banner, their wedding rings and the serving pieces from their wedding – gorgeous!

One Year Anniversary Photo | the Path Less Traveled


Thank you {and congratulations on your anniversaries!!!} to both of these couples for allowing us to share these photos with you!


Do you have photos that you’d like to share? If so, you can either email them to me at elizabeth@pltmarket.com or tag them with #thepathlesstraveledmarket on Instagram {as long as you have a public profile :)} – we’d all love to see your ideas! Also, I often send “thank you” coupons to the lovelies who let me share their photos with you – so if you’re looking for a coupon for your next order, sharing photos is a great way to get a discount!


<3

an engagement party for a bride-to-be

an engagement party for a bride-to-be

{I originally posted this this a few weeks ago, but it got lost in the Great Blog Erase of 2015 – thankfully, most of the blog content was recovered after about a week, but a few of the most recent posts were gone for good. So here it is again!}

One of my husband’s brothers is getting married this fall {yay!}, and several weeks ago his mom, sister and sister’s-in-law and I had the privilege of throwing the bride-to-be a “welcome to the family” brunch. It was so fun! We had lots of ideas of ways to make the engagement party special without breaking the bank, and we kept track of them on a group Pinterest board {have you ever tried using a group board for something like this? It’s so handy!}.

an engagement party for a bride-to-be | the Path Less TraveledWe used our home as the location on a Saturday morning, and for decorations were able to stick almost entirely to things I already had in my stash, and I made a few banners and personalized cake toppers for a special touch.
a tea party brunch for a bride-to-be | the Path Less Traveled an engagement party brunch for a bride-to-be - layers of lace and lots of pink and gold make it a romance filled event! | the Path Less Traveled Over the table, I had John {he so graciously offered to help with the decorating as I was pulling together the last minute details!} hang up a few of these pink lanterns, mixed with white lace lanterns and some white honeycomb balls, all of which were in my party decoration box. I’ve had all of them for a while now, and they’ve been used over and over and held up so well!

party planning tip: Having re-usable party decoration items in your hostess arsenal is a great way to keep costs down, allowing you to focus your party budget on other areas!DSC_0004 Each place setting had one of these gilded frames on it as a favor for the girls to take home – I found the frames in the dollar bin at Michaels, and then personalized them with little prints {that I made on our computer, and then “dry stamped” a large heart over the text} and some lace trim in a bow.A "Bride-To-Be" banner sets the bride's seat at the party apart | the Path Less TraveledOne of the things I made up just for the party was this pair of Bride To Be banners – we have a version in our shop, but I wanted them to be even a little bit more special, and in two layers since I had this vision in my head of decorating her chair with them. I used doilies that I dyed a light pink to back the white letters, and the resulting effect was quite romantic!
a vintage-style tea party brunch for a bride-to-be | the Path Less Traveled  #BecomingASmillie banner to celebrate a bride-to-be | the Path Less Traveled I made a #BecomingASmillie {her new last name} banner for over the window in the same style, and everyone loved it! It was quite cute, and the hashtag may even get used as the one for her wedding prep. :)dress up the chairs with vintage pillow cases and some satin ribbon - so romantic! | the Path Less TraveledFor the chair decor, we took my stash of vintage embroidered pillowcases and slipped on over the back of each chair, and then tied each with a pink satin bow.
Decorate the chairs with vintage embroidered pillow cases and satin ribbon | the Path Less Traveled It was John’s idea {don’t tell him I told you!}, and was gorgeous!!!a feminine tea party style brunch for a bride-to-be | the Path Less Traveled The table came together beautifully. I used a white, every day table cloth layered with a vintage pink damask table cloth and vintage damask napkins. For the table settings, I layered our white every day plates {these} with some vintage salad plates, and used the vintage silver plated table ware I inherited from a family member. The goblets were find at Marshall’s a while ago, and the tea set was from my grandma. It all came together so beautifully!DSC_0014 a feminine tea party style brunch for a bride-to-be | the Path Less TraveledTo accent the rest of the room, I had John hang up a Lace Doily Garland {looping back and forth across the room}, a Glitter Gold Confetti Garland {in the area over the table} and a Large Paper Hearts Garland in pink around the doorway. The garlands added an additional air of romance and festivity, taking the room from feeling like I had just set the table for the party to feeling like this party was an event. Such a difference!
a feminine tea party style brunch for a bride-to-be | the Path Less Traveled I loved having a reason to get out my special tea set! My sister-in-law made the Strawberry Iced Tea, and – wow. It was good!DSC_0017 My mother-in-law, sister-in-law and I each made a few dishes share, and the resulting buffet was delicious!personalize a tray of desserts with the initials of the couple-to-be! Engagement party on the Path Less Traveled The future Mr. and Mrs.’s initials are E and T, so a pair of glittery gold monogram dessert toppers {with a darling ampersand in a vintage style print!} seemed the perfect choice to top off the platter of Mango Scones. To the left there was a platter of {delicious!} Asian Salad Wonton Cups, and to the right a dish of Grapefruit Curd to accompany the scones.Donut holes on heart tipped bamboo skewers | the Path Less TraveledAs we were planning I came across this picture of donut holes on heart-tipped skewers, and quickly added it to the must try list!
mini BLT sandwiches, topped with heart and flag shaped cupcake picks | the Path Less Traveled The tea sandwich size BLTs were cute and scrumptious.mini BLT sandwiches, topped with heart and flag shaped cupcake picks | the Path Less Traveled DSC_0025 The little girl cousins had their own table :)DSC_0026 DSC_0028


It was a special time to welcome Tessa to the family. We all had full, hectic weeks leading up to the day, but taking the time to prepare for a special, out of the ordinary occasion and to visit with each other for a few hours was a blessing to each of the girls. Times like a wedding only come along a few times in a family’s history, and making them with a little fanfare is worth it!

Have you had a chance to celebrate your family recently? I’d love to hear about it!

<3

Items featured:

Bride To Be Banner

Paper Lace Doily Banner

Glitter Gold Confetti Garland

Large Paper Hearts Garland {in pink}

Monogram Cake Toppers

Gold Heart Cupcake Toppers

Vintage Floral Cupcake Flags


{ you can see more photos of the party here}

customer love – a golden safari themed first birthday

customer love – a golden safari themed first birthday

This golden safari themed first birthday party was just too darling – when the mama shared the photos with us, I was amazed at how fabulous it had all come together, and immediately asked if I could share the photos with you, too!

This little fellow had a golden safari themed first birthday, and it was, well, can I just say fabulous again? I LOVE it!
 a golden safari themed first birthday | the Path Less TraveledChrista chose our Happy Birthday Banner in white, and got the extra characters for the ends in gold glitter – she chose a pair of elephants and a pair of giraffes to go with the safari theme. {Did you know you can get animals, hearts, flowers and all sorts of other things added to your banner? It adds a wonderful custom look!} a golden safari themed first birthday | the Path Less Traveled She also chose our ONE Highchair Banner in gold glitter, and then ended up using it as a banner for the table instead – it worked perfectly!  a golden safari themed first birthday | the Path Less TraveledShe loved the “ONE” banner so much that she said they’ll be using it for her little guy’s one year photos as well. :) Christa did an amazing job on the party, and I’m so glad she shared the photos with us! It looks like it was a perfect day to celebrate their little one!!!


Do you have photos that you’d like to share? If so, you can either email them to me at elizabeth@pltmarket.com or tag them with #thepathlesstraveledmarket on Instagram {as long as you have a public profile :)} – we’d all love to see your ideas! Also, I often send “thank you” coupons to the lovelies who let me share their photos with you – so if you’re looking for a coupon for your next order, sharing photos is a great way to get a discount!

<3

products featured:

Happy Birthday Banner

ONE Highchair Banner

customer love: a golden garden wedding

customer love: a golden garden wedding

Customer love time again! I love a wedding, don’t you? For today’s customer love edition, I have a lovely customer’s wedding to share with you! This time it’s a gorgeous golden garden wedding from a sweet bride. Alicia contacted us asking if we could make some custom versions of our Triangle Bunting Chair Garlands, and of course I said yes. :) an intimate golden garden wedding | the Path Less TraveledShe was interested in getting them in a glitter gold to use as an accent in her intimate garden wedding, and we were able to make them exactly as she had in mind {I always love it when that happens!}.  Her wedding was so lovely that I wanted to just crawl inside the photos when I saw them – gorgeous.

{by the way, if you have an idea for a custom item you would like us to make for you, contact us! Most of the time we can accommodate your request, and we are always happy to try.}chair banners at a golden garden wedding | the Path Less Traveled

Thank you so much for sharing these lovely images, Alycia! Your wedding was lovely, and I hope you and your new husband are enjoying a wonderful season as newlyweds, and that you will be blessed with a lifetime of joy.

Do you have photos that you’d like to share? If so, you can either email them to me at elizabeth@pltmarket.com or tag them with #thepathlesstraveledmarket on Instagram {as long as you have a public profile :)} – we’d all love to see your ideas! Also, I often send “thank you” coupons to the lovelies who let me share their photos with you – so if you’re looking for a coupon for your next order, sharing photos is a great way to get a discount!

<3

Items featured: Gold Glitter Bunting Chair Garlands

*Pictures by Michael Simonitsch Photography, used by permission

crafting for a baby

crafting for a baby

Crafting for a sweet new baby is always a joy! A few weeks ago I had the privilege of making this entirely custom, delicate name banner for my precious new niece, and I had so much fun. Her mama is decorating the baby Cora’s new space in blush and glittery gold, so I even got to use some of my current favorite papers. :)a personalized name banner for a baby - perfect for both a baby shower and a birthday party! | the Path Less Traveled

Her mama is decorating the nursery for this babe in gold and pink, so I had a ton of fun making a sweet, girly and glittery name banner for baby Cora using some of my favorite papers and ribbons. I went with scalloped circles in a vintage rose print for the background and gold glitter for the letters, all strung on a light rose satin ribbon. So feminine, and suitable for both a baby and a growing girl.

I am experimenting in making our the name banners in our shop in this double-layered look, and enjoyed doing the same for little Miss Cora, giving her special garland an extra bit of style and texture. The glitter gold played so beautifully off of the vintage rose print!
crafting a glitter and rose name banner for a baby | the Path Less Traveled

These multilayered banners are something I love making, and there are so many options!!! We are planning to add a variety of them to the shop in the next little while, and are just having a bit of trouble deciding exactly which options to offer {there are soooooo many!}. If you have something in mind that you’d like to see, we’d love to hear about it. :)

What do you think? Would you like to see more of this rich, layered look in our pieces? I’d love to hear!


<3

customer love: a romantic cake table

customer love: a romantic cake table

IMG_0779 Customer love time again! I love a wedding, don’t you? For today’s customer love edition, I have a lovely customer’s wedding to share with you! This time it’s a gorgeous wedding cake display from a sweet bride named Brittany {she blogs over at Life in Hearts}.IMG_2278 She put together a amazing wedding {and blogged all about it!} and one of the lovely features was this cake table with a variety of cakes and cake toppers. She choose our Gold Glitter Scallop topper for the cake with the brides and groom on it {how cute are they?!} and I love how it coordinated with the other ones she used!IMG_2281 IMG_2448 Aren’t Brittany and her groom adorable?!IMG_1146IMG_0895 1474635_683077065059850_1670604878_n

Brittany, thank you so much for sharing your wedding day photos with us and allowing me the chance to supply a part of your special day. It was absolutely gorgeous and I wish you both a lifetime of growing in love with each other!

Do you have photos that you’d like to share? If so, you can either email them to me at elizabeth@pltmarket.com or tag them with #thepathlesstraveledmarket on Instagram – we’d all love to see your ideas! Also, I often send “thank you” coupons to the lovelies who let me share their photos with you – so if you’re looking for a coupon for your next order, sharing photos is a great way to get a discount!

Photos courtesy of Cami Takes Photos and Cuteology Cakes, all used by permission of the bride

hello {again}

hello {again}

It’s been …. awhile. Life just keeps moving, doesn’t it?

We’ve been quite busy around here since the last post {Christmas!} – adding new things, figuring out new direction to take with the shop {and if we are taking a new direction – the answer? “Sort of”}. The littles are growing {Olivia is talking!} like crazy, and I’m trying not to blink and miss this precious time.

Here are some photos of the newest additions to the shop {and some fun custom projects, too!} that I thought you might enjoy :)

"Hitched" cupcake toppers from the Path Less Traveled new cupcake toppers in the Etsy shop! {inspired by the toppers for the barn wedding}High Chair Birthday Banner from the Path Less Traveled new First Birthday High Chair Garlands in the Etsy shop {and now I’m wondering why I didn’t think to make these for our own little ones’ first birthdays!}DSC_0014 a custom version of the New York Subway toppers – too cute with the “All Aboard!” flags personalized cake topper | the Path Less Traveleda personalized cake garland – such a sweet hybrid of the Name Bunting and the Confetti Garland!

DSC_0243Hopefully I’ll be able to get you caught up to speed soon {with lots of photos!}, but in the meantime,how are you? I’ve missed chatting here with you. Did you have a lovely holiday season? Make New Year’s resolutions? Are you snowed in {or experiencing 80 degree weather?}?

facebook giveaway

facebook giveaway

Oh, you guys – you did it! I’ve been teasing you on Facebook for about month now with a promised giveaway, hanging it out in front of you like a carrot for when we got to 200 “likes” on the fan page – and you came through! In less than a month, through you sharing it with friends and spreading the word about our little shop, we’ve added over 20 new friends and now I’m thrilled to share the giveaway! {and yes, I know I just had a giveaway – but you guys were fast!}DSC_0020 DSC_0021 DSC_0026 DSC_0029

I’ve been working on getting the kinks out of these sweet little Glittered Votive Holders so that I can add them to the shop, and they’re finally ready. Just in time to give one to you. :) These votives are perfect for weddings, holidays {Christmas and New Year? Of course! 4th of July? Definitely!}, parties – I even have one in our bathroom to add a bit of glittery-glam :)

So, how can you win one? I’ll be posting this on the Facebook page, and all you need to do is leave a comment there {not here}. I’ll randomly pick a winner next Tuesday morning {August 27, which also happens to be my parents’ 30th anniversary! Yeow!} and announce the winner both here and on Facebook.

Now for the nitty-gritty – the votive up for grabs is the one pictured, and this giveaway is open to all of you {even you international lovelies!}. I will cover the shipping expense and even toss in an unscented tea-light so that this pretty little votive is ready to use. :)


how-Tuesday: DIY Birthday Crowns

how-Tuesday: DIY Birthday Crowns

Today’s promised how-Tuesday: DIY Birthday Crowns! Do you remember the princess party that Emma Grace requested? Well, I realized that I had never shown you how I made her darling Birthday Crown {and, since I’m kind of on a birthday theme at the moment, now is the perfect time to change that, right?}!

DIY Party CrownDIY Party Crown
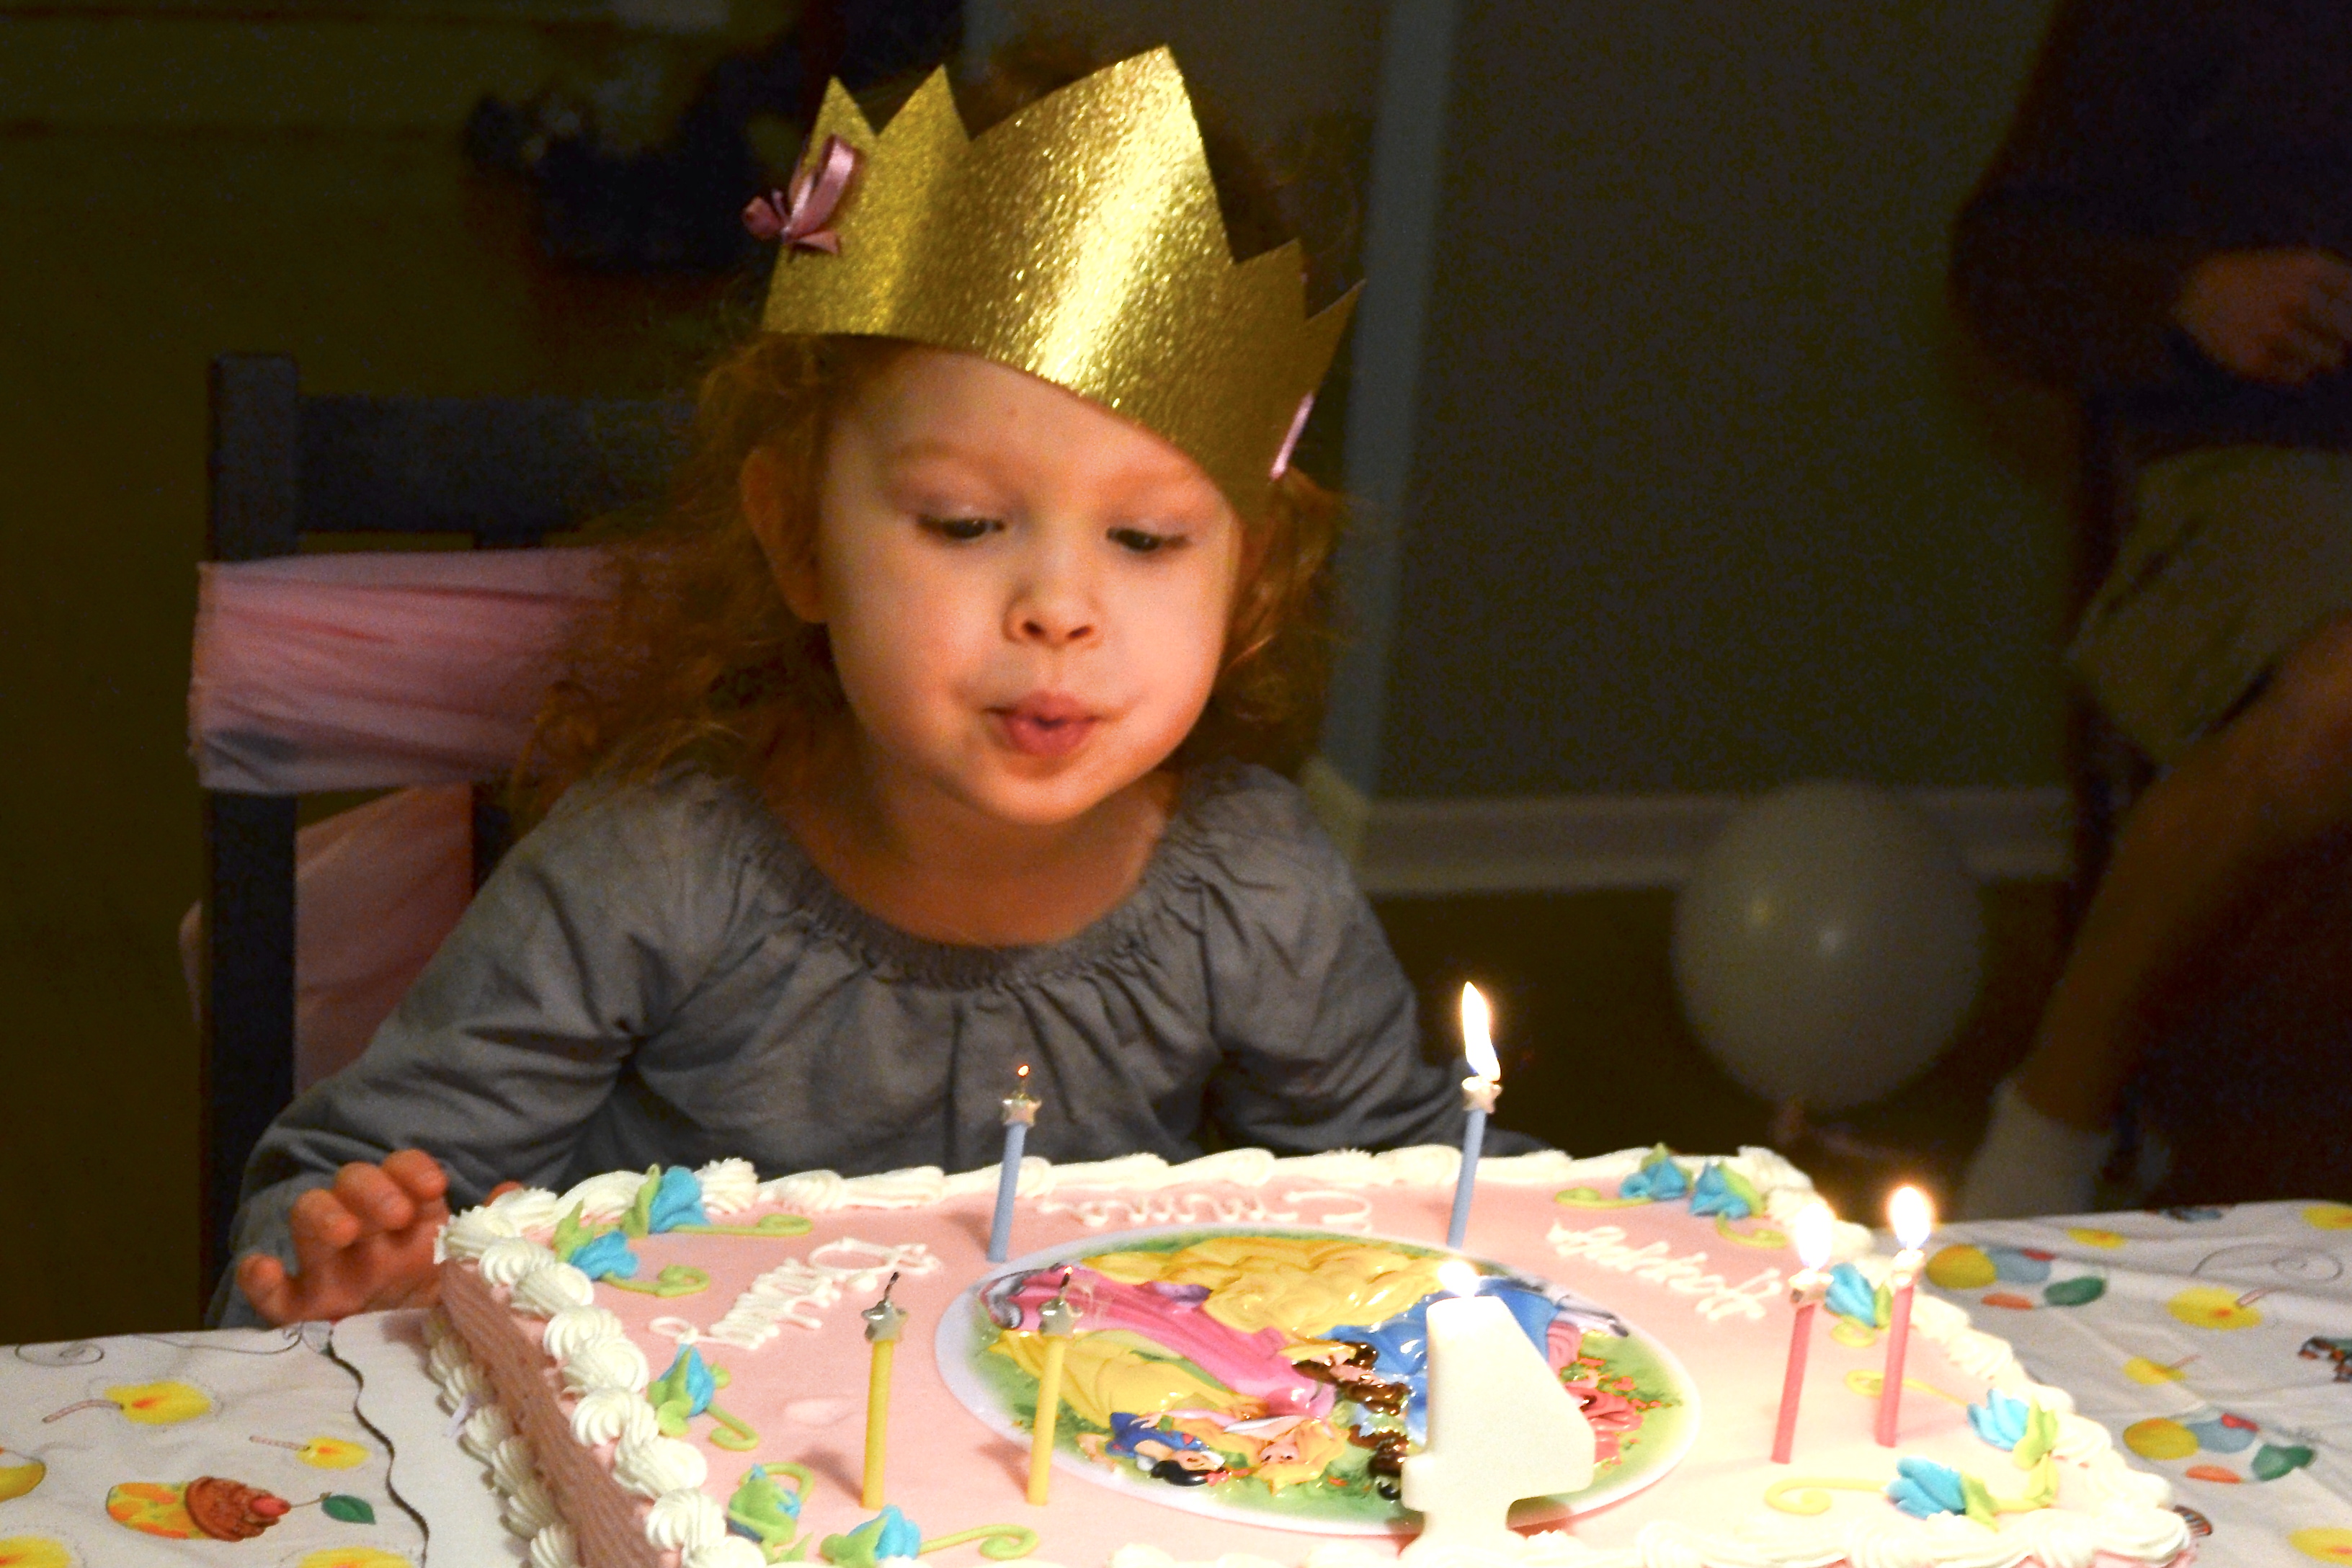
Too cute, isn’t it?! Now, let’s get started:DIY Prince or Princess Crown materials: mid to heavy weight card stock in size 8 1/2″x11″ or larger {I used white for these so my kiddos could color them, but you can use any color you wish! For E.G.’s birthday I used a gold glittered paper}, ruler, pencil, scissors, hole punch, ribbonDIY Prince or Princess Crown step one: with your paper in the “portrait” position {so that it’s facing the “tall” way}, draw a line down the middle {4 1/4″ from the edge} and then cut along this line. You will now have two 4 1/4″x11″ pieces.DIY Prince or Princess Crown step two: find your middle point on one long edge of the paper {at 5 1/2″} and make a small dot. Then, measuring from this same edge, measure 2″ toward the middle and lay your ruler along this 2″ line. Make a dot on this line at the 2″, 4″, 7″ and 9″ marks.

Now it gets just a bit more fun … you get to play connect the dots! Draw lines connecting the corners on the long edge with the dots you’ve just made, forming a series of …DIY Prince or Princess Crown …triangles along what is now the top edge of your crown.DIY Prince or Princess Crown Step three: cut along this line. It’s beginning to take shape!DIY Prince or Princess Birthday Party Crown step four: punch two holes on each end of the crown, about an inch apart.DIY Prince or Princess Birthday Party Crown step five: cut 2 lengths of ribbon, each about 18″ long and thread a piece through the holes of one end {like in the photo} and it to itself so that one side has a knot and the other …DIY Prince or Princess Birthday Party Crown …looks like this. Repeat for the opposite end. Now, at this point you can either be finished or you can pass it on to a child and allow them to decorate it to their heart’s content :)DIY Prince or Princess Birthday Party Crown DIY Prince or Princess Birthday Party Crown DIY Prince or Princess Birthday Party CrownDIY Prince or Princess Birthday Party CrownsThis cutie modeled her party crown again as she colored her new, custom decorated by her tiara.DIY Prince or Princess Birthday Party CrownsSo intent on her work!DIY Prince or Princess Birthday Party CrownsTada! Wouldn’t it be a sweet party activity to decorate your own crown? Maybe with feathers, glitter and sequins, too? I think a little one {or several} would be just over the moon with these!DIY Prince or Princess Birthday Party CrownsDIY Prince or Princess Birthday Party CrownsDIY Prince or Princess Birthday Party Crowns

Gah, those eyes! So, there’s your promised adorable tutorial for the day :) And I’ve got another one up my sleeve! Maybe for tomorrow? Maybe …

Until then, I’d love to hear if you try this! How would you customize them for your littles? Do you have a favorite party hat tradition?


XOXO

Follow on Bloglovin


I’m sharing this at the Vintage Farmhouse <3