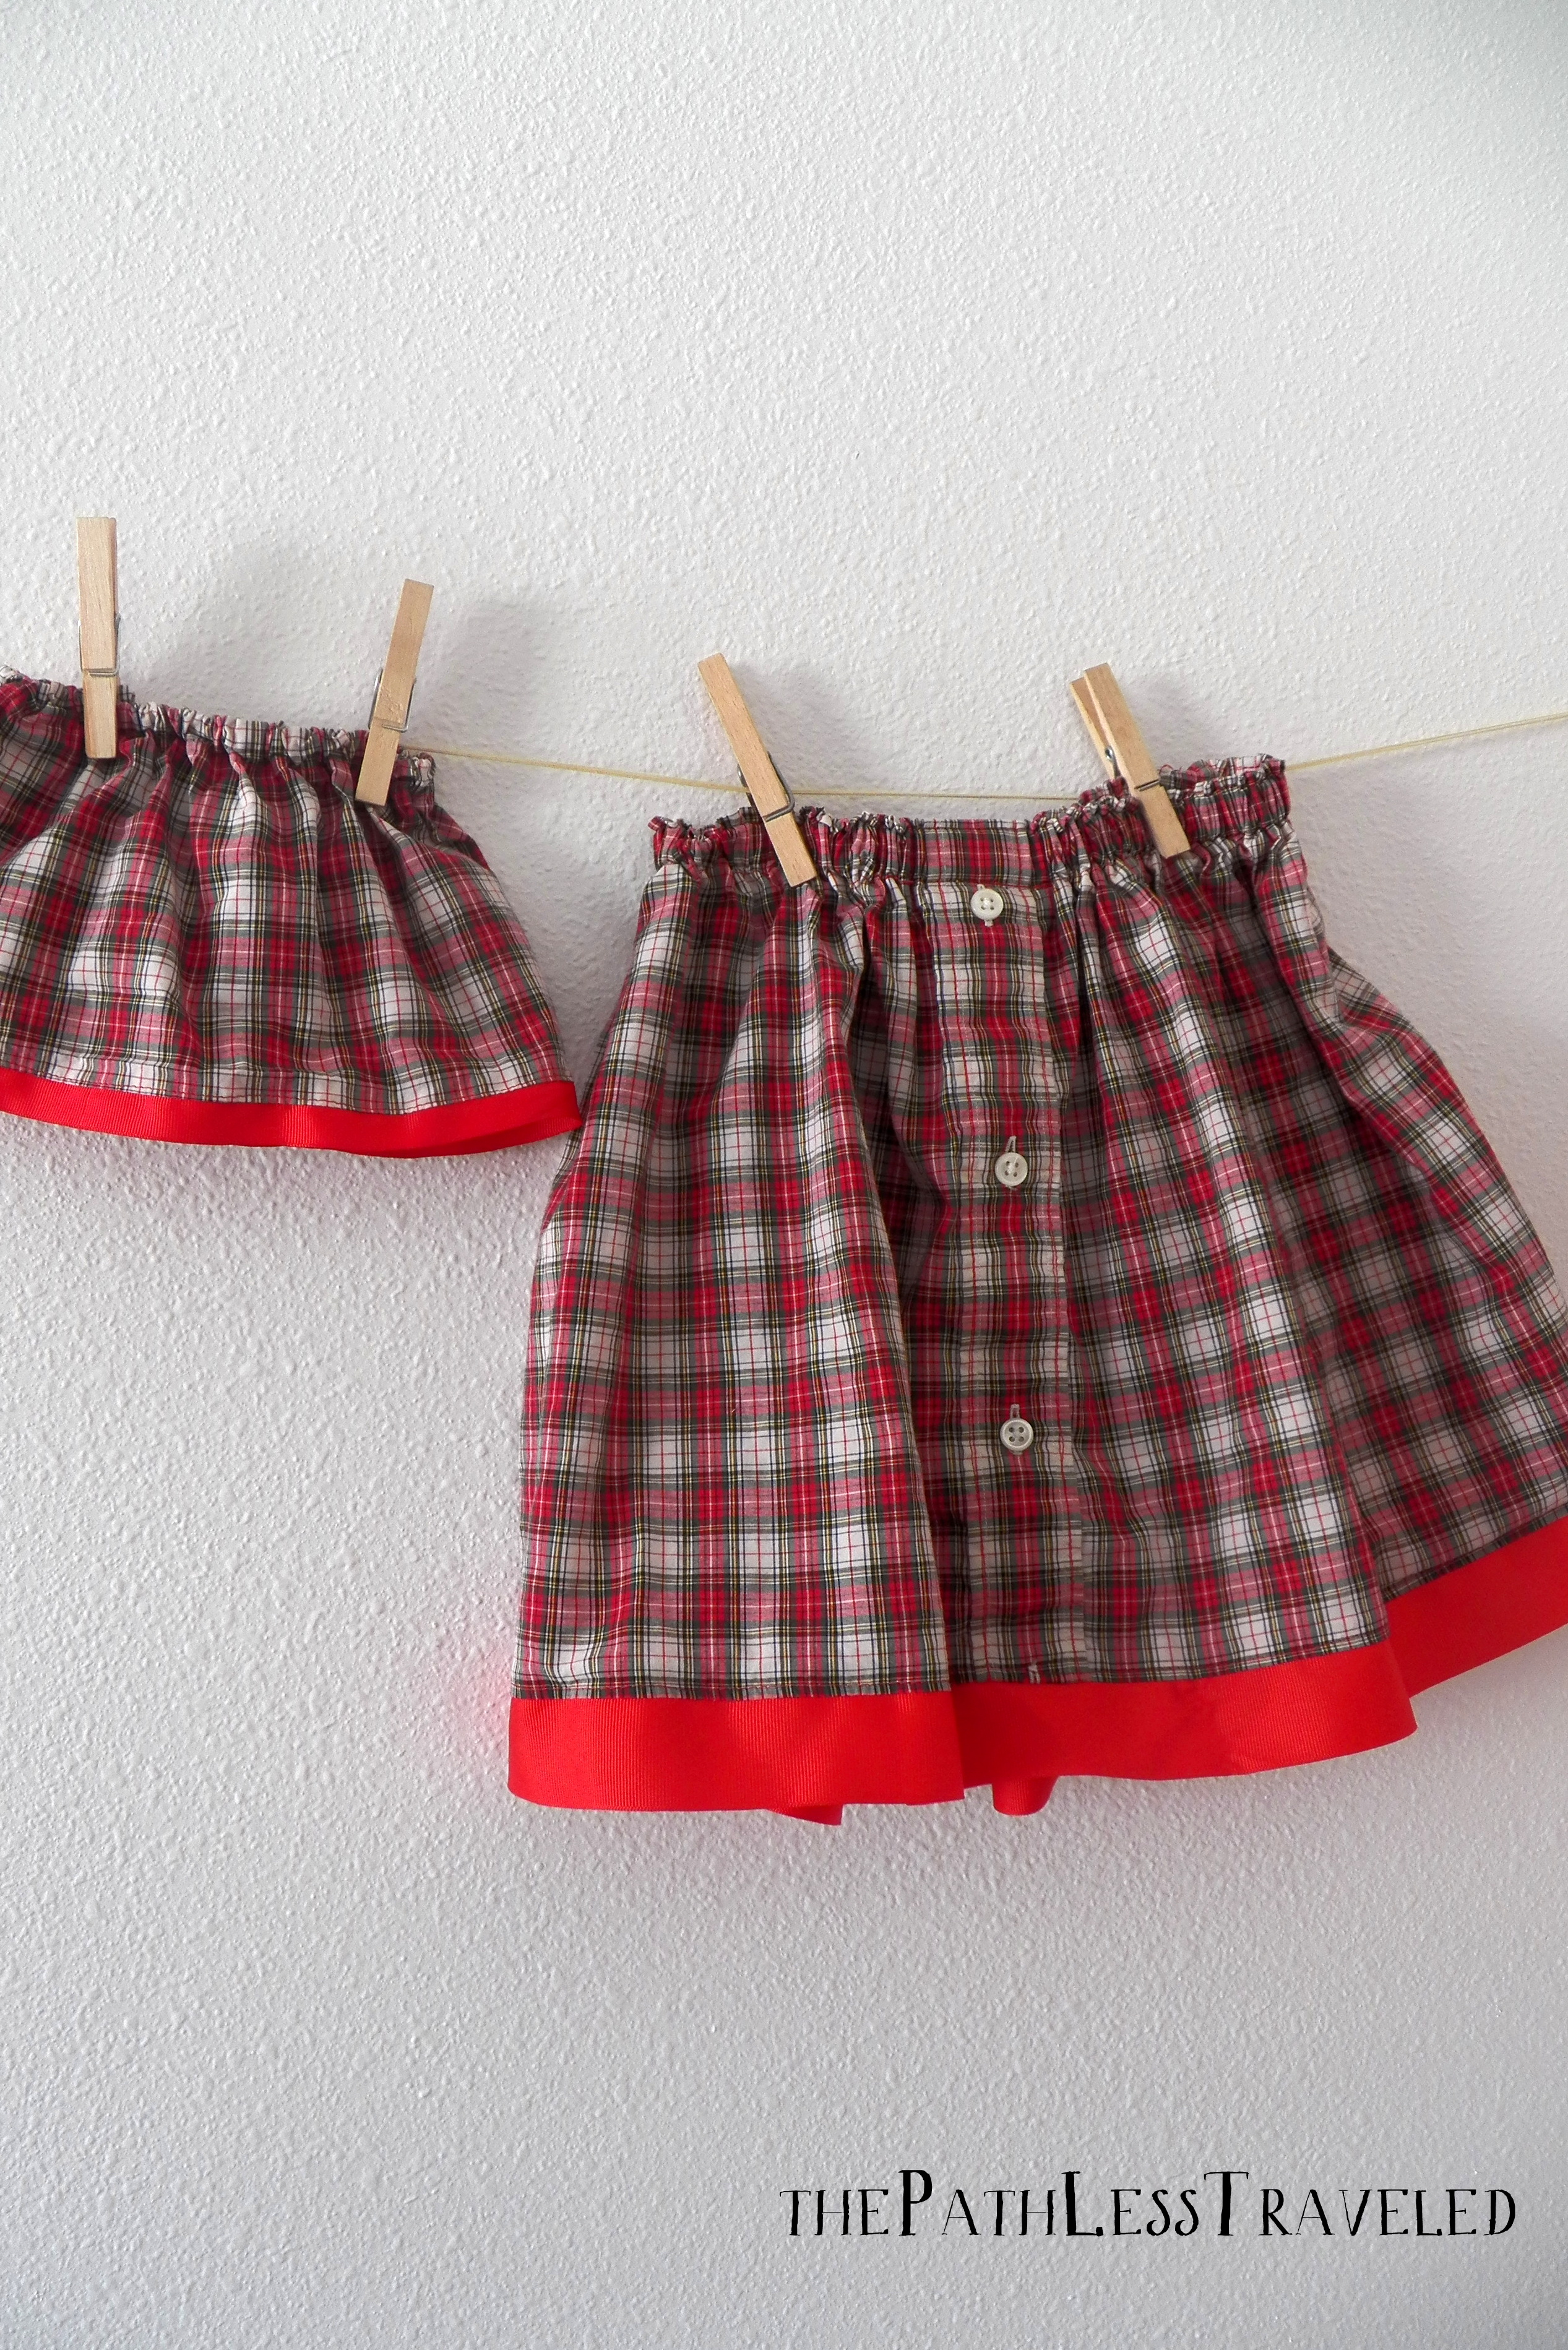
Those of you who follow me on Instagram might have seen the late night photos of the skirts I was making for the girls. {This being the first Christmas that we had two girls, of course I felt that they needed to have matching outfits :) I’d love sewing Christmas outfits for them to become a tradition!}

They were rather last minute, but even so came together just as I had pictured!
I used Oliver+S’s free Lazy Days Skirt pattern which I’ve used so many times that I know it by heart {it makes up so quickly – if you’re not interrupted, that is}. Of course, late at night I can’t quite remember how to do the ribbon hem, so I winged it {I’m pretty good at winging it}.

{please excuse the darkness of these photos – it was really late!}
First, I scrounged through my fabric looking for a length of some nice heavy-weight Black Watch plaid that I knew I had. Didn’t find it {I know it’s in there somewhere, though! Maybe I’ll find it for next Christmas’s outfits …}, but I did find an old dress shirt of my dad’s that would work nicely.

Then I measured – note my super accurate measurement technique of using the last Lazy Days skirt that I made for Emma Grace to check the length – and cut. I cut Em’s from the torso section of the shirt, and Olivia’s from one of the sleeves. Because I used the midsection of the shirt for Em’s, hers has a sweet feature of a button placket down the front which I thought classed it up just a bit. I sewed the placket shut so it’s non-functioning now, but if I make her a Lazy Days skirt from a shirt in the future I might leave it useable … it could be really sweet!

At this point, Olivia got hungry. It was already after midnight, so I told myself that I’d finish them the next day {hah!}. Well, it was a nice thought. Remember how I mentioned that this pattern works up pretty quickly when you’re not interrupted? Somehow I didn’t quite realize how many interruptions two toddlers and a newborn can give! Wonderful interruptions though they are. :) This set, instead of taking about an hour which they normally would have, took bits and snippets grabbed from 3 days.

I ended up finishing them at almost midnight Christmas Eve. Yep.
After we got two super excited children to bed and Olivia finally settled for a few hours I was able to get the sewing part done. Totally guessed as to the width of the waist bands, but they worked! They turned out so very darling.

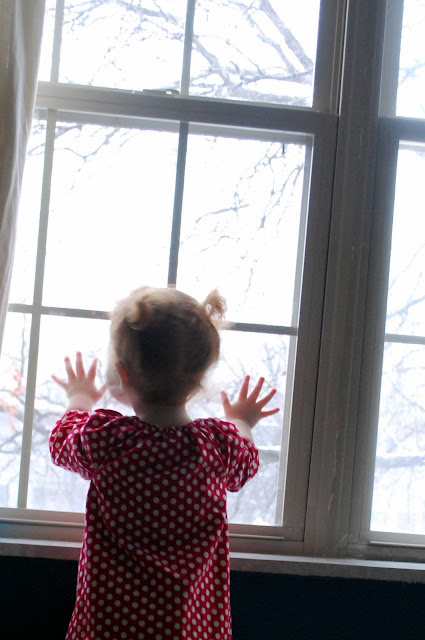
I {re} dressed up Emma Grace and Olivia the other day to get some more photos of the two of them together – funny how in the busyness of Christmas day I didn’t get one where they were both smiling!
Coming soon, the onesie that I embellished for Olivia to wear with the skirt. :)
I hope you’re enjoying the new format of the blog over here on our site. I’m still learning all the ins and outs of it, and am enjoying the challenge!
Have a lovely weekend!
<3
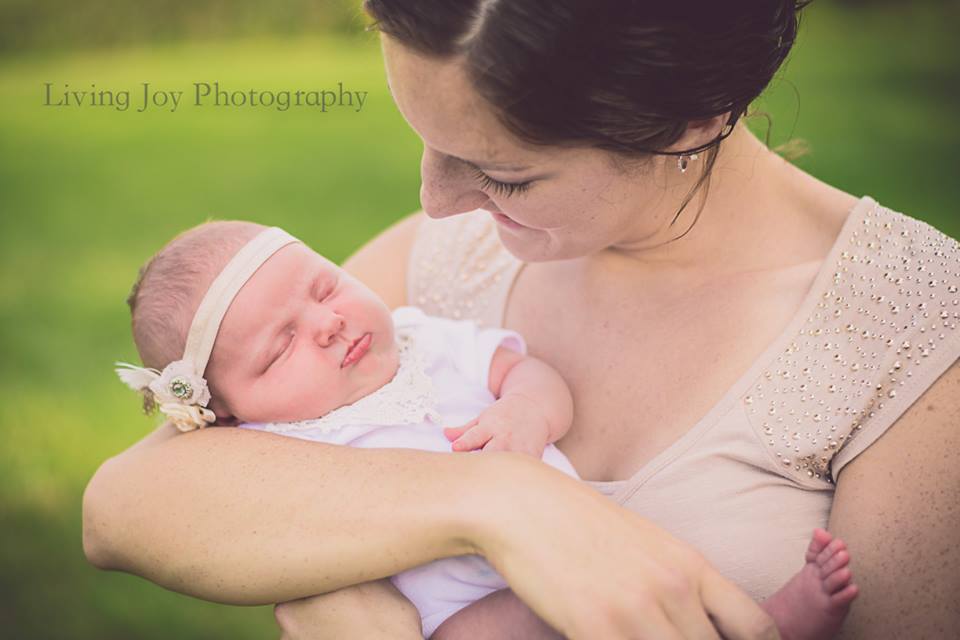
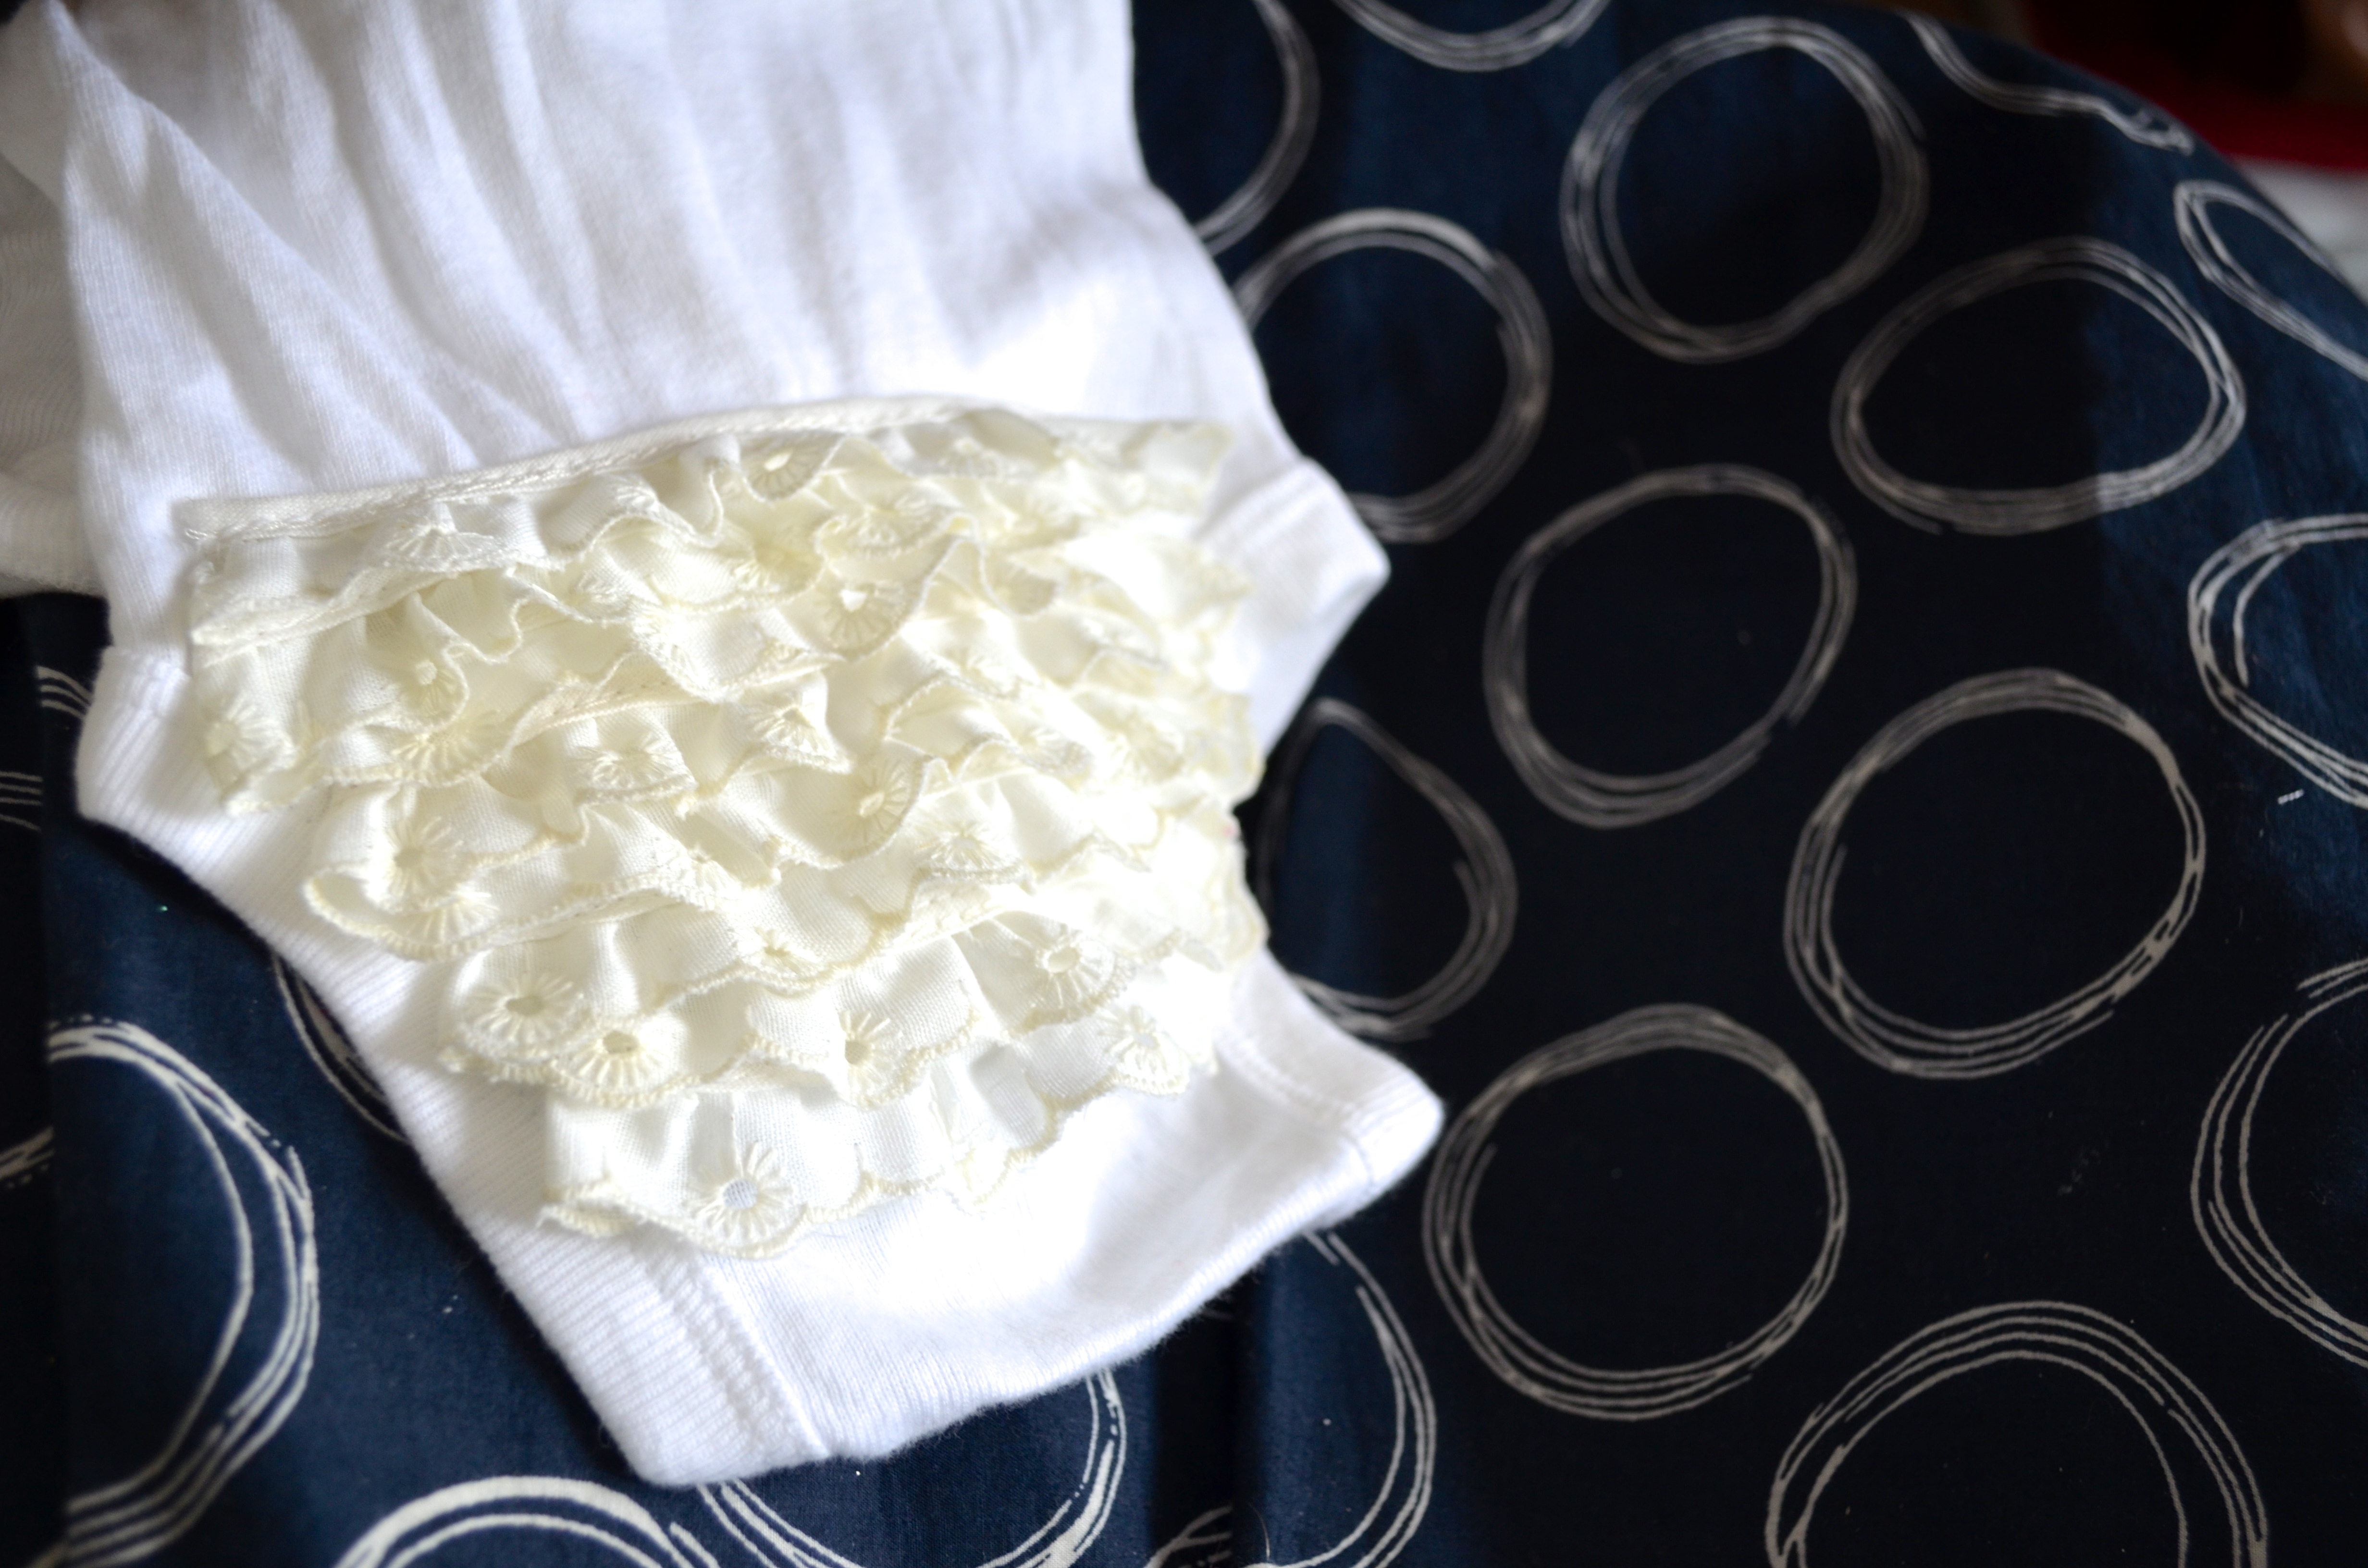
 I’m so excited to share this with you today! Do you remember the lace onesies that I’ve shown you how to make {here and here}? And how I mentioned that we welcomed a sweet new niece into the family {my first niece!}?


