how-Tuesday: ruffle bottom onesies {is there anything sweeter than a tiny ruffled bum?!}
I have a new niece! The sweet little dumpling was born last week, and in anticipation I had been doing just a bit of sewing {of course} :) Sewing for my own babes is a joy, and making sweet little things for nephews and nieces is just as much fun!}.
She’s the first little girl in her family, and is destined to be outfitted with her fair share of pink and lace … so it was only fitting that I make her a ruffle bottomed onesie!
Would you like to make your own version? If so, follow along with me as I show how I made this one {note: I’m not a professional seamstress, and this is the “wing it as you go method” :)}

materials: 1 onesie, ruffled lace trim {mine was about 1 yard long, but you could use more or less for different looks}, sewing pins, thread {that matches your trim}, scissors and a sewing machine
 step 1: unsnap the bottom of the suit and pin the lace to the base of where you like the ruffling to start in the rear – I chose to begin pinning where the leg curve stopped. As you pin, turn the raw, beginning edge of the lace under so that there are no straggling threads. :) Don’t cut the trim yet!
 step 2: begin sewing! starting at the end of the lace, sew almost to the other side of the onesie, stopping about an inch from the edge. Backstitch and raise your needle and presser foot.
 step 3: fold the trim back the other way, layering it over the first line. Stagger the second row of trim a bit – this begins your “ruffle but”! Pin in place, and sew as the first line.
 Continue in this manner, zigzagging the trim back and forth until you’ve achieved the fullness and look you have in mind …
 …and when you come to the end of your last layer …
 …turn under the raw end as in the beginning …
 …and sew to secure it, backstitching to lock it in place.
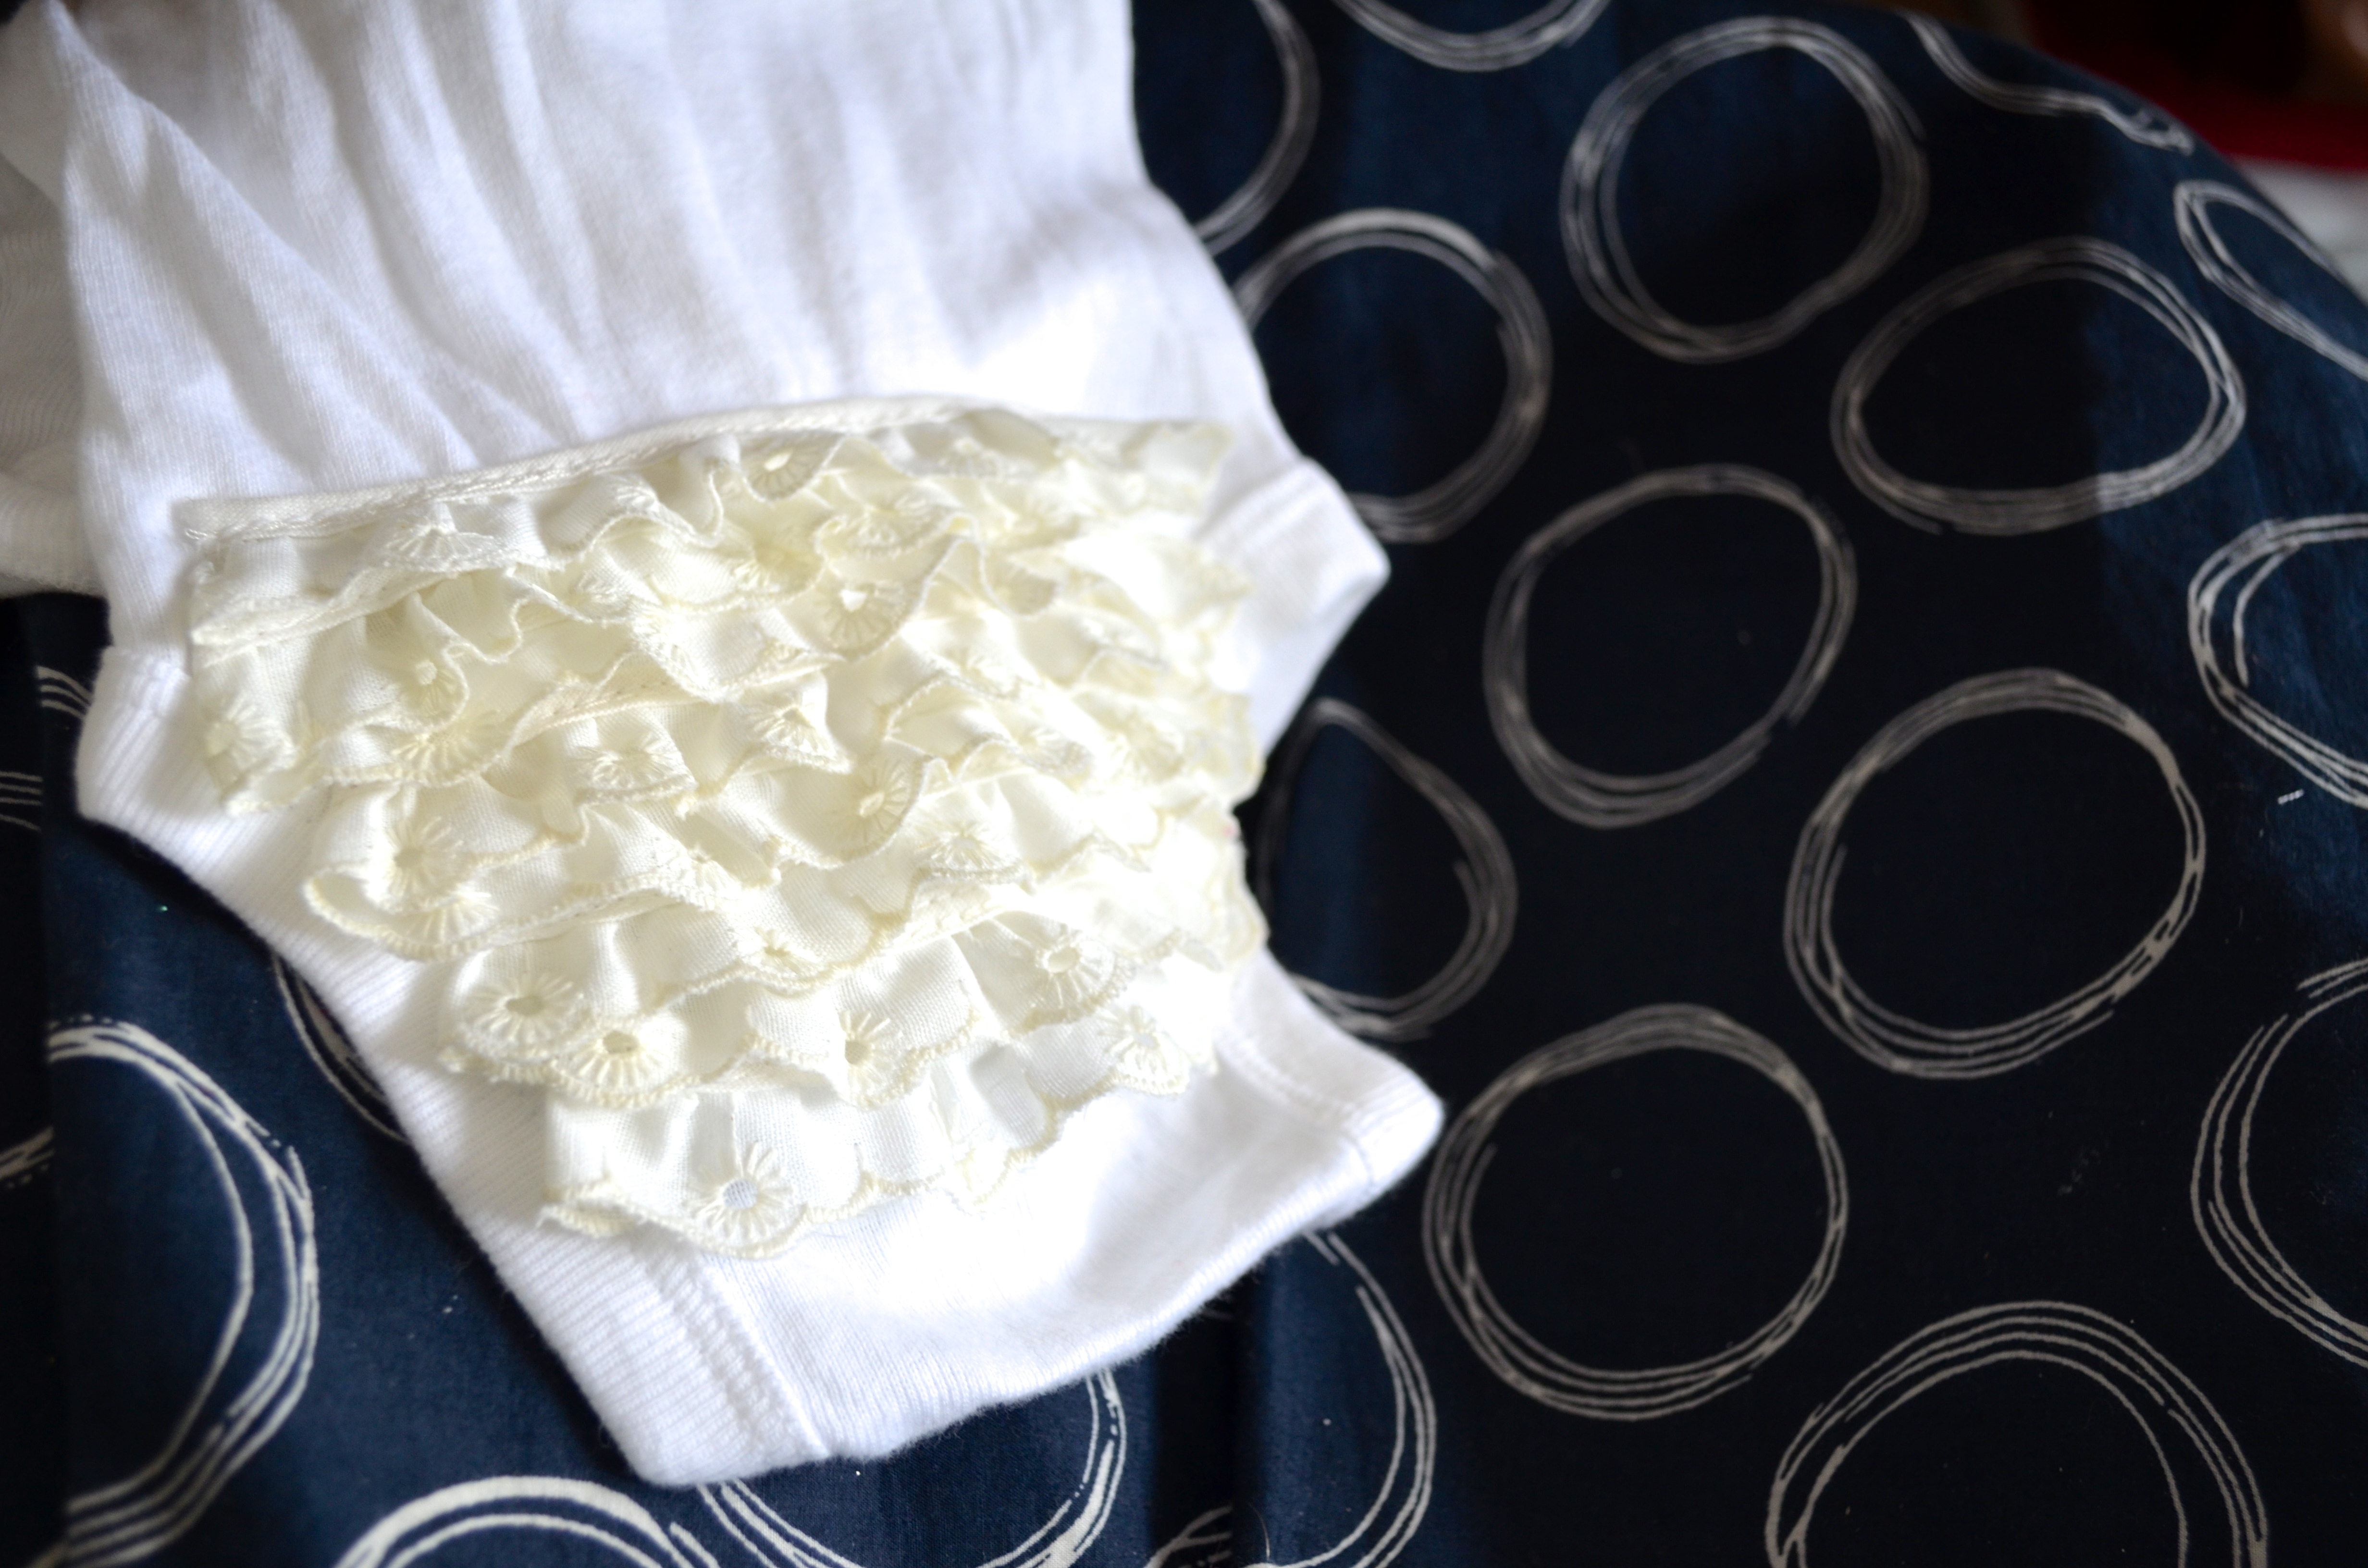
 This is what it will look like from the inside – zigzags of stitching!
 Once you’ve finished, be sure to clip any stray threads. Then enjoy the cuteness!
Now that I’ve made these for baby Brooke, I think I need to make one or two for Olivia :) Because it sure would be a shame to miss out on seeing a darling pile of ruffles squirming across the floor as she learns to crawl!
<3

I’m sharing this at the Vintage Farmhouse, the Train To Crazy and She Sews <3