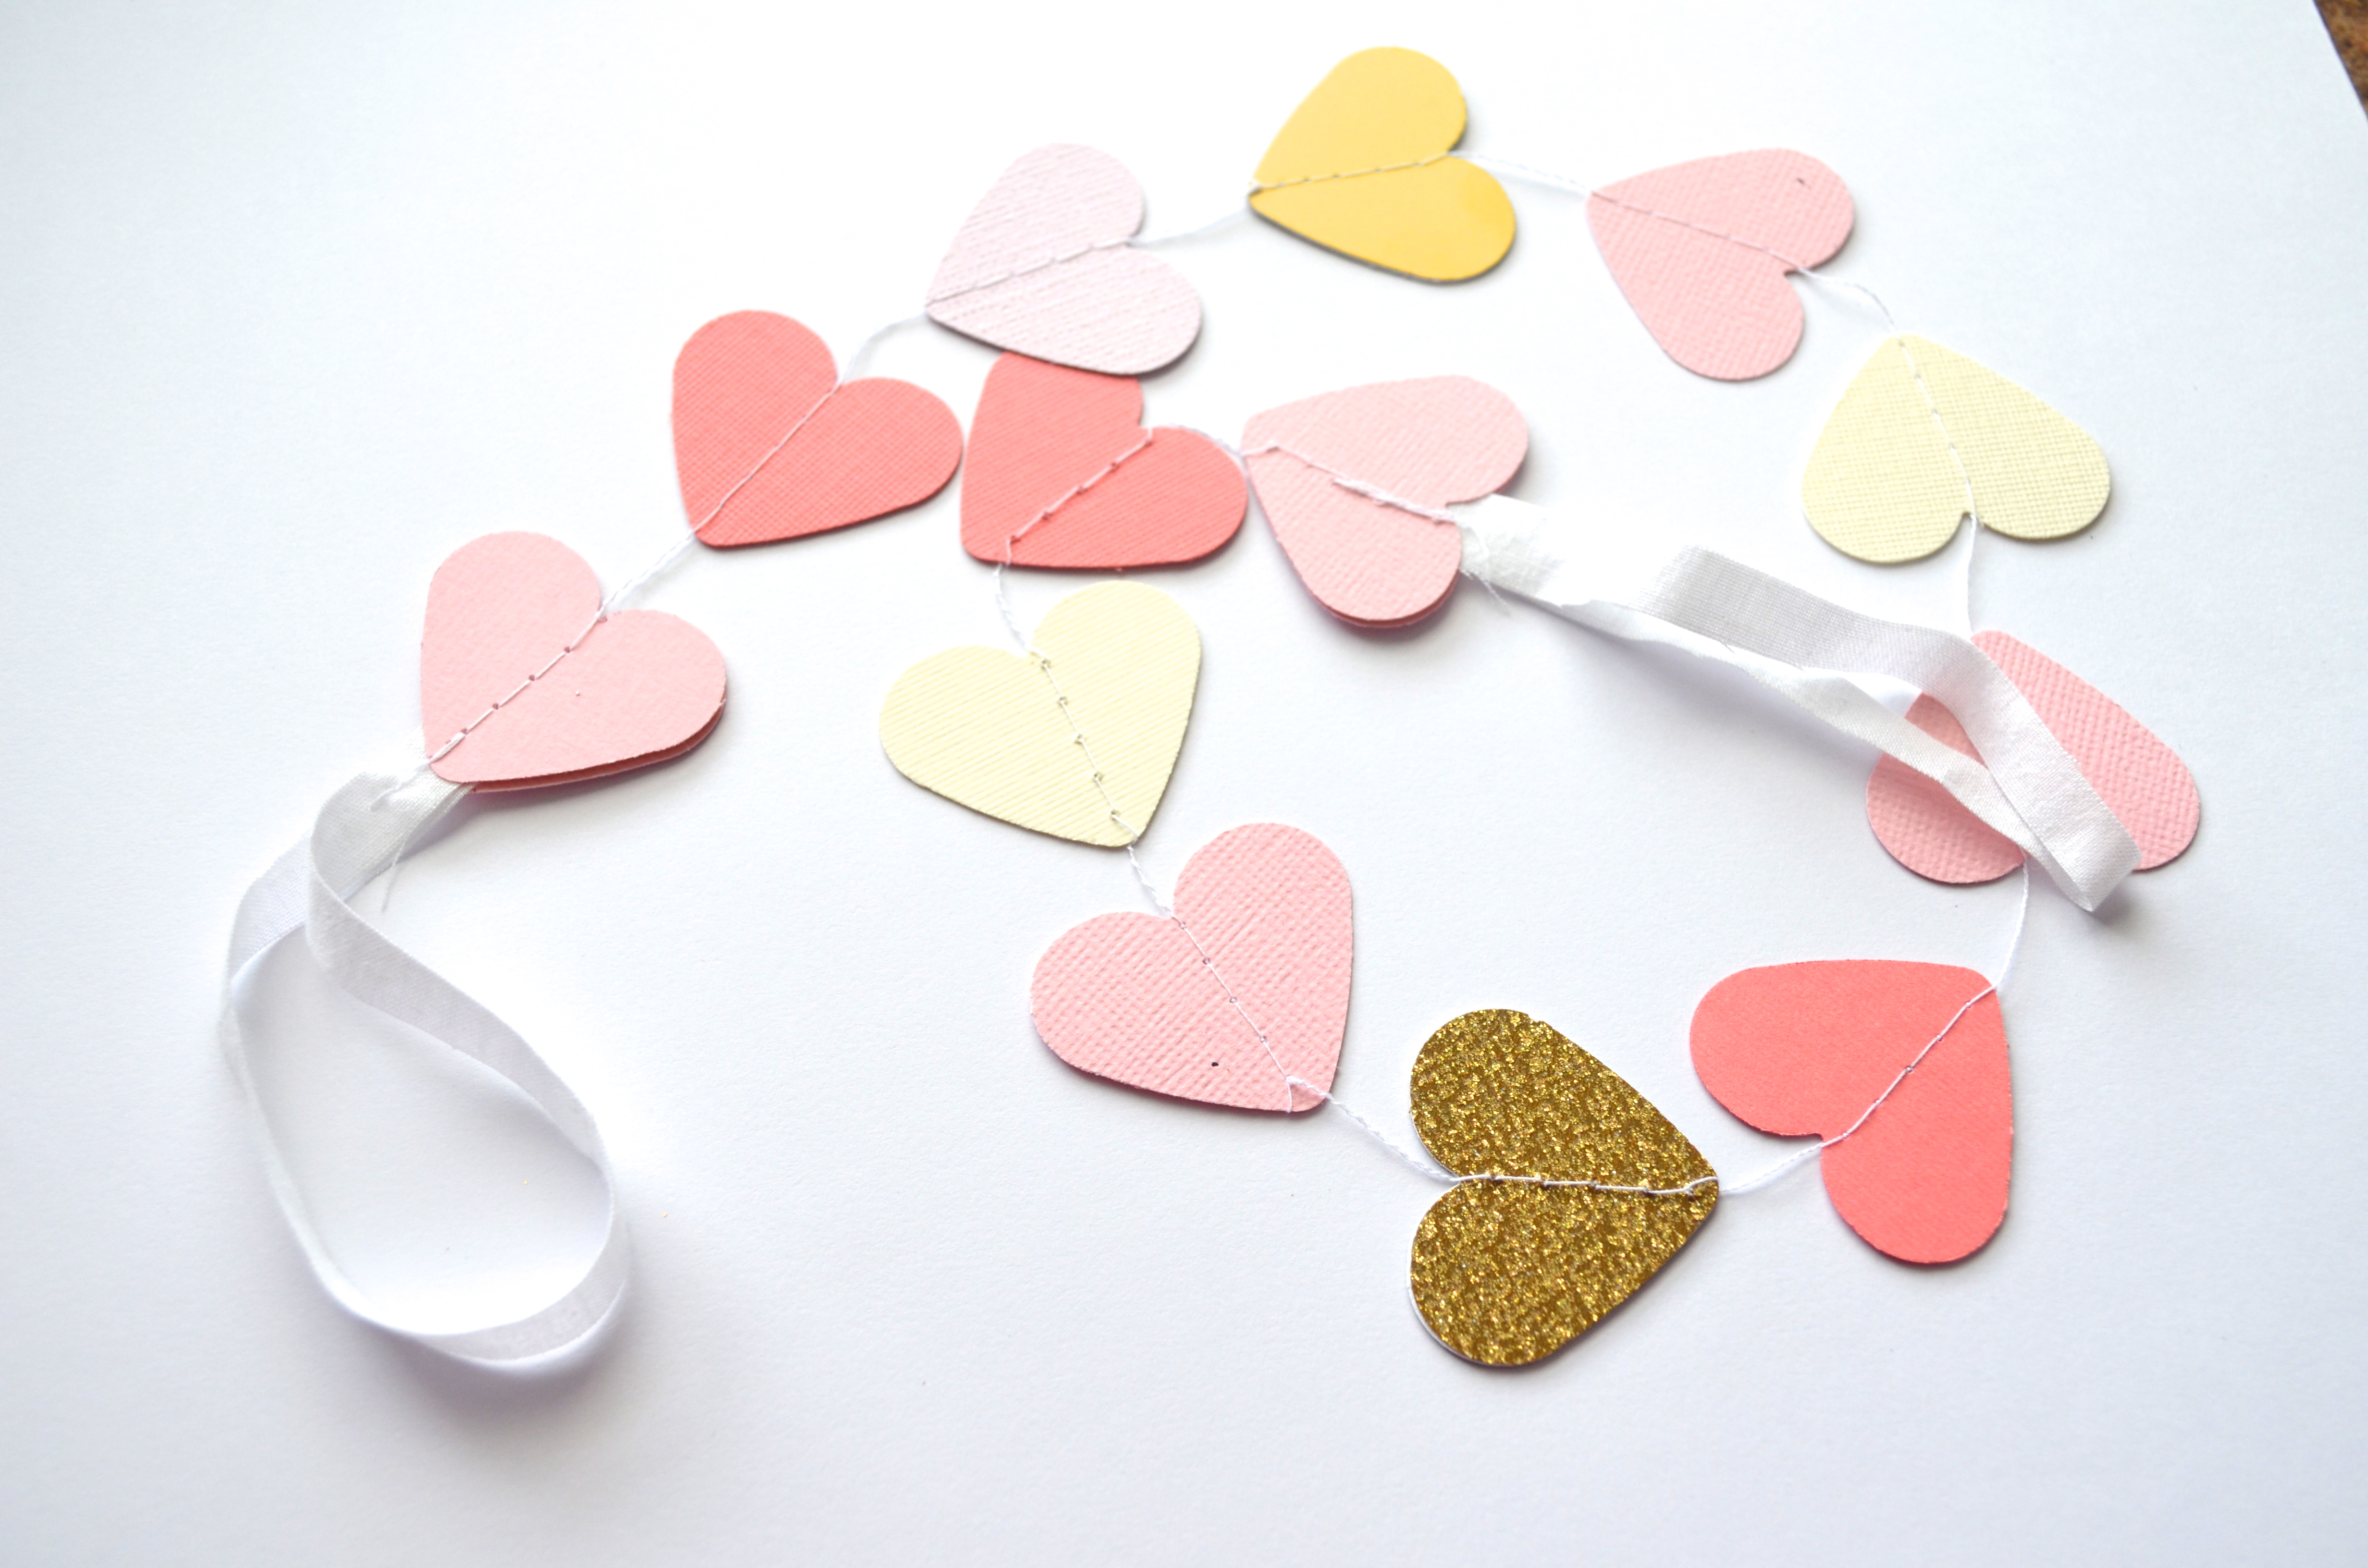
Just so you know, pretty much all of the garlands, toppers, etc. in my shop can be made in any range of custom colors:Imagine the possibilities – they’re almost endless! These started out as our classic heart chair backers, and the customer requested that they be made in the same color scheme as our Confetti Circles garlands. The resulting hybrid is gorgeous! Or at least, I thought it was :)
Each time a customer leaves a comment saying how much they love their purchase, it makes my day. I especially love it when they tell their friends and send me photos of how they have used the things that they have bought!
This darling photo is from a baby girl’s first birthday – her mama planned a sweet purple and white butterfly themed party and asked me to make a custom cake topper for her. Isn’t it just too sweet?!
The customer ordered a customized version of the butterfly toppers with a personalized garland between the butterflies {isn’t that a darling idea?!} and she said: “They looked absolutely perfect with the cake. Thank you so much for helping me create the perfect cake topper for {my daughter’s} first birthday!” She even made her own blueberry ombre colored frosting for the cake – it looks delicious!
Thank you so much for sharing! Now I just wish I could have a piece of that cake …. :)
Do you have photos that you’d like to share? If so, you can either email them to me at elizabeth@pltmarket.com or tag them with #thepathlesstraveledmarket on Instagram – we’d all love to see your ideas!
XO
p.s. I often send “thank you” coupons to the lovelies who let me share their photos with you – so if you’re looking for a coupon for your next order, sharing photos is a great way to get a discount!
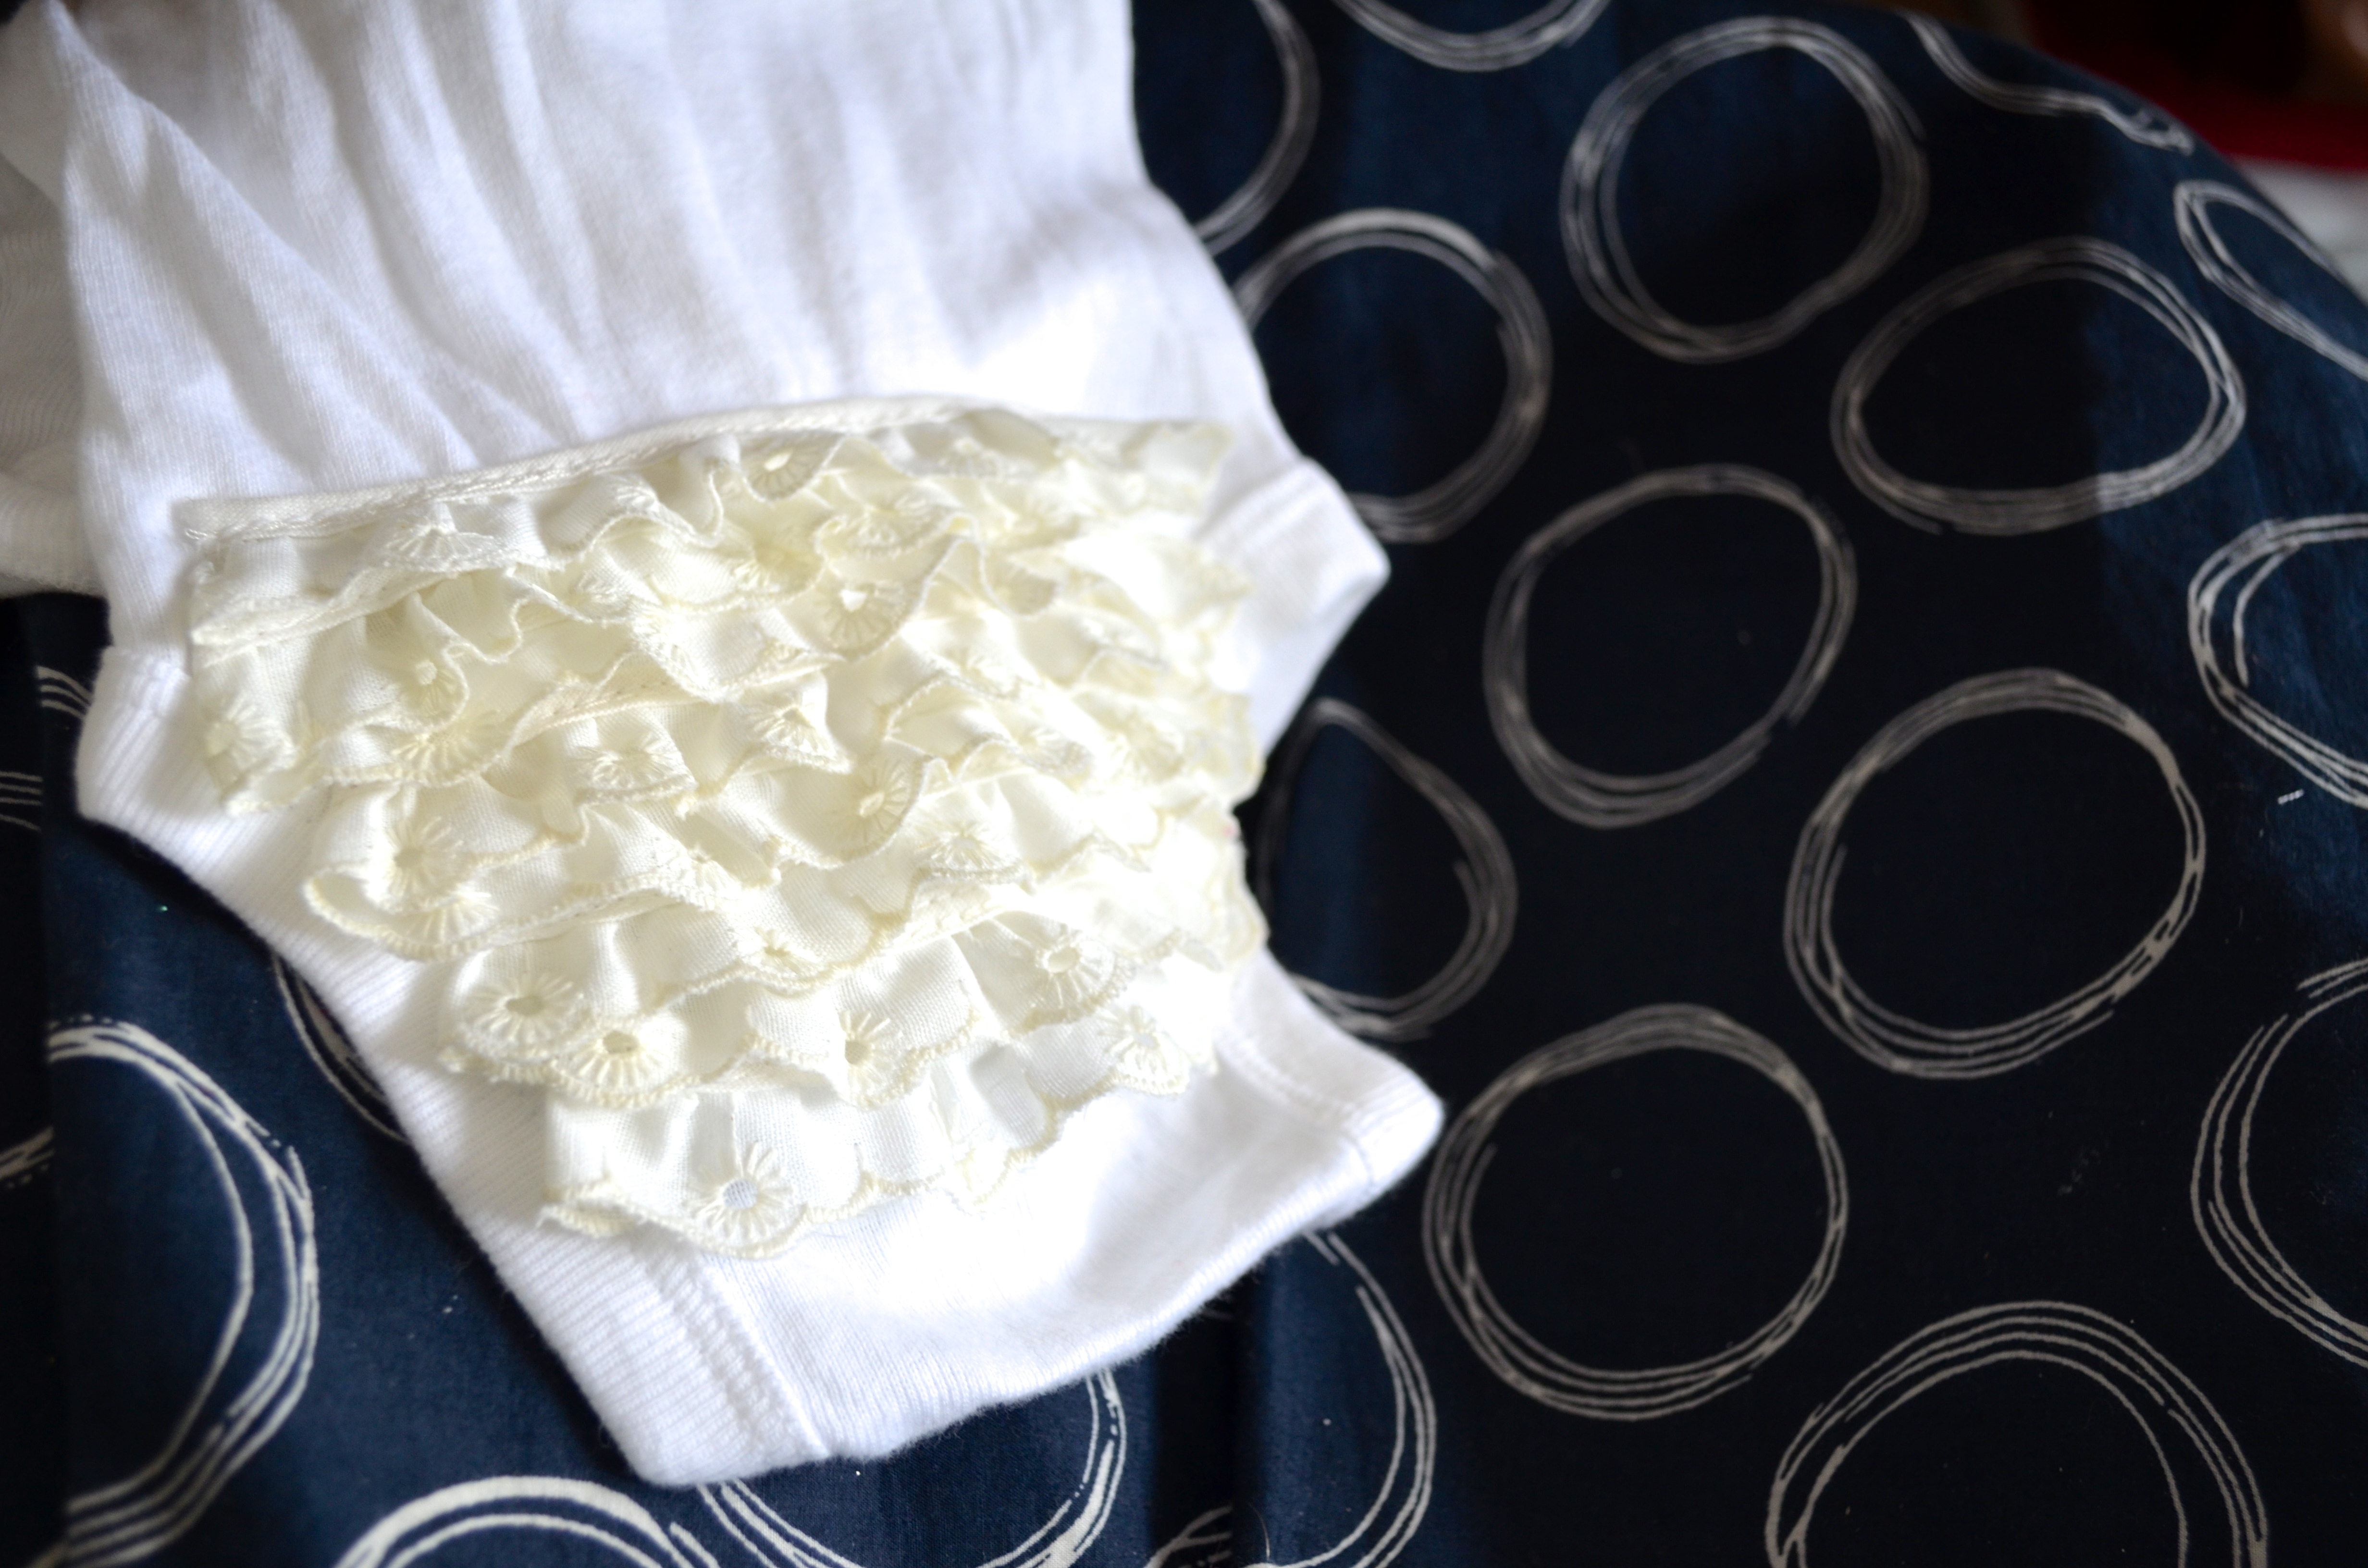
how-Tuesday: ruffle bottom onesies {is there anything sweeter than a tiny ruffled bum?!}
I have a new niece! The sweet little dumpling was born last week, and in anticipation I had been doing just a bit of sewing {of course} :) Sewing for my own babes is a joy, and making sweet little things for nephews and nieces is just as much fun!}.
She’s the first little girl in her family, and is destined to be outfitted with her fair share of pink and lace … so it was only fitting that I make her a ruffle bottomed onesie!
Would you like to make your own version? If so, follow along with me as I show how I made this one {note: I’m not a professional seamstress, and this is the “wing it as you go method” :)}
materials: 1 onesie, ruffled lace trim {mine was about 1 yard long, but you could use more or less for different looks}, sewing pins, thread {that matches your trim}, scissors and a sewing machine
step 1: unsnap the bottom of the suit and pin the lace to the base of where you like the ruffling to start in the rear – I chose to begin pinning where the leg curve stopped. As you pin, turn the raw, beginning edge of the lace under so that there are no straggling threads. :) Don’t cut the trim yet! step 2: begin sewing! starting at the end of the lace, sew almost to the other side of the onesie, stopping about an inch from the edge. Backstitch and raise your needle and presser foot. step 3: fold the trim back the other way, layering it over the first line. Stagger the second row of trim a bit – this begins your “ruffle but”! Pin in place, and sew as the first line. Continue in this manner, zigzagging the trim back and forth until you’ve achieved the fullness and look you have in mind ……and when you come to the end of your last layer … …turn under the raw end as in the beginning … …and sew to secure it, backstitching to lock it in place. This is what it will look like from the inside – zigzags of stitching!
Once you’ve finished, be sure to clip any stray threads. Then enjoy the cuteness!
Now that I’ve made these for baby Brooke, I think I need to make one or two for Olivia :) Because it sure would be a shame to miss out on seeing a darling pile of ruffles squirming across the floor as she learns to crawl!
the photos that I capture on Instagram are just little pieces of our life, and it’s really interesting to see what moments I capture {and which ones I don’t} – of course, it seems as if {since I instagram from our iPad} I only capture the things that stand still. Which of course explains why Emma Grace, Ian and John don’t show up very often, but flowers, projects and Olivia do. :)
here are some of the little pieces of this last week:Monday morning loveliness on our kitchen windowsill <3
I make our black beans from scratch – both to save money and because I like knowing what is {and isn’t!} in our food. Usually I do the “quick soak” method {boil them for an hour and then rinse and cook} because I’m usually making them when we actually need them and not ahead of time, but this week I thought ahead and let them sit overnight. I was so surprised to be greeted by these lovely purple gems when I rinsed them out the next morning! Is it just my beans that do this? Or have you experienced it, too? A custom cake garland order – triple layered gold scallops! It will be so lovely on her cake, don’t you think?
Emma Grace asked me to make her a braid “all the way down” so that she could be like Rapunzel – the braid reached her shoulder blades, and she decided that might be good enough :) <3
Each time a customer leaves a comment saying how much they love their purchase, it makes my day. I especially love it when they tell their friends and send me photos of how they have used the things that they have bought, and recently you lovelies have sent some super darling ones!
Here are a few of the most recent photos:
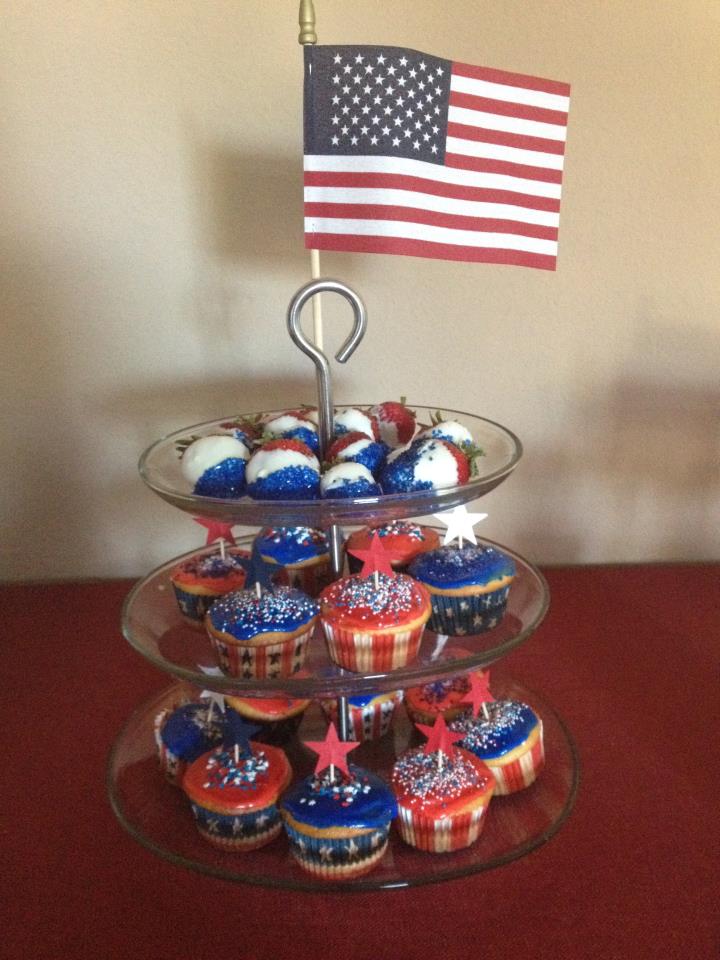
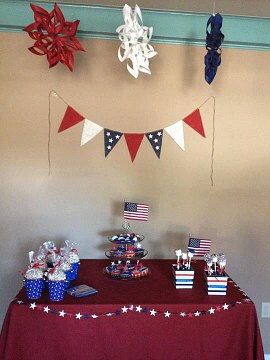
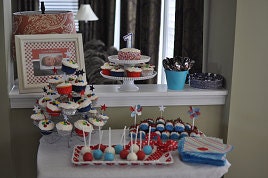
It’s so simple to add a festive and patriotic touch to your desserts with the Red, White and Blue Star set – and even more striking with a miniature flag to top them off!
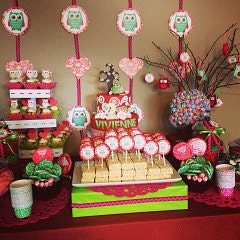
The red heart toppers again, this time for a little girl’s first birthday – love! The red is really striking against the colors of aqua, teal and yellow :)
The Red Heart Garland sweetening a display of photos from the baby girl’s first year – I love this idea!
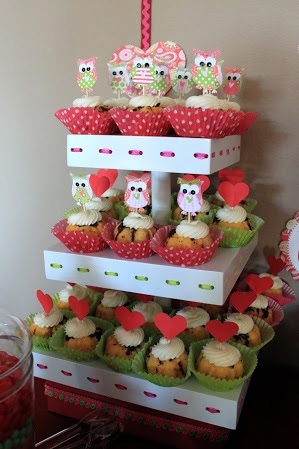
the Star cupcake toppers again, this time adding a crisp and masculine touch to a little guy’s first birthday – can you see the little number “one” on the cake? I love how creative you all are!
She even used some of the star chair garlands to drape in front of {and in!} the super darling Birthday Boy vignette. Love this!
Do you have photos that you’d like to share? If so, you can either email them to me at elizabeth@pltmarket.com or tag them with #thepathlesstraveledmarket on Instagram – we’d all love to see your ideas!
Don’t forget -there are just a few hours left to save 20% using the exclusive coupon. It expires at midnight tonight! I hope you are all having a truly lovely weekend,
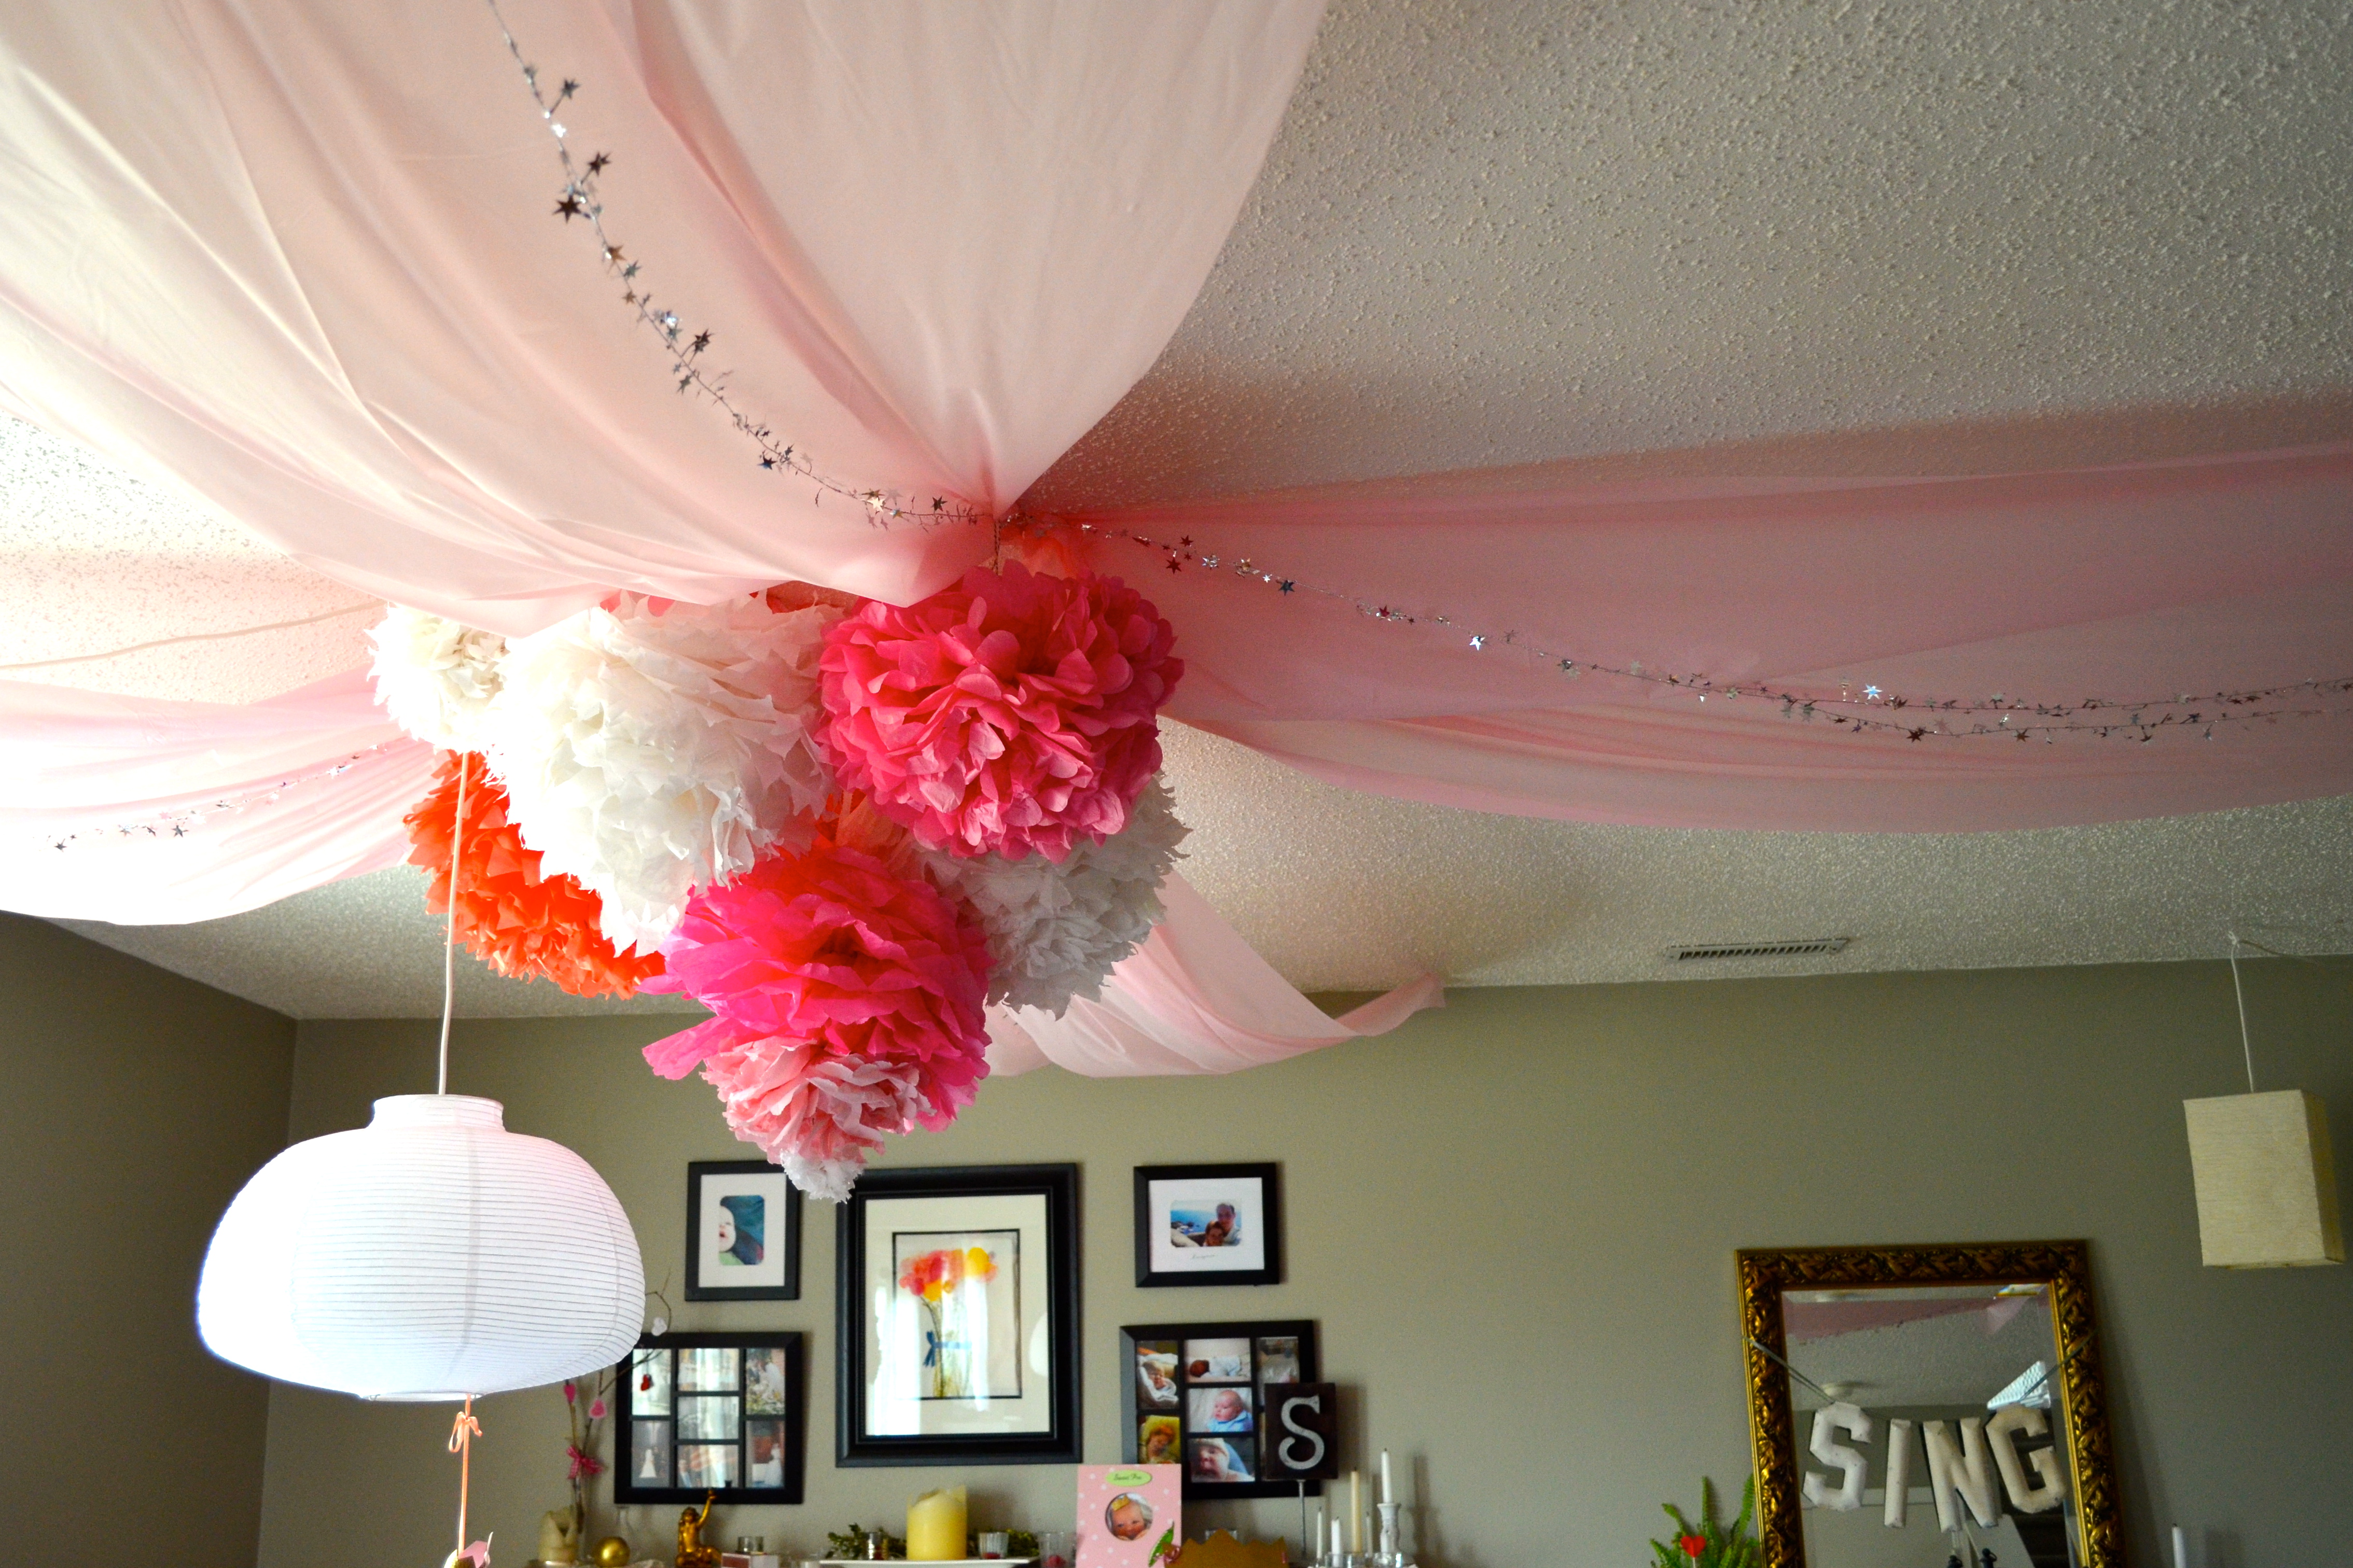
There has to be a better name for it, but for now I’m calling it “Party Ceiling Pouf” {really, any of you have suggestions? Let me know!}
image via Lindsay Meinhart on Pinterest
I found this photo on Pinterest a while back, and when we started working on the pink princess party, I knew it would have to happen. Of course, when I was making it I just winged it and didn’t click through to see if there was a tutorial for it. :) After I was finished I found out that wasn’t a tutorial {yay for figuring things out on your own!} but one of the commenters suggested cutting the table covers in half the long way to double your “streamers” – even so, I think it turned out really sweet!
I picked up all the materials {except for the tissue poms which I borrowed from the kids’ bedroom :)} at the Dollar Tree, and the entire project came to $5 – a huge impact for a small price!
materials: plastic table cloth, wire star garland and thumb tacks {all pictured} tissue poms or balloons and twine or fishing line {not pictured}
step one: remove the table cloths from the packaging and gather half of one end in your hand.
step two: find where you want the “center” to be, climb up on a step stool and tack it up …
… like this.
step three: Gather and tack up the other side of the end, then do the same with the opposite end.
Repeat with the other three table cloths, making a “+” shape on the ceiling.
Once you’ve used all four table cloths, you can stop there or continue on like I did and add a touch of whimsy and sparkle {which, it turns out, thrills little 4-year old girls!} by adding strands of the star garland along the underside of the draped cloths.
step four: gather your tissue pons {or balloons} and, using twine or fishing line, hang them in a bunch in the center to provide a focal point and hide the bunching :)
step five: step back and admire your work :)
that’s it! Super simple with a huge impact – and a great way to make your celebration special.
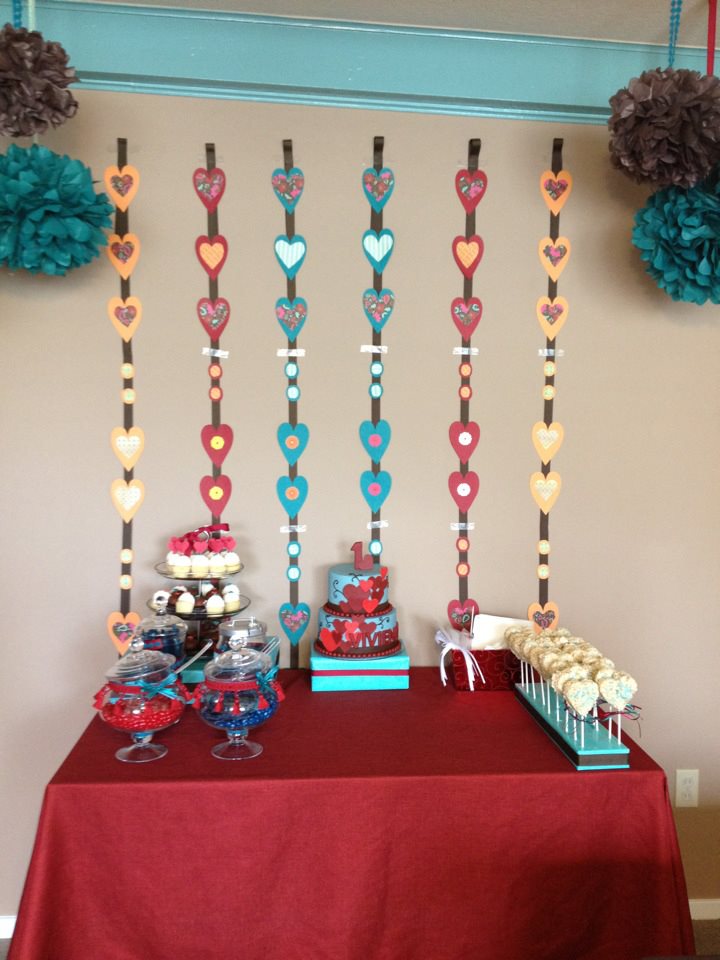
I LOVE custom orders. Sometimes it’s a bit tricky to get the customer’s ideas transferred from “idea” to “reality”, but I always love them. Here’s a sweet little something that I was working on for a baby girl’s first birthday:
The baby girl’s mama contacted me with an idea board and a request for 6 3-foot long garlands, and we were both pretty tickled with how they turned out!
Do you have a vision or idea that you’d like to see created? Contact me and we’ll talk about it!


 Imagine the possibilities – they’re almost endless! These started out as our classic heart chair backers, and the customer requested that they be made in the same color scheme as our Confetti Circles garlands. The resulting hybrid is gorgeous! Or at least, I thought it was :)
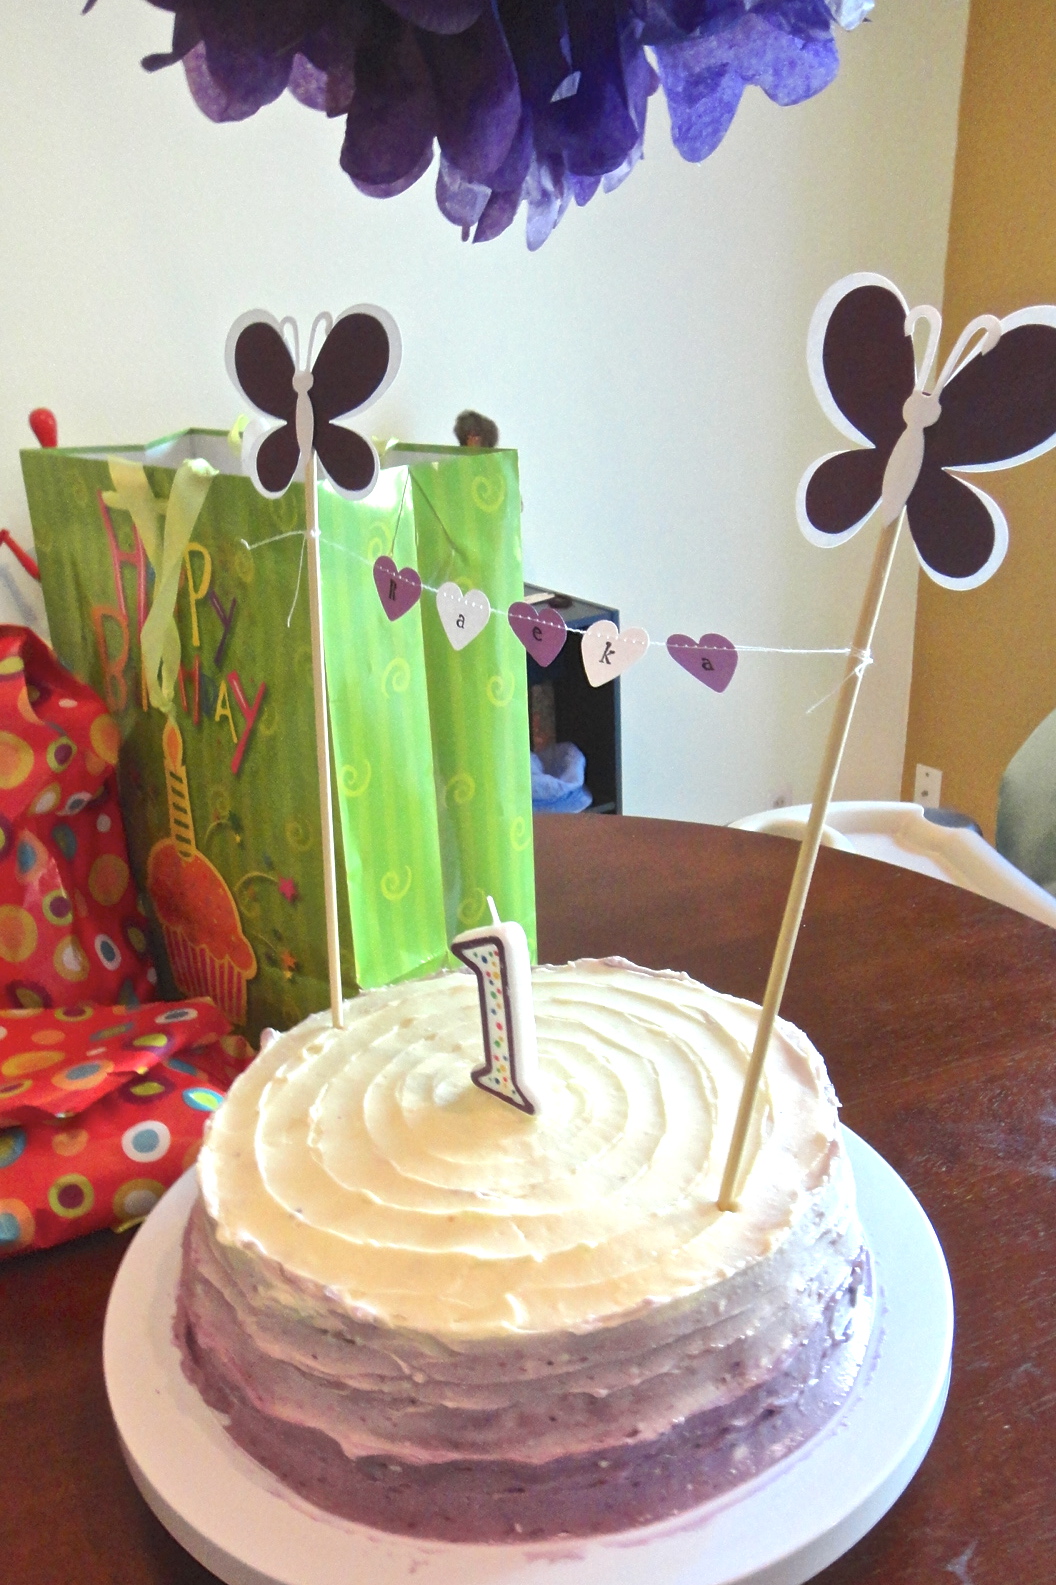


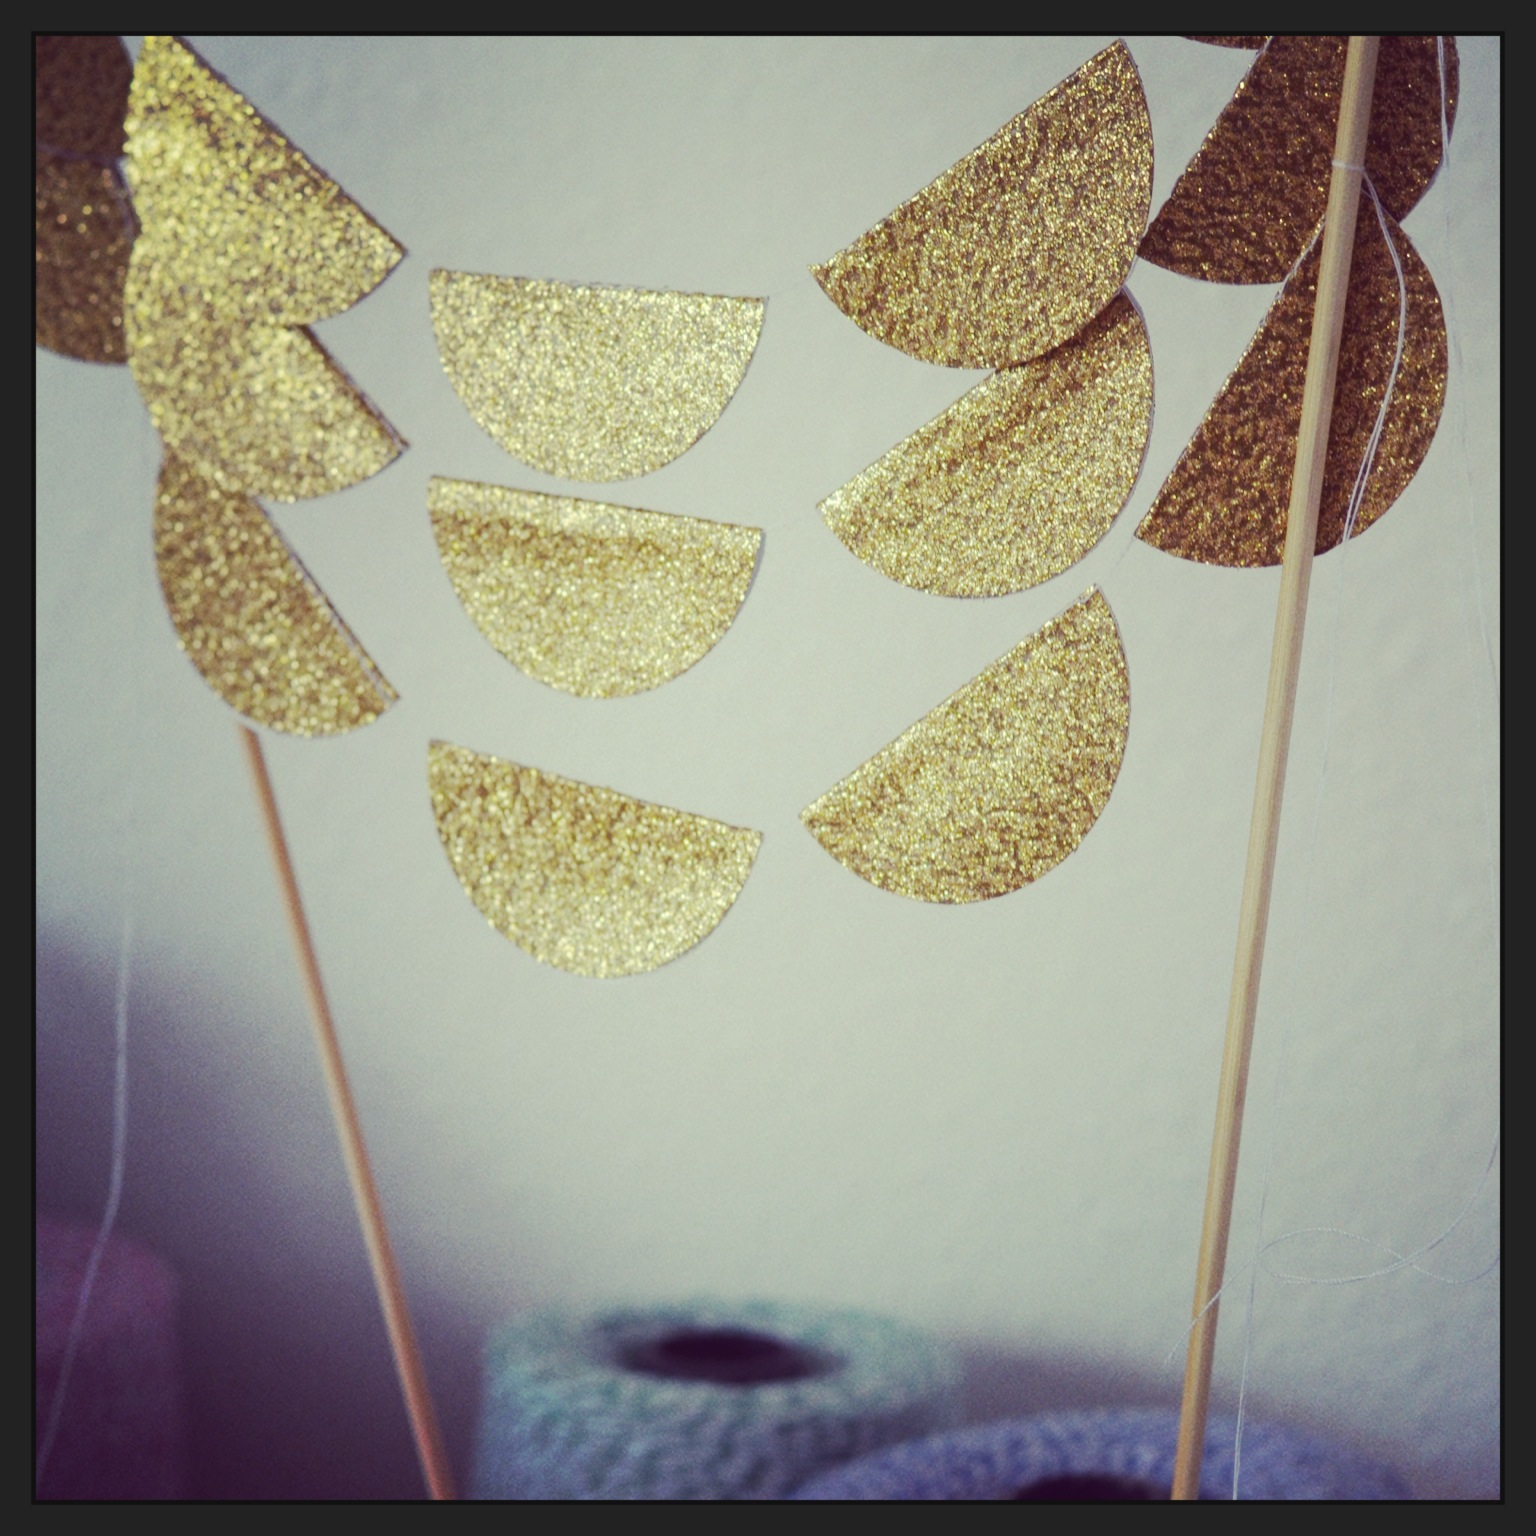


 A custom cake garland order – triple layered