flower pin tutorial
Here it is! The thing I was working on – other than compulsively organizing our apartment in preparation for Baby #2 – is this little flower pin tutorial. Enjoy! :)
(by the way, this is a great way to use up random scraps of fabric that you might otherwise toss as you are spring cleaning your stash)
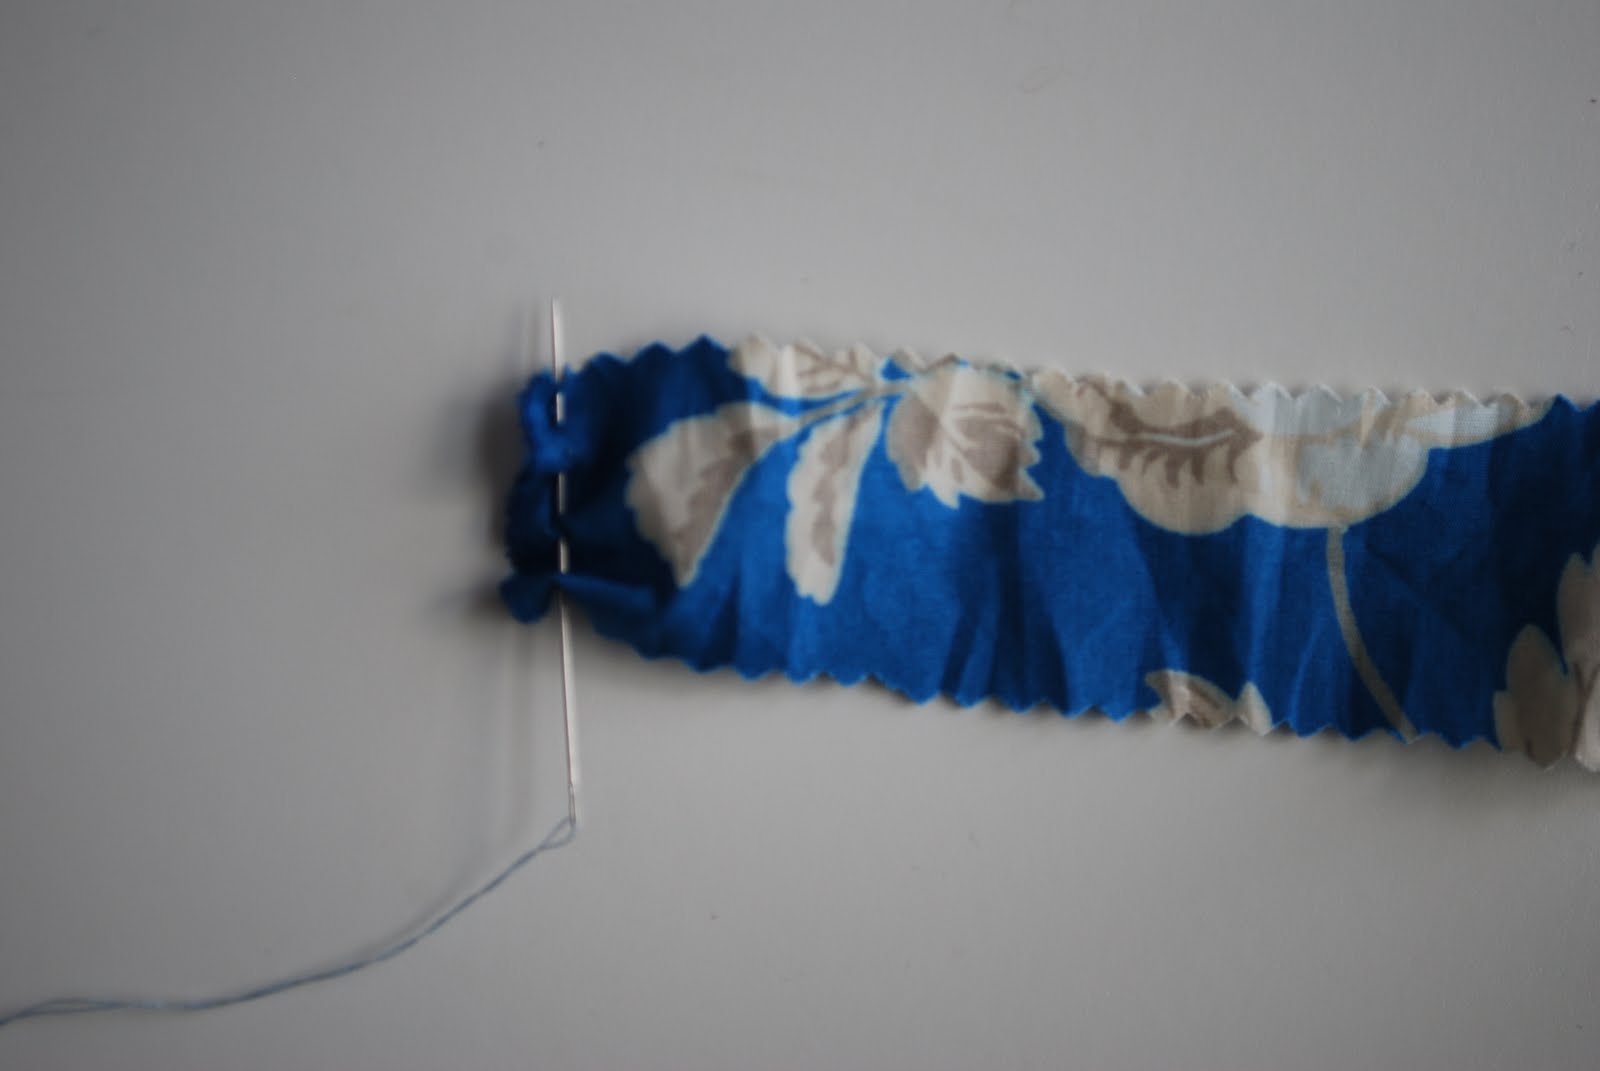 start by sewing – with a doubled thread to prevent breakage – through the end of the strip to anchor your thread and gather the end. this will be the center of your flower.
materials:
fabric – a strip (at least an inch wide) cut from a 45″ piece of material, selvage to selvage
scissors
needle and thread
pin back
fabric glue
Cut a piece of fabric at least an inch wide (your flower will be twice as wide as your strip). I used a quilting weight fabric that was 45″ wide for this flower, but you can use any type in any length. The length that you use will determine how “full” your flower is.
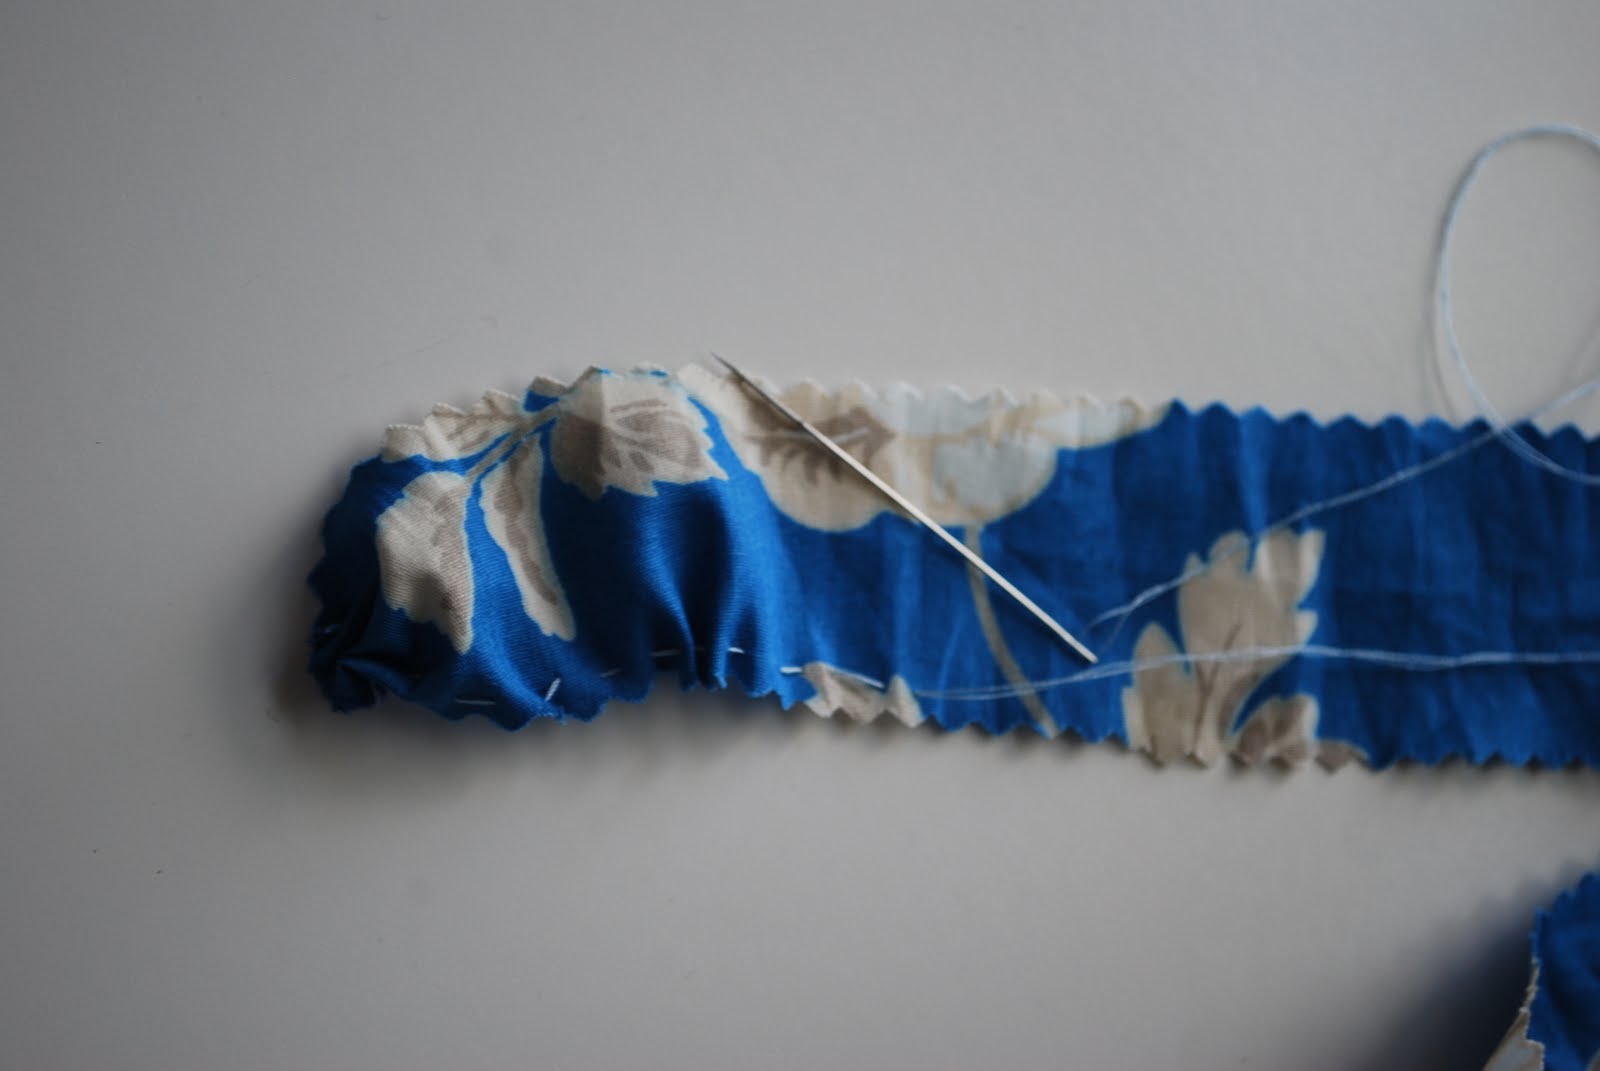 continue to sew a running stitch along one side of the strip, pulling the thread to gather it every few inches.
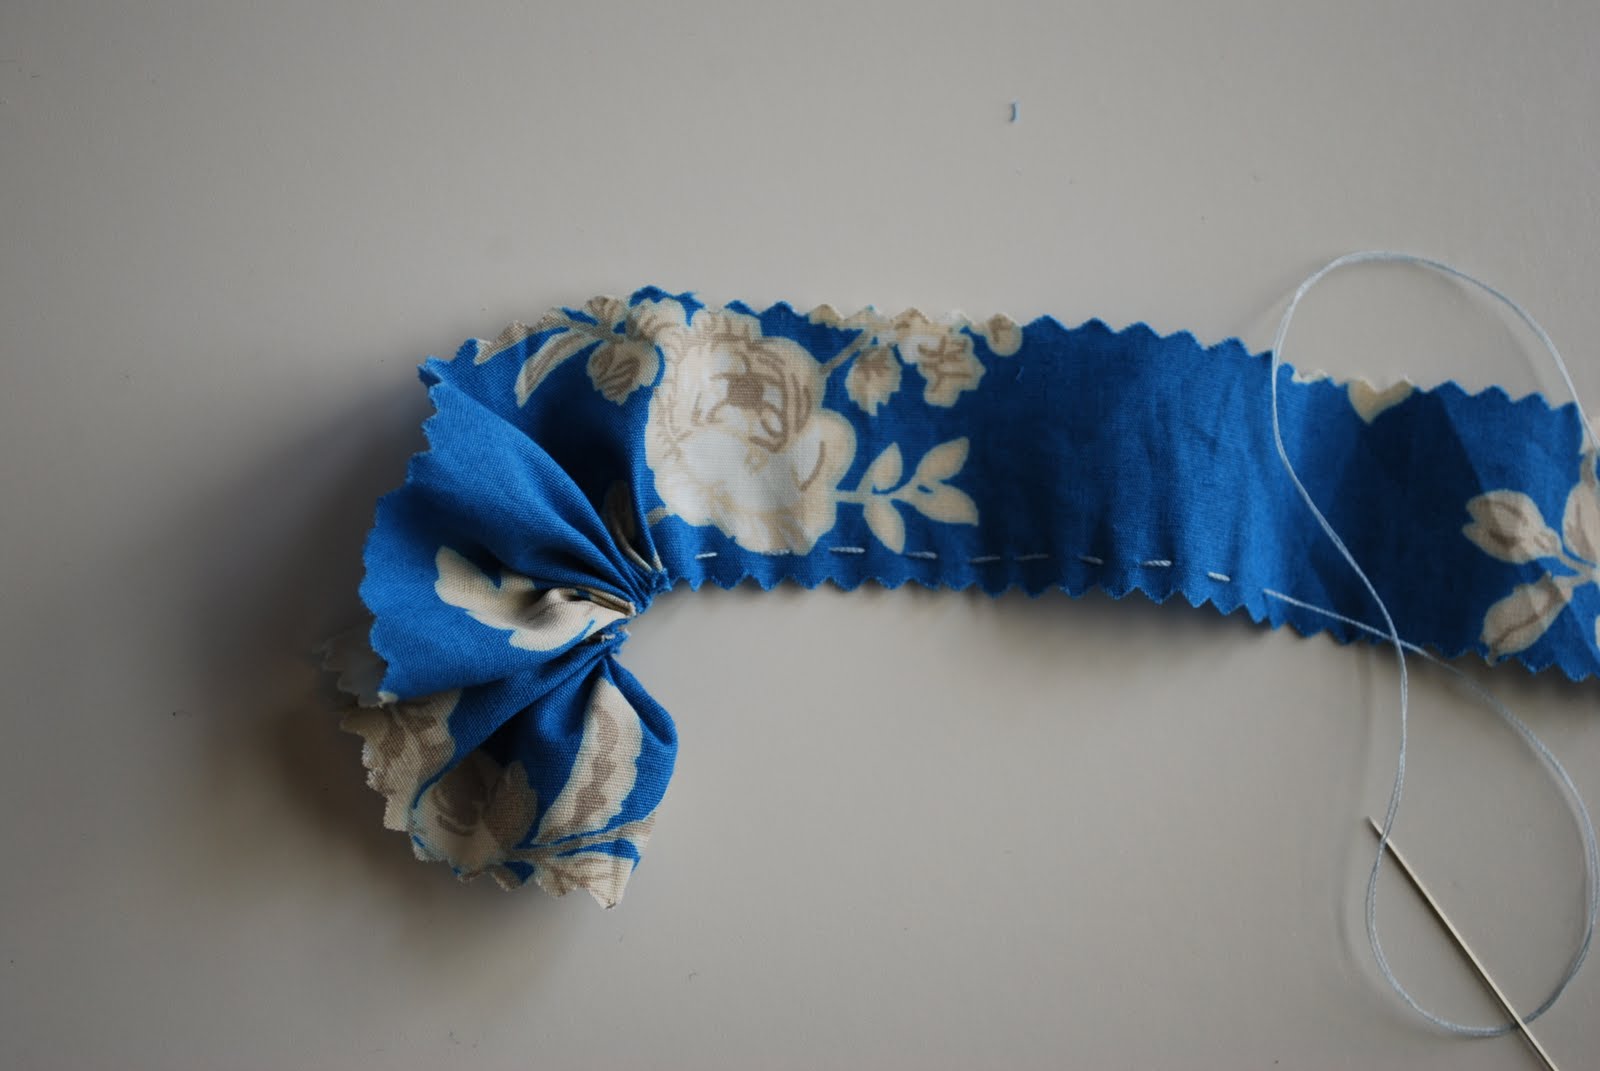
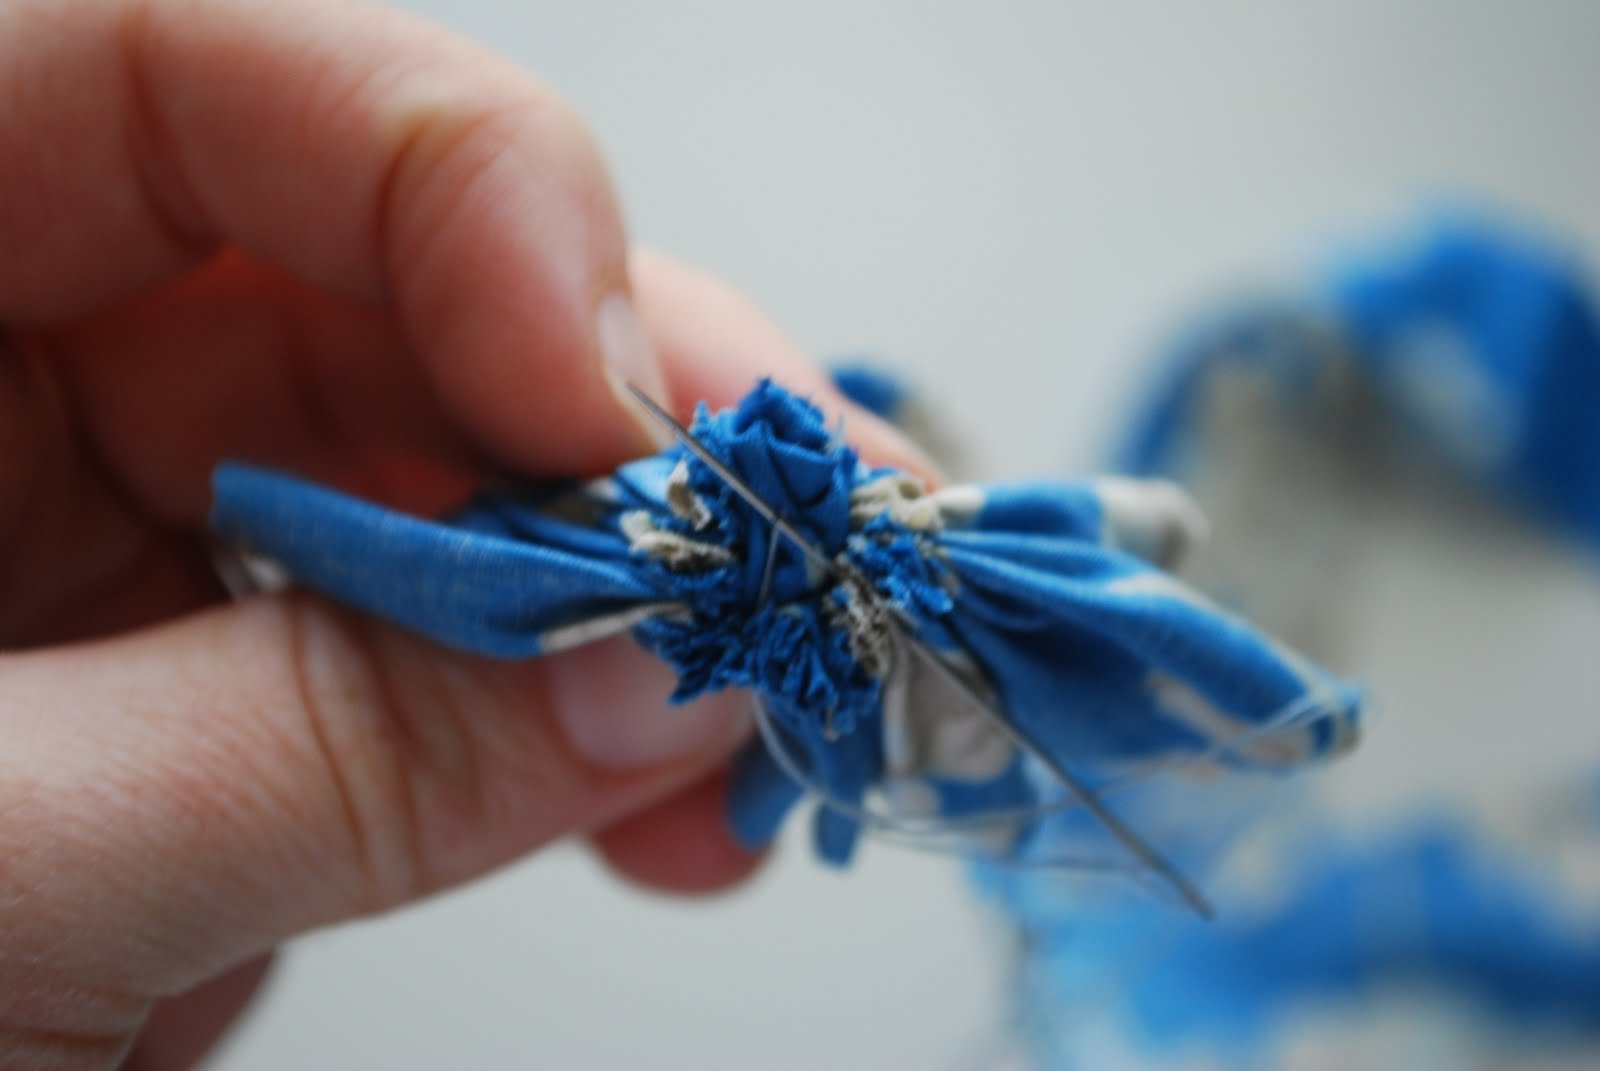 once you have sewn and gathered about 12″ or so, begin to coil the strip into a flower, sewing it in place as you go…
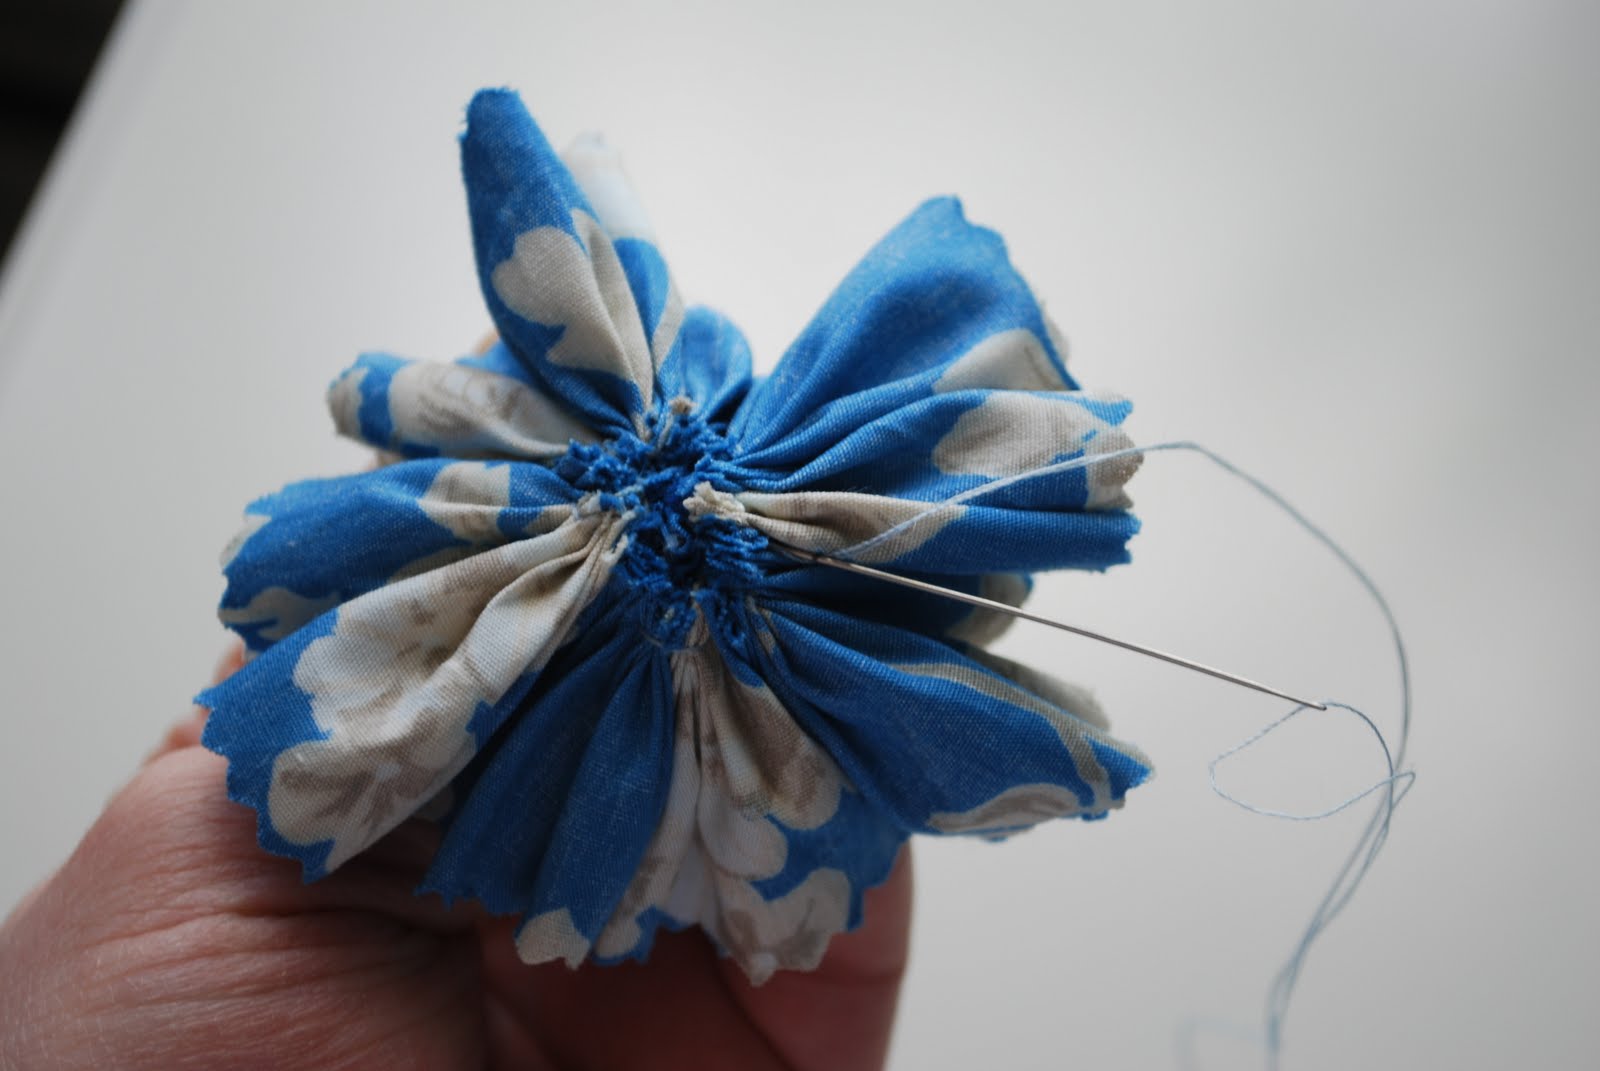 …continuing to gather, coil and stitch until you come to the end of the strip.
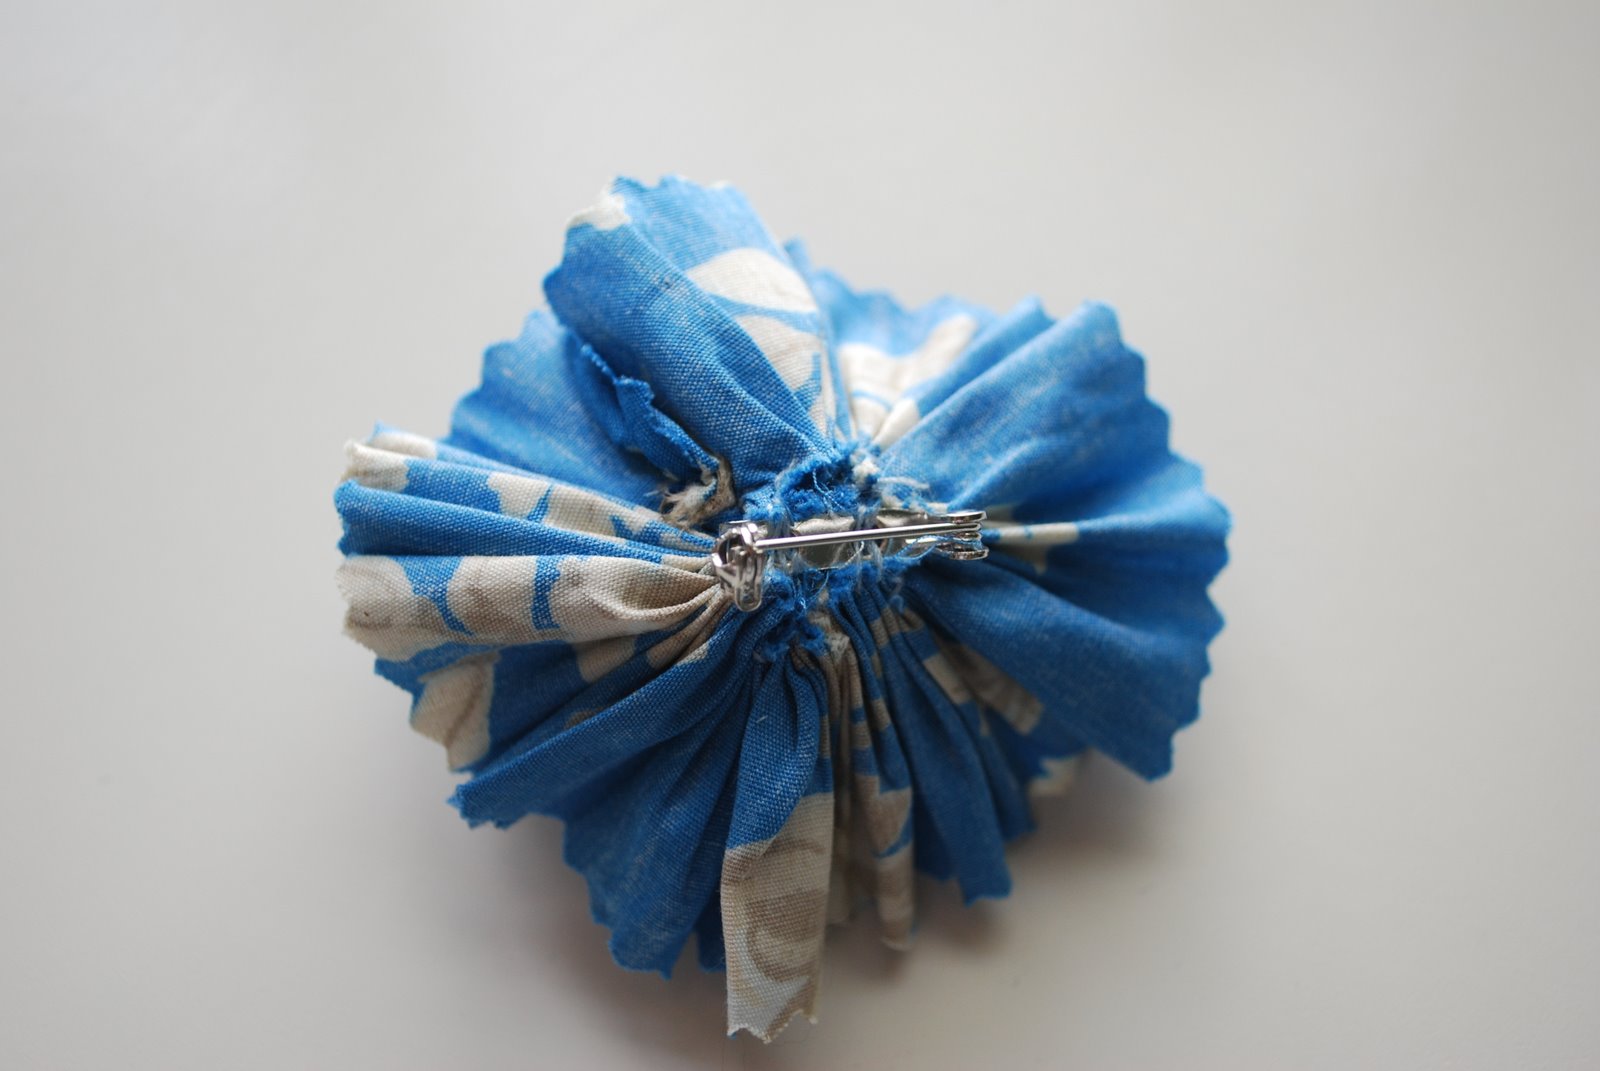
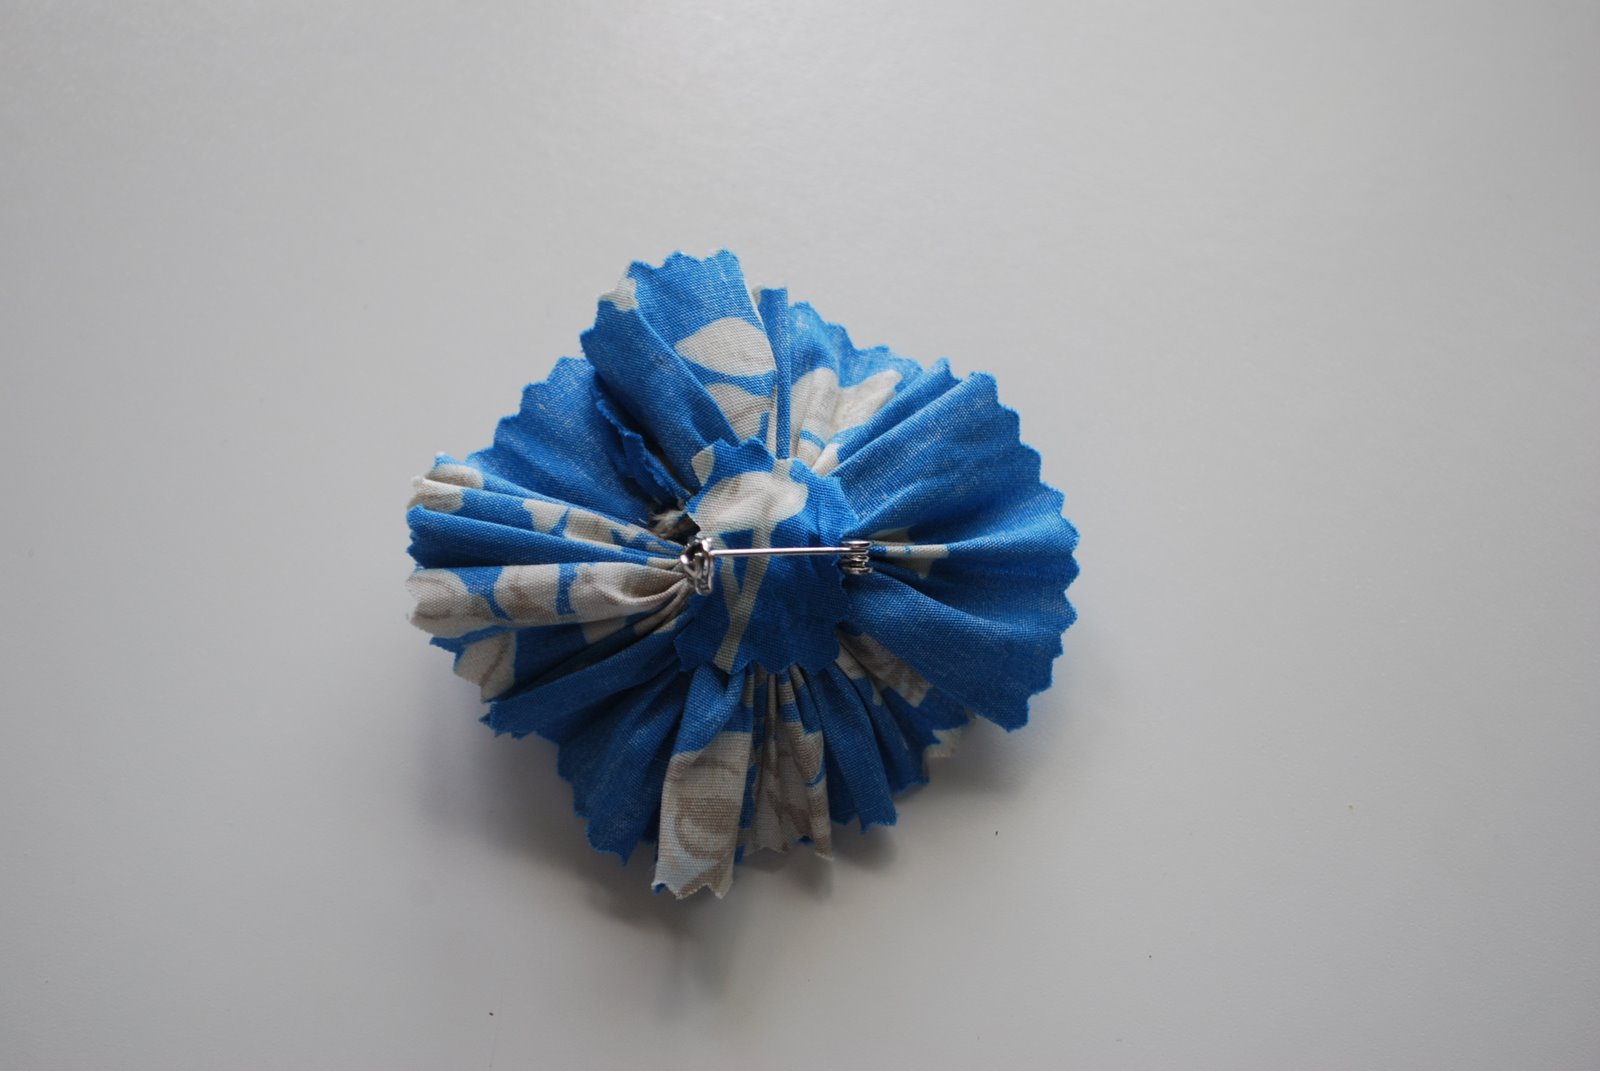
Glue a snippet of fabric over the bar of the pin (this part allows you to hide any messy stitches).


7 thoughts on “flower pin tutorial”
I love it! I have a link party on saturdays that I would love for you to join
http://www.iamonly1woman.blogspot.com
This is adorable. I love fabric flower pins!
I’m hosting a blog party right now and I’d love it if you stopped by and linked up. Hope to see you at Saturday is Crafty Day!
This looks easy and it is so cute!! I’m gonna have to try it out! Thanks!
Thanks for linking up to Saturday is Crafty Day @ along for the ride! Hope to see you back next week!
That looks great! Thanks for linking up to check me out saturday http://www.iamonly1woman.blogspot.com
I love these flowers! They look easy to make. I am going to try one. Thanks
Love it! I’d love for you to link up for Flower Week @ Singing Three Little Birds.
http://singingthreelittlebirds.blogspot.com/2010/05/flower-week-linky-party.html
Comments are closed.