Browsed by
Category: tutorial

Autumn Leaves Light Catcher

Autumn Leaves Light Catcher

I love Autumn (and Winter. And Spring. And Summer – okay, I love them all …). I love the crispness, the colors, the baking, the lack of mosquitoes, and the way the light changes. It is not quite Winter blueness, but not quite Summer intensity – kind of warm, makes you feel cozy, like you are being wrapped in a blanket.

DSC_0071
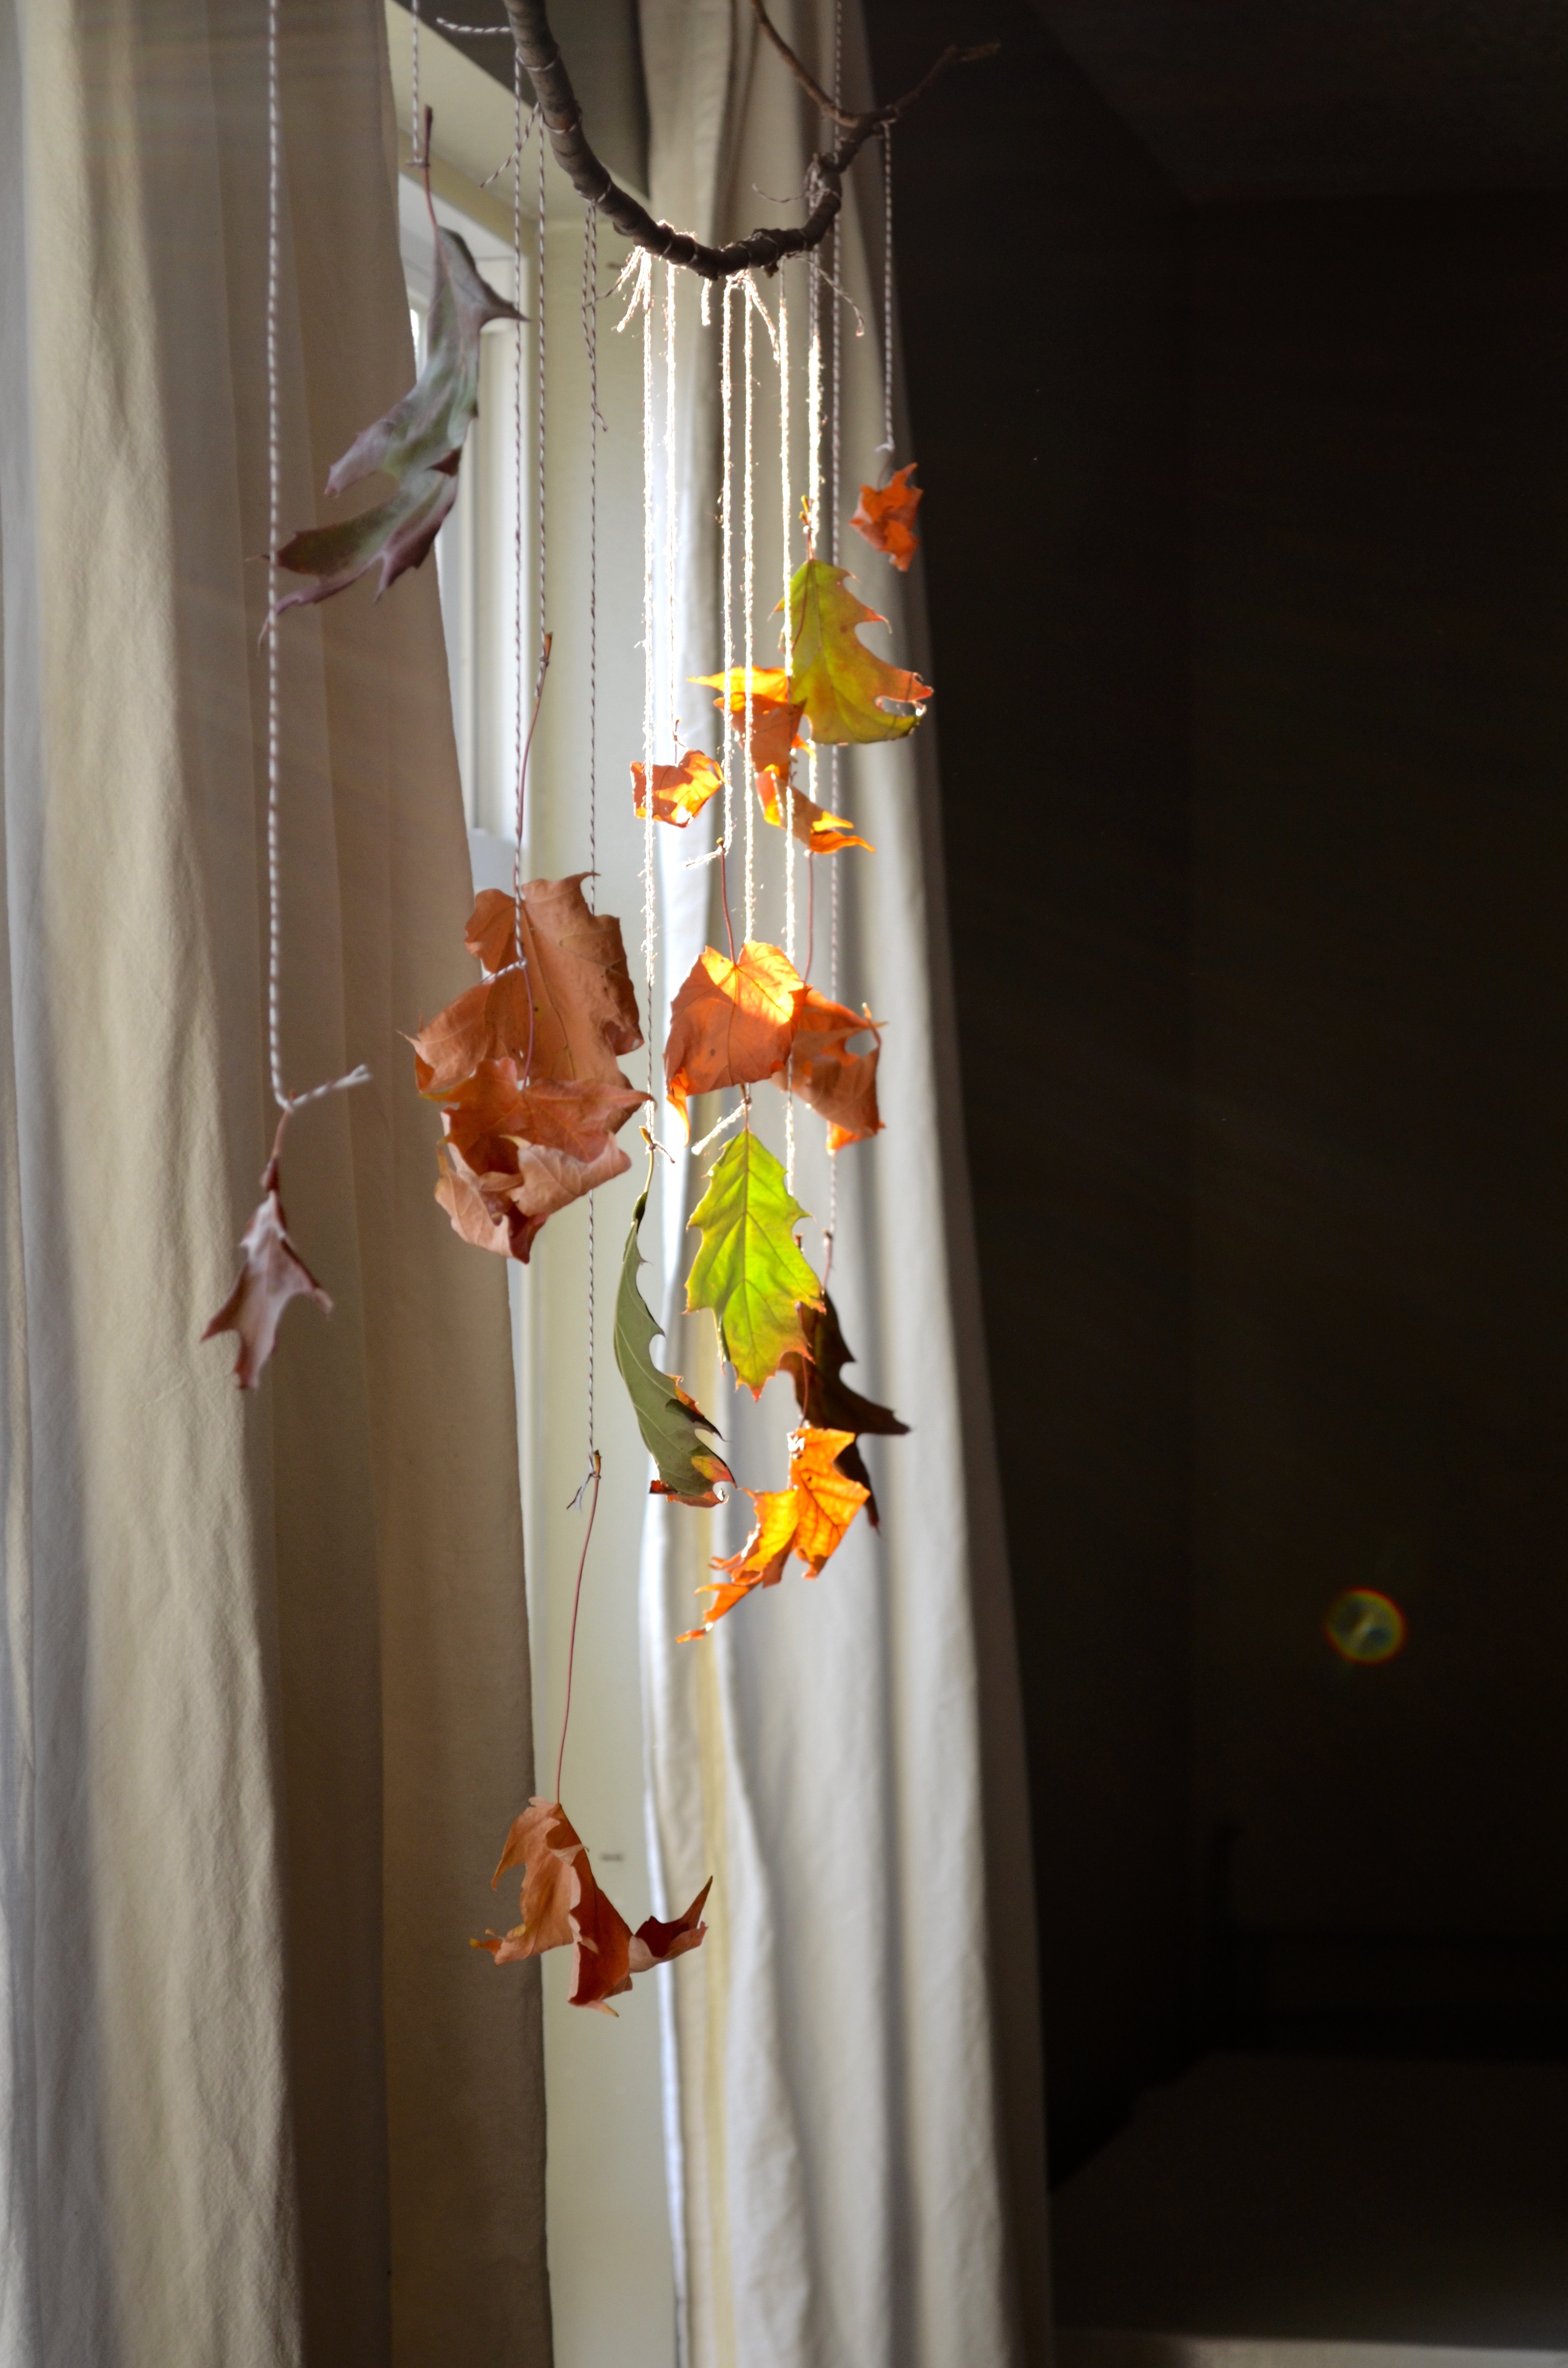
Our trees are changing colors so quickly, and then shedding their leaves promptly – changing and moving toward Winter. I was looking out our back window the other evening, watching the light stream through our maple tree. The color was just so glorious. Knowing that the leaves would be gone in just another day or two, I wanted to capture a little bit of that gloriousness for a while longer, to enjoy the light in the leaves for a few weeks more. So – an Autumn Leaves Light Catcher!DIY Autumn Leaves Light Catcher materials needed:

  • an assortment of lovely fall leaves (collecting these would be a perfect opportunity for a Nature Walk)
  • a branch – this can be straight or curvy, your choice!
  • string (you could also use fishing line/monofilament to achieve a “floating leaves” look)
  • scissors

DIY Autumn Leaves Light Catcher

step 1:

tie the string to the stem of a lovely little leaf.DIY Autumn Leaves Light Catcher

step two: cut the string to the desired length and tie it to your branch.DIY Autumn Leaves Light Catcher

and continue these until you like the way it looks! I like the way staggering the heights of the leaves looked, but there really isn’t any “Wrong” way to do this. Just enjoy the process. :DAutumn Leaves Light Catcher Project

Once you have the leaves suspended the way you like, add one more string to hang the mobile with and find a place where the light will stream through. After that, just remember to take a moment or two every day to enjoy the beauty, let the warmth of color and light feed your spirit.

This could be altered in all sorts of ways – add feathers! Use paint pens to decorate the leaves! Or glitter! Really, the only limit is your imagination. :)

If you’re looking for other Autumn Inspiration, I have some lovely Autumn and Thanksgiving things on Pinterest.


<3

how Tuesday – DIY shelf paper

how Tuesday – DIY shelf paper

Pretty DIY Shelf Liner{how Tuesday is back! Well, sort of :) I meant to post this on Tuesday, but better late than never!}

It’s that time of year – taking down and putting away all the loveliness of Christmas, cleaning, purging of clutter …. what better time than now to get your cupboards prettied up!

Brace yourselves:

DIY Shelf Paper via the Path Less Traveled

Well, let’s just say our pots and pans cupboard has looked worse. But it also has the potential to look so much better! Seeing a splash of pretty pattern and a tidy and organized stack of pans always soothes me just a bit, so one afternoon I decided to give the inside of our cabinets a little make-over.DIY Shelf Paper via the Path Less Traveled

materials needed: patterned paper {I used some giftwrap from World Market}

clear contact paper

ruler/yardstick/straight edge

pen or pencil

scissors

Step one: take everything out of your cabinet and wipe them out. You may need to use a bit of soap if they’re greasy – this is the perfect time to get all the little gross bits you’ve been ignoring since their hiding in the shadows taken care of!

DIY Shelf Paper via the Path Less TraveledStep two: measure the bottom of the cabinet. Once you have the dimensions, roll out your paper {wrong side up} and mark the size you will need.DIY Shelf Paper via the Path Less Traveled Step three: cut it out!DIY Shelf Paper via the Path Less Traveled Step four: unroll the contact paper, and cut off a section about an inch longer on each side than your pretty paper {so, if the base of your cabinet is 14″x20″, your contact paper needs to be 16″x22″}. DIY Shelf Paper via the Path Less Traveled step five: peel the backing off of the contact paper and carefully center the art paper in the middle. Notch the corners like this:DIY Shelf Paper via the Path Less Traveled and fold the edges over the back of the pretty paper, sealing the edges.DIY Shelf Paper via the Path Less Traveled This makes your pretty paper into a semi rigid shelf liner!DIY Shelf Paper via the Path Less Traveled Step six: slip the new shelf liner into your cupboard and …DIY Shelf Paper via the Path Less Traveled have fun arranging and organizing your kitchen ware!
Organizing a cabinet on the Path Less TraveledPretty DIY Shelf LinerOne of the lovely things about this is that if your cabinet gets really gross {not that it would, but you know, if}, you can just take the liner out, carry it over the sink and wipe it of – so much easier than kneeling with your head in the cupboard as you scrub out the sticky spots!


<3


a last-minute Christmas Gift DIY roundup

a last-minute Christmas Gift DIY roundup

Well, hello again! This past {almost} month since I posted last has really flown by! You all have blown me away with your support of our shop {from the bottom of our hearts, thank you, to each and every one of you} and you’ve also been keeping me busier than ever before. :)

If you’re like me, chances are very good that you’re looking for a few quick, cheap *eh hem* inexpensive Christmas gifts that you can whip up before Christmas morning {tell me I’m not the only one!}. Today I’m rounding up a few of my favorite tutorials I’ve posted here over the years –  most of them can be made from materials {or ingredients!} you already have, and all of them are quick, simple, and sure to be loved by your nearest and dearest. :D

These fabric posy pins are quick to whip up, and are a huge hit as stocking stuffers {or could double as package toppers!}!

Or how about some handmade tea-towels {always a lovely gift, and endlessly customizable to suit any personality and home!}

Or perhaps an cute ironing board cover for the newly-weds in your life {or maybe your mom who has had hers for 20+ years}?

Or maybe you need a special something for the foodie in your life? In that case, homemade Lemon Curd is delightful!

For the newest additions to the family circle, these
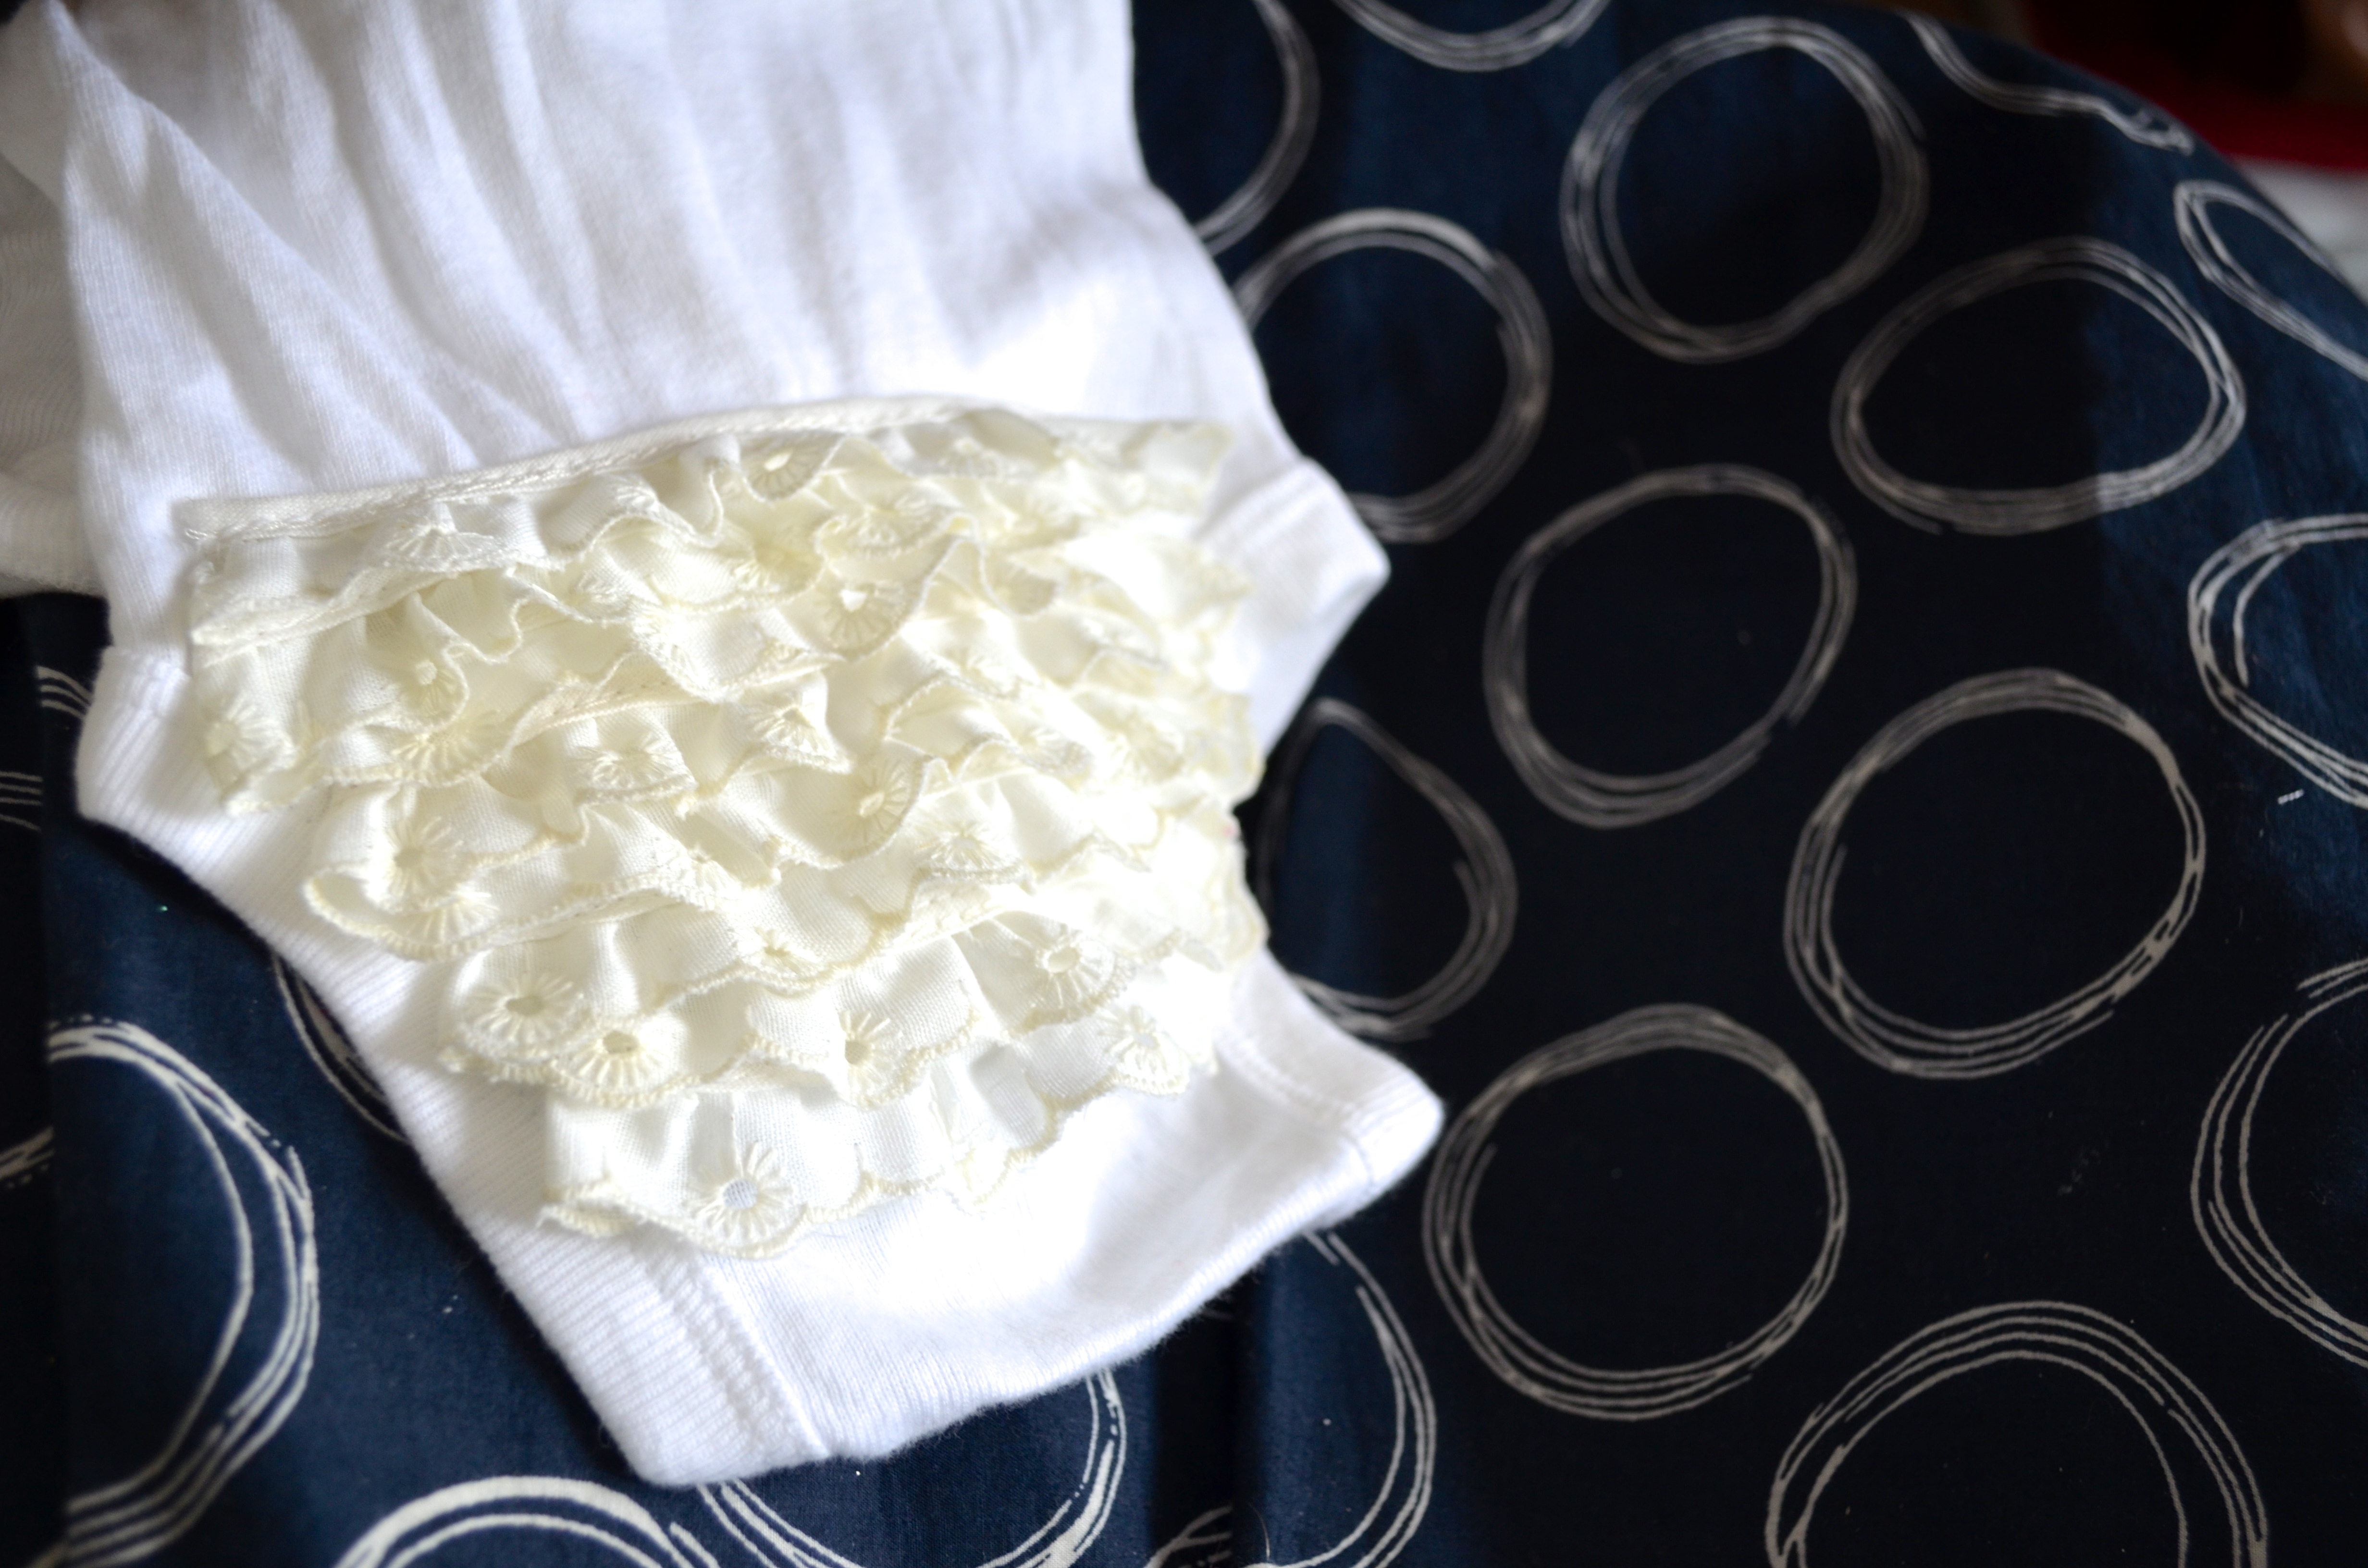
 embellished onesies here

and here are beyond adorable,

and cute-ified burp cloths are always appreciated!

Up-cycled crayons are perfect for your junior artist,

and if you have more than one little girl in your life, little matching skirts are quick, adorable, and might even start a tradition!

As I said, these are just a few of my favorites from the peat few years – have you made any of them? Or do you have a favorite {or two!} of your own to share?

Hugs to you all <3

THE 36TH AVENUE
end of summer {Mint Chocolate Chip Ice Cream recipe}

end of summer {Mint Chocolate Chip Ice Cream recipe}

Oh my, we’re already looking at the end of Summer! In just one week it will be Labor Day here in the US, the day that traditionally signals the end of Summer and the closing of the community swimming pools {and the end of wearing white!} and the begin of Fall. Some of you with kids have already been back in your school routine for a month {the summers seem to keep getting shorter, don’t they?} and some of you won’t start until after Labor Day – but either way, the weather still says “Summer” and every last bit of it should be enjoyed … and what better way than with home made ice cream, of course!!!

My sister’s favorite flavor is Mint Chocolate Chip, and every few years I’ve tried my hand at making a yummy home made version – with varying results. Most recipes I’ve tried call for mint extract to provide the minty lightness, and I’ve found that usually it gave the ice cream an odd, “fake” flavor – not what I have in mind when I’m making ice cream from scratch! So, the other day I was missing my sister, had Mint Chocolate Chip on the brain again, and decided to give it another try. A few weeks ago I made a coconut ice cream recipe from Annie’s Eats {sooooo yummy! and it’s a simple, quick one, too :)} made from coconut milk that had the coconut flavor strengthen by steeping some flaked coconut in the milk. Yum! And so the idea for this version, spun off of hers and tweaked to include chocolate, was born.

16 oz half and half {or 1 cup heavy cream and 1 cup milk}

1/2 cup sugar

a sprig of fresh mint {mine was a gift from CameronHomemade – so kind of her!}

4 {+} oz chocolate

an ice cream maker

Mint Chocolate Chip Ice Cream - with fresh mintCombine the half and half, sugar and mint in a saucepan and heat until the sugar is dissolved, stirring occasionally. Mint Chocolate Chip Ice Cream - with fresh mintRemove from heat and let steep for 10-30 minutes. {the longer you let the mint sit in the cream, the stronger your flavor will be – I let mine sit a bit too long {closer to 30 minutes}, resulting in a stronger mint flavor than I was looking for, but it’s still delicious!}Mint Chocolate Chip Ice Cream - with fresh mint Remove the mint from the cream, straining if needed.DSC_0011 Chill your cream mixture thoroughly, overnight is best. {If you can’t wait, though, you can make an ice bath to speed up the process – place ice and water in a bowl larger than the one your mixture is in, place your cream bowl in the ice water and stir occasionally.}DSC_0012 Chocolate! I used a mix of Trader Joe’s Dark and 72% Dark, and the result was delicious!DSC_0015 DSC_0016 Chop your chocolate – I was looking for chocolate slivers and shards for this version, but any type of chop will work :)DSC_0019DSC_0005 Once your cream mixture is chilled, pour into your ice cream maker and freeze according to manufacturer’s directions, adding the chocolate near the end of the process.an easy Mint Chocolate Chip Ice Cream Recipe - made with fresh mint! And then, enjoy! How do you like yours – cone or bowl? Or straight out of the container? ;) I love how this recipe turned out! I think I’d like to try some chocolate mint next time instead of spearmint to strengthen the chocolate flavor … mmm! an easy Mint Chocolate Chip Ice Cream Recipe - made with fresh mint!

To celebrate the last {traditional} week of Summer, we are unveiling a new feature here on the site – a special selection of Special FindsHere you will find special, one-time finds with limited quantities that we have enjoyed in our home and are excited to share with you. We are looking forward to providing product reviews and also some “how-to’s” through the blog, and hope you enjoy them as much as we do. :) Our most recent find is {wait for it ……………} an ice cream maker! I hope that you enjoy these fun, brightly colored machines as much as we have ours. They are the electric, “ice-less” variety, which means that, if you store yours in your freezer as we do, you can have home made ice cream in under half an hour. Seriously, it’s the best! :)

Do you have plans for this last week of Summer? Will they include ice cream? ;)

Follow on Bloglovin

making mini crowns

making mini crowns

Yesterday I showed you how I made the pretty little crown for Emma Grace’s birthday {and she still keeps it in her dress-up box. After over 6 months of wear, I’m kind of impressed by how sturdy card stock can be!} and then mentioned that I had another darling little DIY tutorial up my sleeve :)

making mini crowns

One of the “crowning” touches to E. G.’s party was the little tiny tiara that I made to grace the number “4” I had made from pink paper to hang over the table. It was so cute, I couldn’t bring myself to throw it away when I took down the rest of the princess things, and now it’s sitting on top of a Winnie the Pooh figurine in the kids’ room. {It’s the little touches that make a room (and a party), you know :)}

After walking by it, day after day for months, it occurred to me that the tiny crown would be perfect for a baby shower, too. Or a first birthday, a Quinceanera, a Sweet Sixteen, gracing the top of your jewelry stand or a birthday package, um, the list goes on and on :) And these little things are so easy to make, too! Ready to see how?

materials for making mini crowns materials: scissors, ruler {optional – you can also just eyeball it}, glittery paper, hole punch, narrow ribbon {I used about 7″, but the length is up to you}making mini crowns starting with a 4″ by  3/4″ {or so} piece of paper, bring the ends together to form a circle.making mini crownsPunch two small holes where the ends overlap, thread the ribbon through these holes and tie a pretty little bow.making mini crowns Next, make the little triangles on the top of the crown with your scissors – because the crown is so small I just freehanded these, but you could measure if you want :)making mini crowns And there you have it! A darling little tiara for …. whatever you’d like!making mini crowns

I think Winnie the Pooh is enjoying wearing it, don’t you?

Tell me, what would you use this tiny darling for?

Follow on Bloglovin


I’m sharing this at the Vintage Farmhouse <3

how-Tuesday: DIY Birthday Crowns

how-Tuesday: DIY Birthday Crowns

Today’s promised how-Tuesday: DIY Birthday Crowns! Do you remember the princess party that Emma Grace requested? Well, I realized that I had never shown you how I made her darling Birthday Crown {and, since I’m kind of on a birthday theme at the moment, now is the perfect time to change that, right?}!

DIY Party CrownDIY Party CrownToo cute, isn’t it?! Now, let’s get started:DIY Prince or Princess Crown materials: mid to heavy weight card stock in size 8 1/2″x11″ or larger {I used white for these so my kiddos could color them, but you can use any color you wish! For E.G.’s birthday I used a gold glittered paper}, ruler, pencil, scissors, hole punch, ribbonDIY Prince or Princess Crown step one: with your paper in the “portrait” position {so that it’s facing the “tall” way}, draw a line down the middle {4 1/4″ from the edge} and then cut along this line. You will now have two 4 1/4″x11″ pieces.DIY Prince or Princess Crown step two: find your middle point on one long edge of the paper {at 5 1/2″} and make a small dot. Then, measuring from this same edge, measure 2″ toward the middle and lay your ruler along this 2″ line. Make a dot on this line at the 2″, 4″, 7″ and 9″ marks.

Now it gets just a bit more fun … you get to play connect the dots! Draw lines connecting the corners on the long edge with the dots you’ve just made, forming a series of …DIY Prince or Princess Crown …triangles along what is now the top edge of your crown.DIY Prince or Princess Crown Step three: cut along this line. It’s beginning to take shape!DIY Prince or Princess Birthday Party Crown step four: punch two holes on each end of the crown, about an inch apart.DIY Prince or Princess Birthday Party Crown step five: cut 2 lengths of ribbon, each about 18″ long and thread a piece through the holes of one end {like in the photo} and it to itself so that one side has a knot and the other …DIY Prince or Princess Birthday Party Crown …looks like this. Repeat for the opposite end. Now, at this point you can either be finished or you can pass it on to a child and allow them to decorate it to their heart’s content :)DIY Prince or Princess Birthday Party Crown DIY Prince or Princess Birthday Party Crown DIY Prince or Princess Birthday Party CrownDIY Prince or Princess Birthday Party CrownsThis cutie modeled her party crown again as she colored her new, custom decorated by her tiara.DIY Prince or Princess Birthday Party CrownsSo intent on her work!DIY Prince or Princess Birthday Party CrownsTada! Wouldn’t it be a sweet party activity to decorate your own crown? Maybe with feathers, glitter and sequins, too? I think a little one {or several} would be just over the moon with these!DIY Prince or Princess Birthday Party CrownsDIY Prince or Princess Birthday Party CrownsDIY Prince or Princess Birthday Party Crowns

Gah, those eyes! So, there’s your promised adorable tutorial for the day :) And I’ve got another one up my sleeve! Maybe for tomorrow? Maybe …

Until then, I’d love to hear if you try this! How would you customize them for your littles? Do you have a favorite party hat tradition?


XOXO

Follow on Bloglovin


I’m sharing this at the Vintage Farmhouse <3

how-Tuesday: ruffle bottom onesies {is there anything sweeter than a tiny ruffled bum?!}

how-Tuesday: ruffle bottom onesies {is there anything sweeter than a tiny ruffled bum?!}

I have a new niece! The sweet little dumpling was born last week, and in anticipation I had been doing just a bit of sewing {of course} :) Sewing for my own babes is a joy, and making sweet little things for nephews and nieces is just as much fun!}.

She’s the first little girl in her family, and is destined to be outfitted with her fair share of pink and lace … so it was only fitting that I make her a ruffle bottomed onesie!

Would you like to make your own version? If so, follow along with me as I show how I made this one {note: I’m not a professional seamstress, and this is the “wing it as you go method” :)}

DIY ruffle bottom onesie tutorial from the Path Less Traveled

materials: 1 onesie, ruffled lace trim {mine was about 1 yard long, but you could use more or less for different looks}, sewing pins, thread {that matches your trim}, scissors and a sewing machine

DIY ruffle bottom onesie tutorial from the Path Less Traveled step 1: unsnap the bottom of the suit and pin the lace to the base of where you like the ruffling to start in the rear – I chose to begin pinning where the leg curve stopped. As you pin, turn the raw, beginning edge of the lace under so that there are no straggling threads. :) Don’t cut the trim yet!DIY ruffle bottom onesie tutorial from the Path Less Traveled step 2: begin sewing! starting at the end of the lace, sew almost to the other side of the onesie, stopping about an inch from the edge. Backstitch and raise your needle and presser foot.DIY ruffle bottom onesie tutorial from the Path Less Traveled step 3: fold the trim back the other way, layering it over the first line. Stagger the second row of trim a bit – this begins your “ruffle but”! Pin in place, and sew as the first line.DIY ruffle bottom onesie tutorial from the Path Less Traveled Continue in this manner, zigzagging the trim back and forth until you’ve achieved the fullness and look you have in mind …DIY ruffle bottom onesie tutorial from the Path Less Traveled…and when you come to the end of your last layer …
DIY ruffle bottom onesie tutorial from the Path Less Traveled …turn under the raw end as in the beginning …DIY ruffle bottom onesie tutorial from the Path Less Traveledand sew to secure it, backstitching to lock it in place.DIY ruffle bottom onesie tutorial from the Path Less Traveled This is what it will look like from the inside – zigzags of stitching!

DIY ruffle bottom onesie tutorial from the Path Less TraveledOnce you’ve finished, be sure to clip any stray threads. Then enjoy the cuteness! 

Now that I’ve made these for baby Brooke, I think I need to make one or two for Olivia :) Because it sure would be a shame to miss out on seeing a darling pile of ruffles squirming across the floor as she learns to crawl!

<3

Follow on Bloglovin

I’m sharing this at the Vintage Farmhouse, the Train To Crazy and She Sews <3

how Tuesday: DIY Balloon Garland Tutorial!

how Tuesday: DIY Balloon Garland Tutorial!

as promised, today for how Tuesday I have a tutorial for the DIY Balloon Garland!

how Tuesday: DIY Balloon Garland Tutorial from the Path Less TraveledIt makes a big impact for an incredibly small investment, and can be customized in an almost endless array of colors! Want a rainbow? No problem. Monochromatic more your style? Again, no problem. Seriously, you can use this for any of life’s celebrations from baby showers, birthdays, graduations (school colors!}, bridal showers, casual receptions, housewarmings … even retirement parties!

how Tuesday: DIY Balloon Garland Tutorial from the Path Less Traveled materials: balloons in your preferred color{s}, a needle with a large eye {hole for the twine}, twine {or narrow ribbon}, scissors, and thumbtacks {if you’re planning on hanging it outside, you might prefer to tie the garland up and not need the tacks}how Tuesday: DIY Balloon Garland Tutorial from the Path Less Traveled step 1: measure the length you’d like your garland to be and choose your pattern – I decided to use red, white and two shades of blue for Ian’s party – {You might like a monochrome look, a random look, or some other variation!} and inflate your balloons. Having an assistant for this step can be very helpful!how Tuesday: DIY Balloon Garland Tutorial from the Path Less Traveled step 2: thread your needle with the twine – I chose to use twine for this due to it’s strength {thread just wasn’t going to be strong enough!}, but you could also choose to use a narrow ribbon or some other narrow type of cording.how Tuesday: DIY Balloon Garland Tutorial from the Path Less Traveled step 3: begin sewing the garland – poke the needle through the “tag” of the balloon, not too close to the end or it might rip out, just somewhere in the middle …how Tuesday: DIY Balloon Garland Tutorial from the Path Less Traveled…pull the needle and cording through, and continue with the rest of your balloons.

how Tuesday: DIY Balloon Garland Tutorial from the Path Less Traveledstep 4: tie a loop in the end of your cord to prepare for hanging. If you’re hanging the balloon garland outside, you might choose to skip the loop and leave a long tail {to use for tying} instead.how Tuesday: DIY Balloon Garland Tutorial from the Path Less Traveled step 5: put a tack through afore mentioned loop and stick ‘er up there!how Tuesday: DIY Balloon Garland Tutorial from the Path Less Traveled

how Tuesday: DIY Balloon Garland Tutorial from the Path Less Traveled step 6: string out the garland across your desired distance and repeat step 5 …

how Tuesday: DIY Balloon Garland Tutorial from the Path Less Traveled…while taking a moment to admire how pretty it looks hanging across your room. :)

how Tuesday: DIY Balloon Garland Tutorial from the Path Less Traveled how Tuesday: DIY Balloon Garland Tutorial from the Path Less Traveled

And that’s it! You can make several strands and hang them together, leave it to stand alone or, as you can see from the first photo, combine it with crepe streamers! Each option looks great – with a project like this, it’s hard to go wrong :)

If you haven’t taken a moment to enter the giveaway, you might want to click over and do that – it’s super easy to enter, and you might win a set of the newest red, white and blue star garland and matching cupcake toppers!

<3


sharing this on Skip To My Lou Sew Can Do and C.R.A.F.T.

Follow on Bloglovin

how Tuesday – growing your own green onions

how Tuesday – growing your own green onions

for today’s how Tuesday – we have a tutorial on growing your own green onions! Yay, right?!

I’m not sure about you, but I usually only use part of the bunch that I bring home from the store, and the rest gets slimy in the fridge while it waits to be used – and then I feel bad that I let it go to waste {ah, such a vicious cycle!}.

Inspired by this pin on Pinterest last year, I gave growing my own a shot – and it worked! I harvested the amount I needed {fresh! soooo yummy} all summer, and then towards the end of the summer planted them in our garden. To my surprise, they overwintered on their own, and have come back this summer as lovely as ever.

So, want to give it a try yourself? :) If you can cut a veggie and put water in a glass, you can do this! {it’s almost beyond easy}

how to re-grow green onions

All you need to succeed are a bunch of green onions {actually, you only need the bulbs (the white ends)}, an upright container, and water

how to re-grow green onionsstep one: wash your green onions

how to re-grow green onionsStep two: chop up the green section, cutting off the “leaves” all the way down to the crotch of the onions

how to re-grow green onionsStep three: place the onion bulbs in a glass {other other upright container – a small vase would also be lovely} and add just enough water to cover the roots

how to re-grow green onionsStep four: wait. But you won’t need to wait too long – the growth in this photo is only 5 days old! I recommend rinsing the roots every few days, and make sure that there’s always just a bit of water in the glass.how to re-grow green onions the roots will eventually start to wind around the base of your glass – lovely!

And that’s it! I’d love to know if you try and how you like it – and have any of you ever tried to grow {or re-grow} other things this way?

<3


p.s. I’m sharing this here: Skip To My Lou and on C.R.A.F.T.

How-Tuesday: chalkboard storage jars {from the archives}

How-Tuesday: chalkboard storage jars {from the archives}

{a re-post from my archives :) originally posted on May 4th, 2010. I’m still loving this project, and still using the jars in my pantry!}


Have you seen all the chalkboard stuff floating around the blog community recently? There have been painted walls, framed chalkboards, mirrors, cupboards, flower and herb pots and the lists goes on and on!

Anyway, I finally got on the bandwagon. Yes, I did, and I can’t believe that it took me this long!
I think I found this chalkboard jar idea on a Martha Stewart email or somewhere, but I could be wrong. I could have thought this up in my dreams ……… not sure about that. But here’s a tutorial about how I did it!

I started with basic clean glass jars left over from applesauce and salsa.

I masked off 3″ squares with regular old masking tape (and squares of note paper to keep the tape straight).

Then I went over the glass with chalkboard paint and a foam brush. I gave the jars 3 coats, letting them dry between each coat.

On the first jar I just took the tape off, but as I did it I found that it looked a LOT better if I scored along the tape with a knife before I took it off. Much much better. Next I went over them with some chalk and rubbed it off the prep (or “season”) them, and they were done!

Fill them with whatever, write the contents on the jar with some chalk, and then ….. ta da! You’ve just made your very own chalkboard storage jars!
Of course, that very last step is to stand back and admire – don’t they look lovely?
<3