Browsed by
Tag: party

the Cars party!

the Cars party!

Part one of the Cars party, here we come! Do you remember the sneak peak of Ian’s party that I shared? Here’s the {beginning of} the rest of it :)

If you remember, here’s the Pinterest board that I used to brainstorm party ideas for the Cars/fire engine/mechanic/Americana birthday that Ian asked for. There were sooo many amazing ideas that would have been fun to make happen, and John and I managed to pull off a few … and Ian was more than thrilled with the result!

the Cars party on the Path Less Traveled
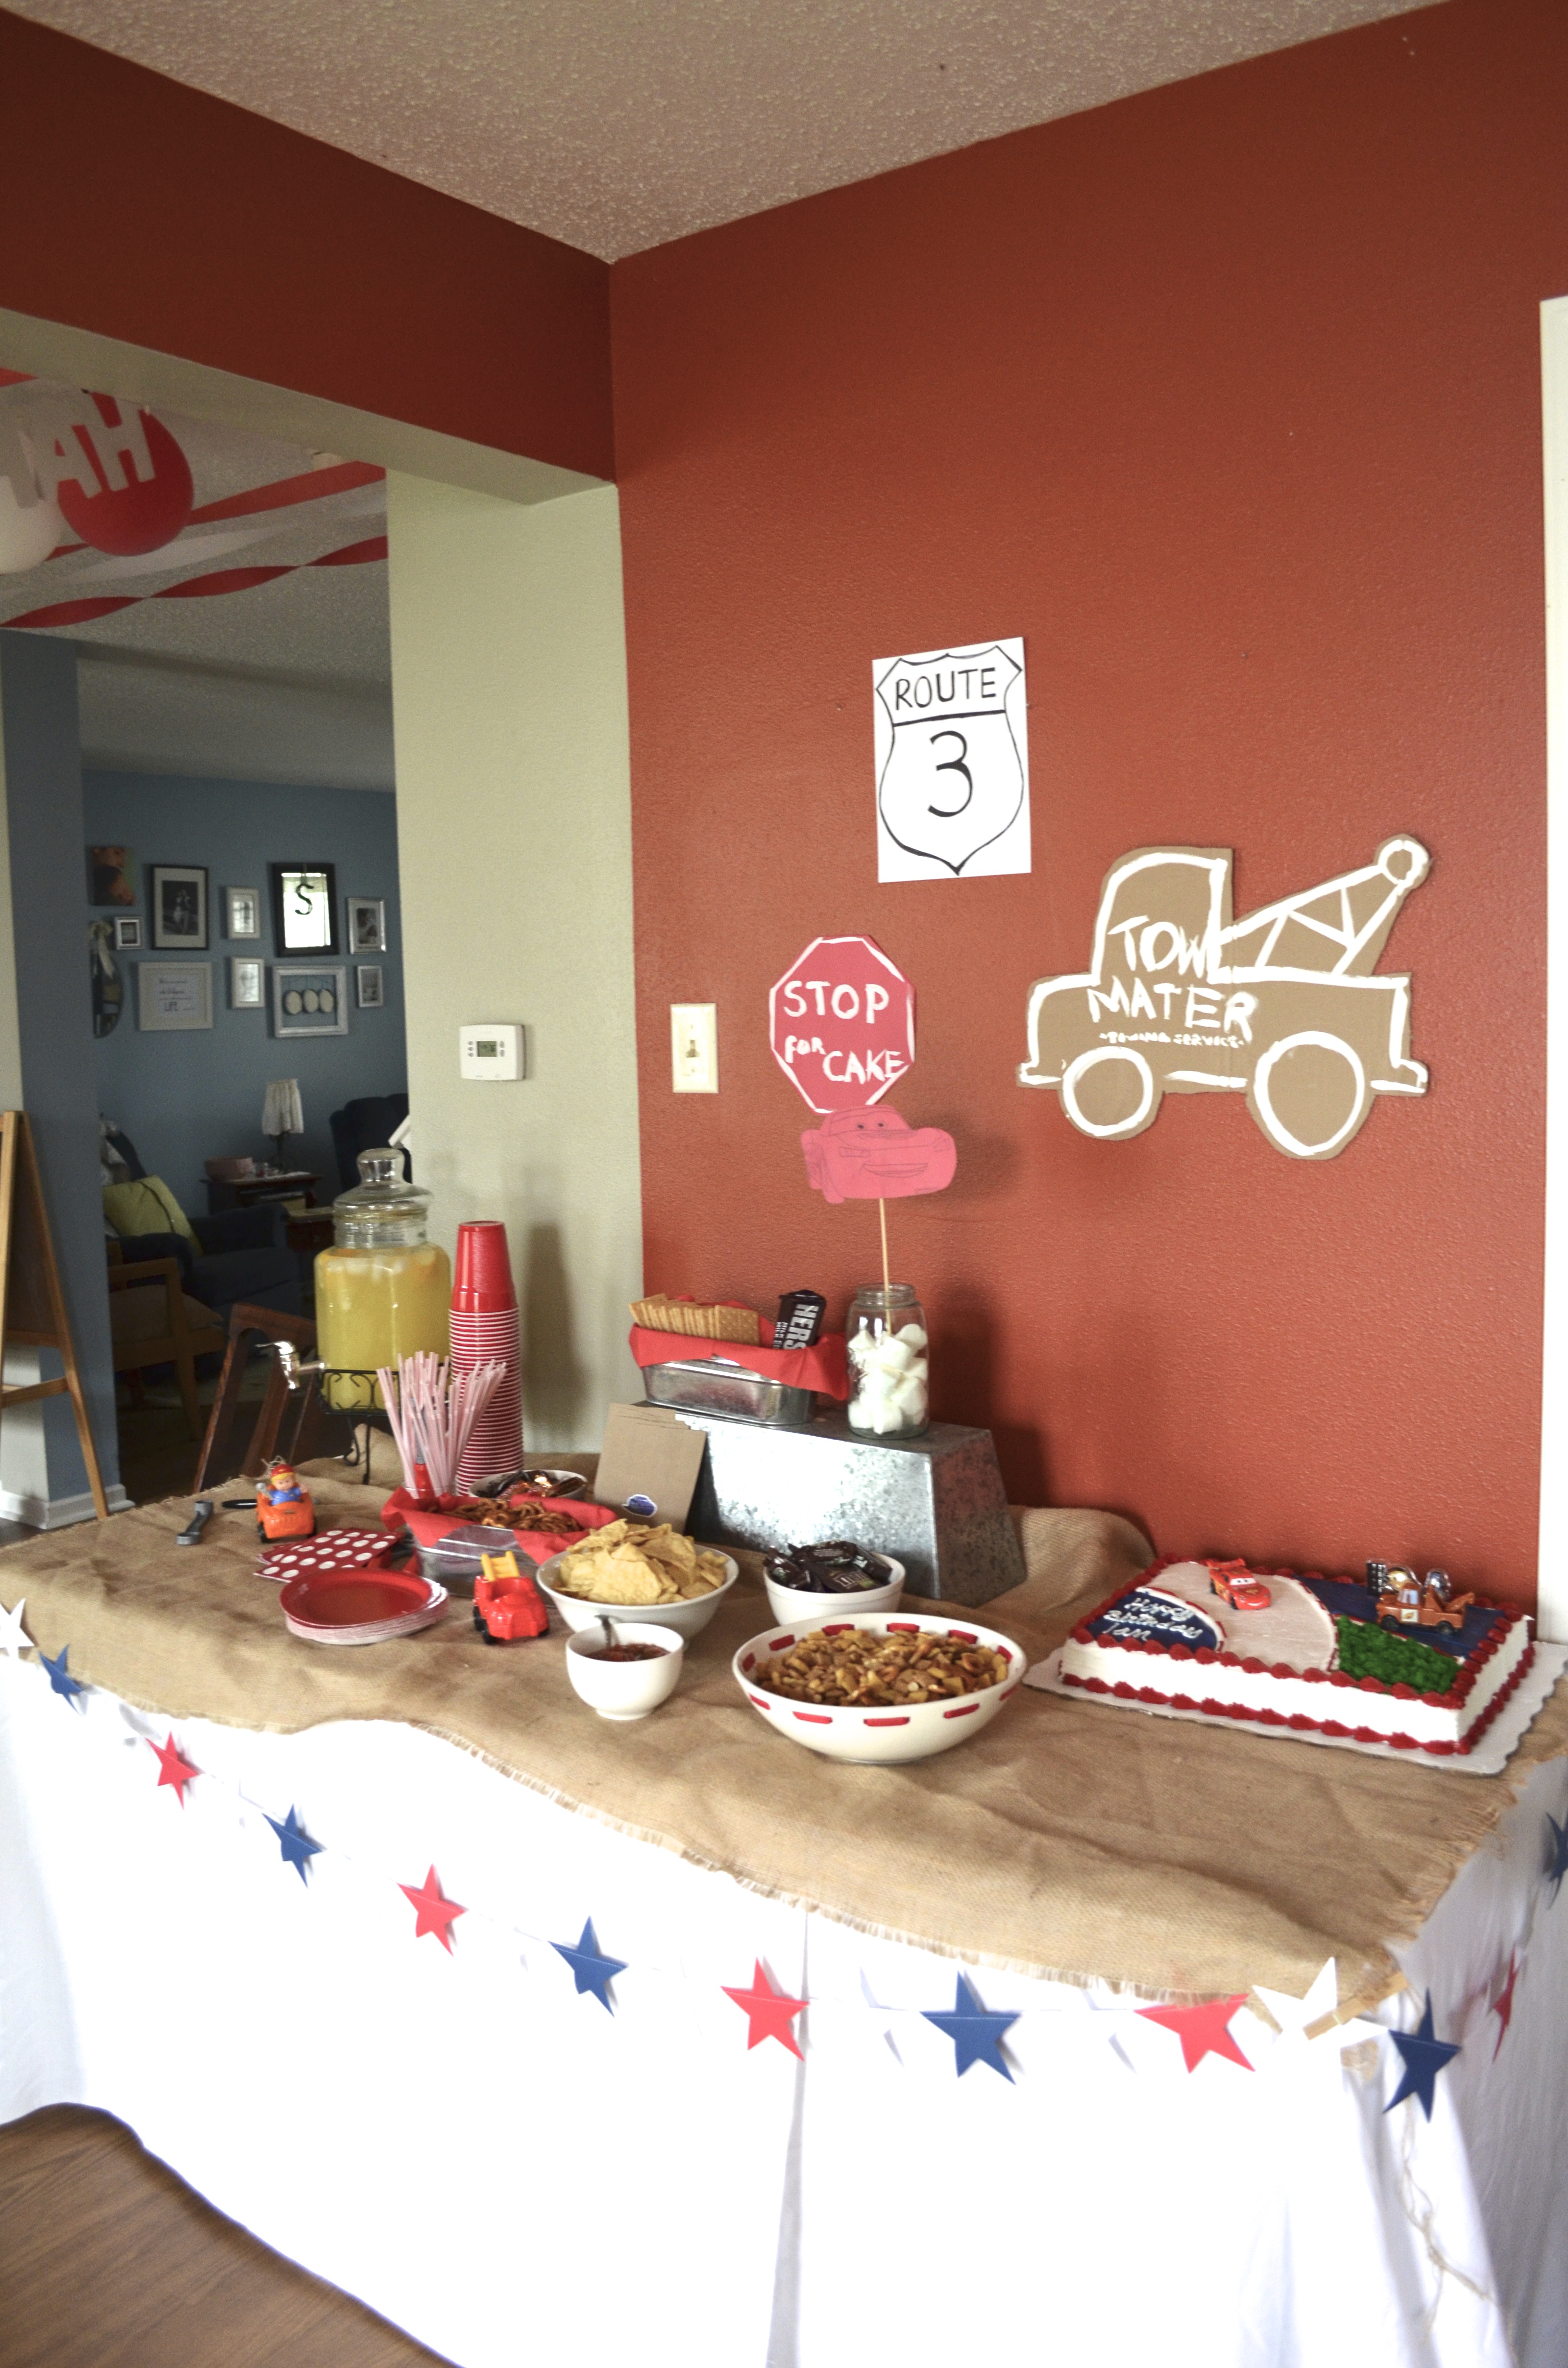
a pre-party shot of the snack/dessert table that was one of the focal points of our indoor decor {note the absence of the drinks and other cold items :)}
the Cars party on the Path Less Traveled
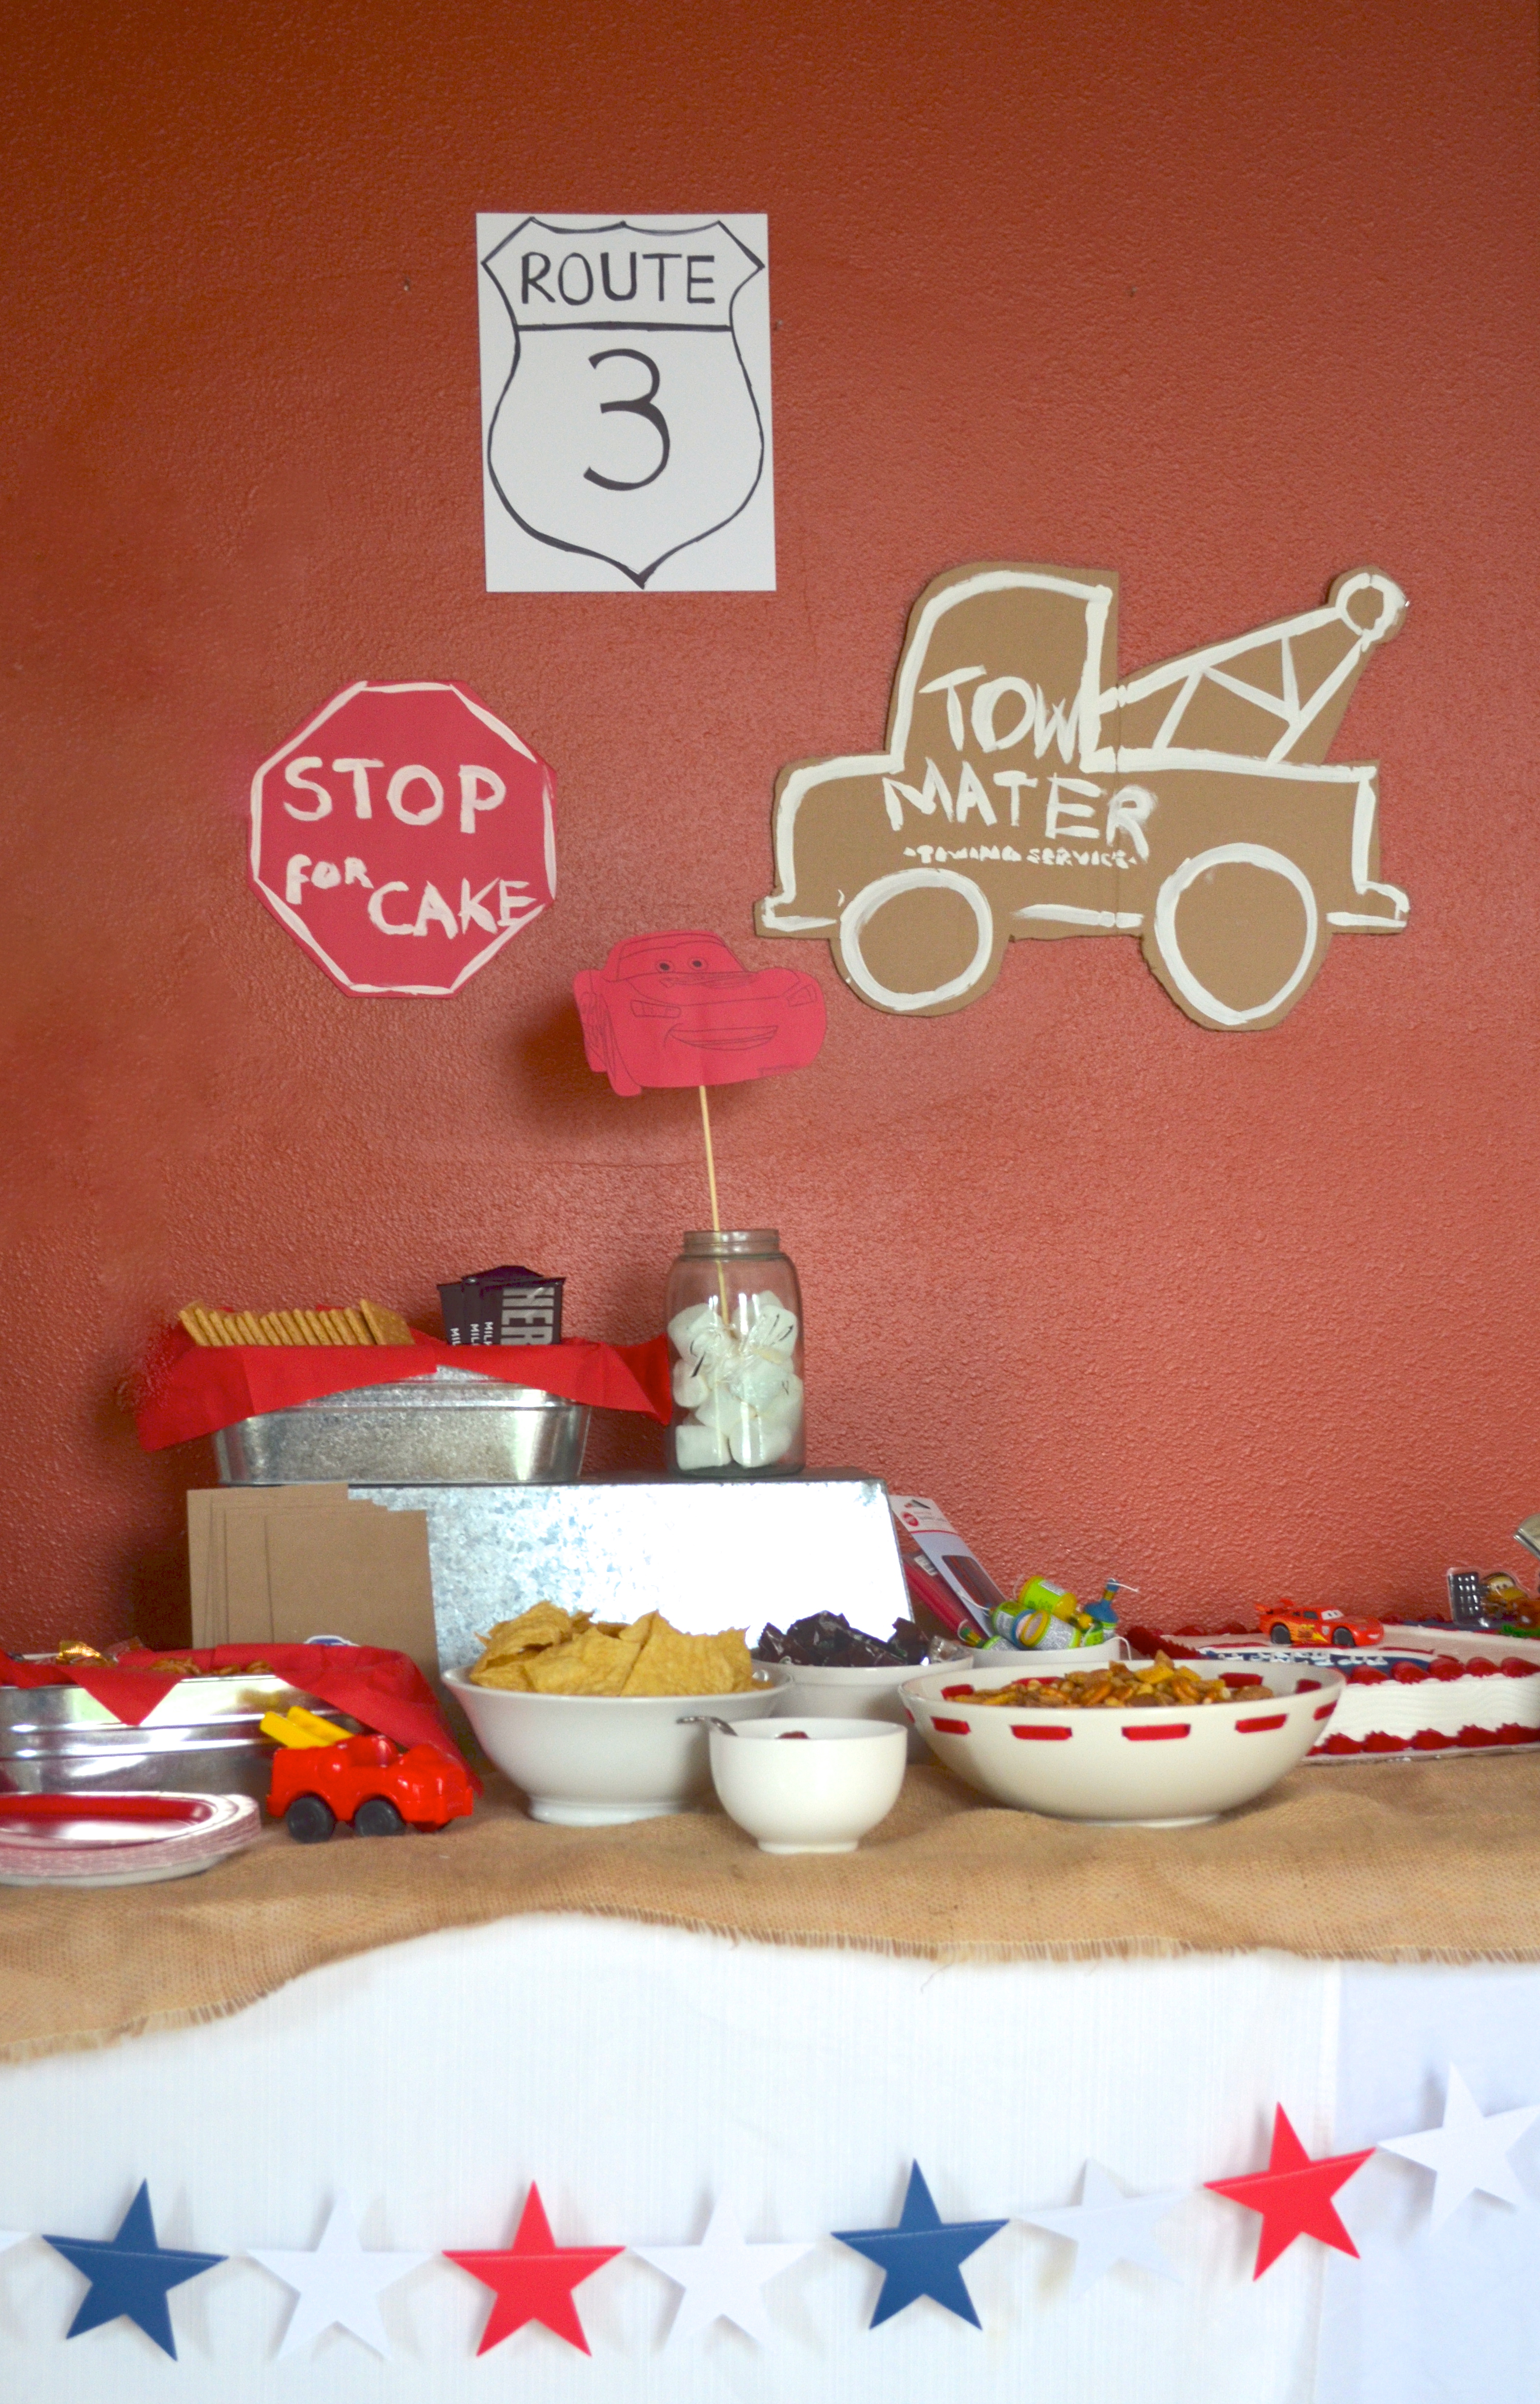
I used a piece of burlap from my fabric stash {stashes of goodies like this come in super handy when pulling together parties on a budget!} to cover the table and rounded up all the galvanized bins that I could find to hold snacks and add some height to the spread.the Cars party on the Path Less TraveledThe wall signs were inspired by this Radiator Springs party and this “Route 3” party – all done free hand by moi while the birthday boy was taking his pre-party nap :)the Cars party on the Path Less Traveled
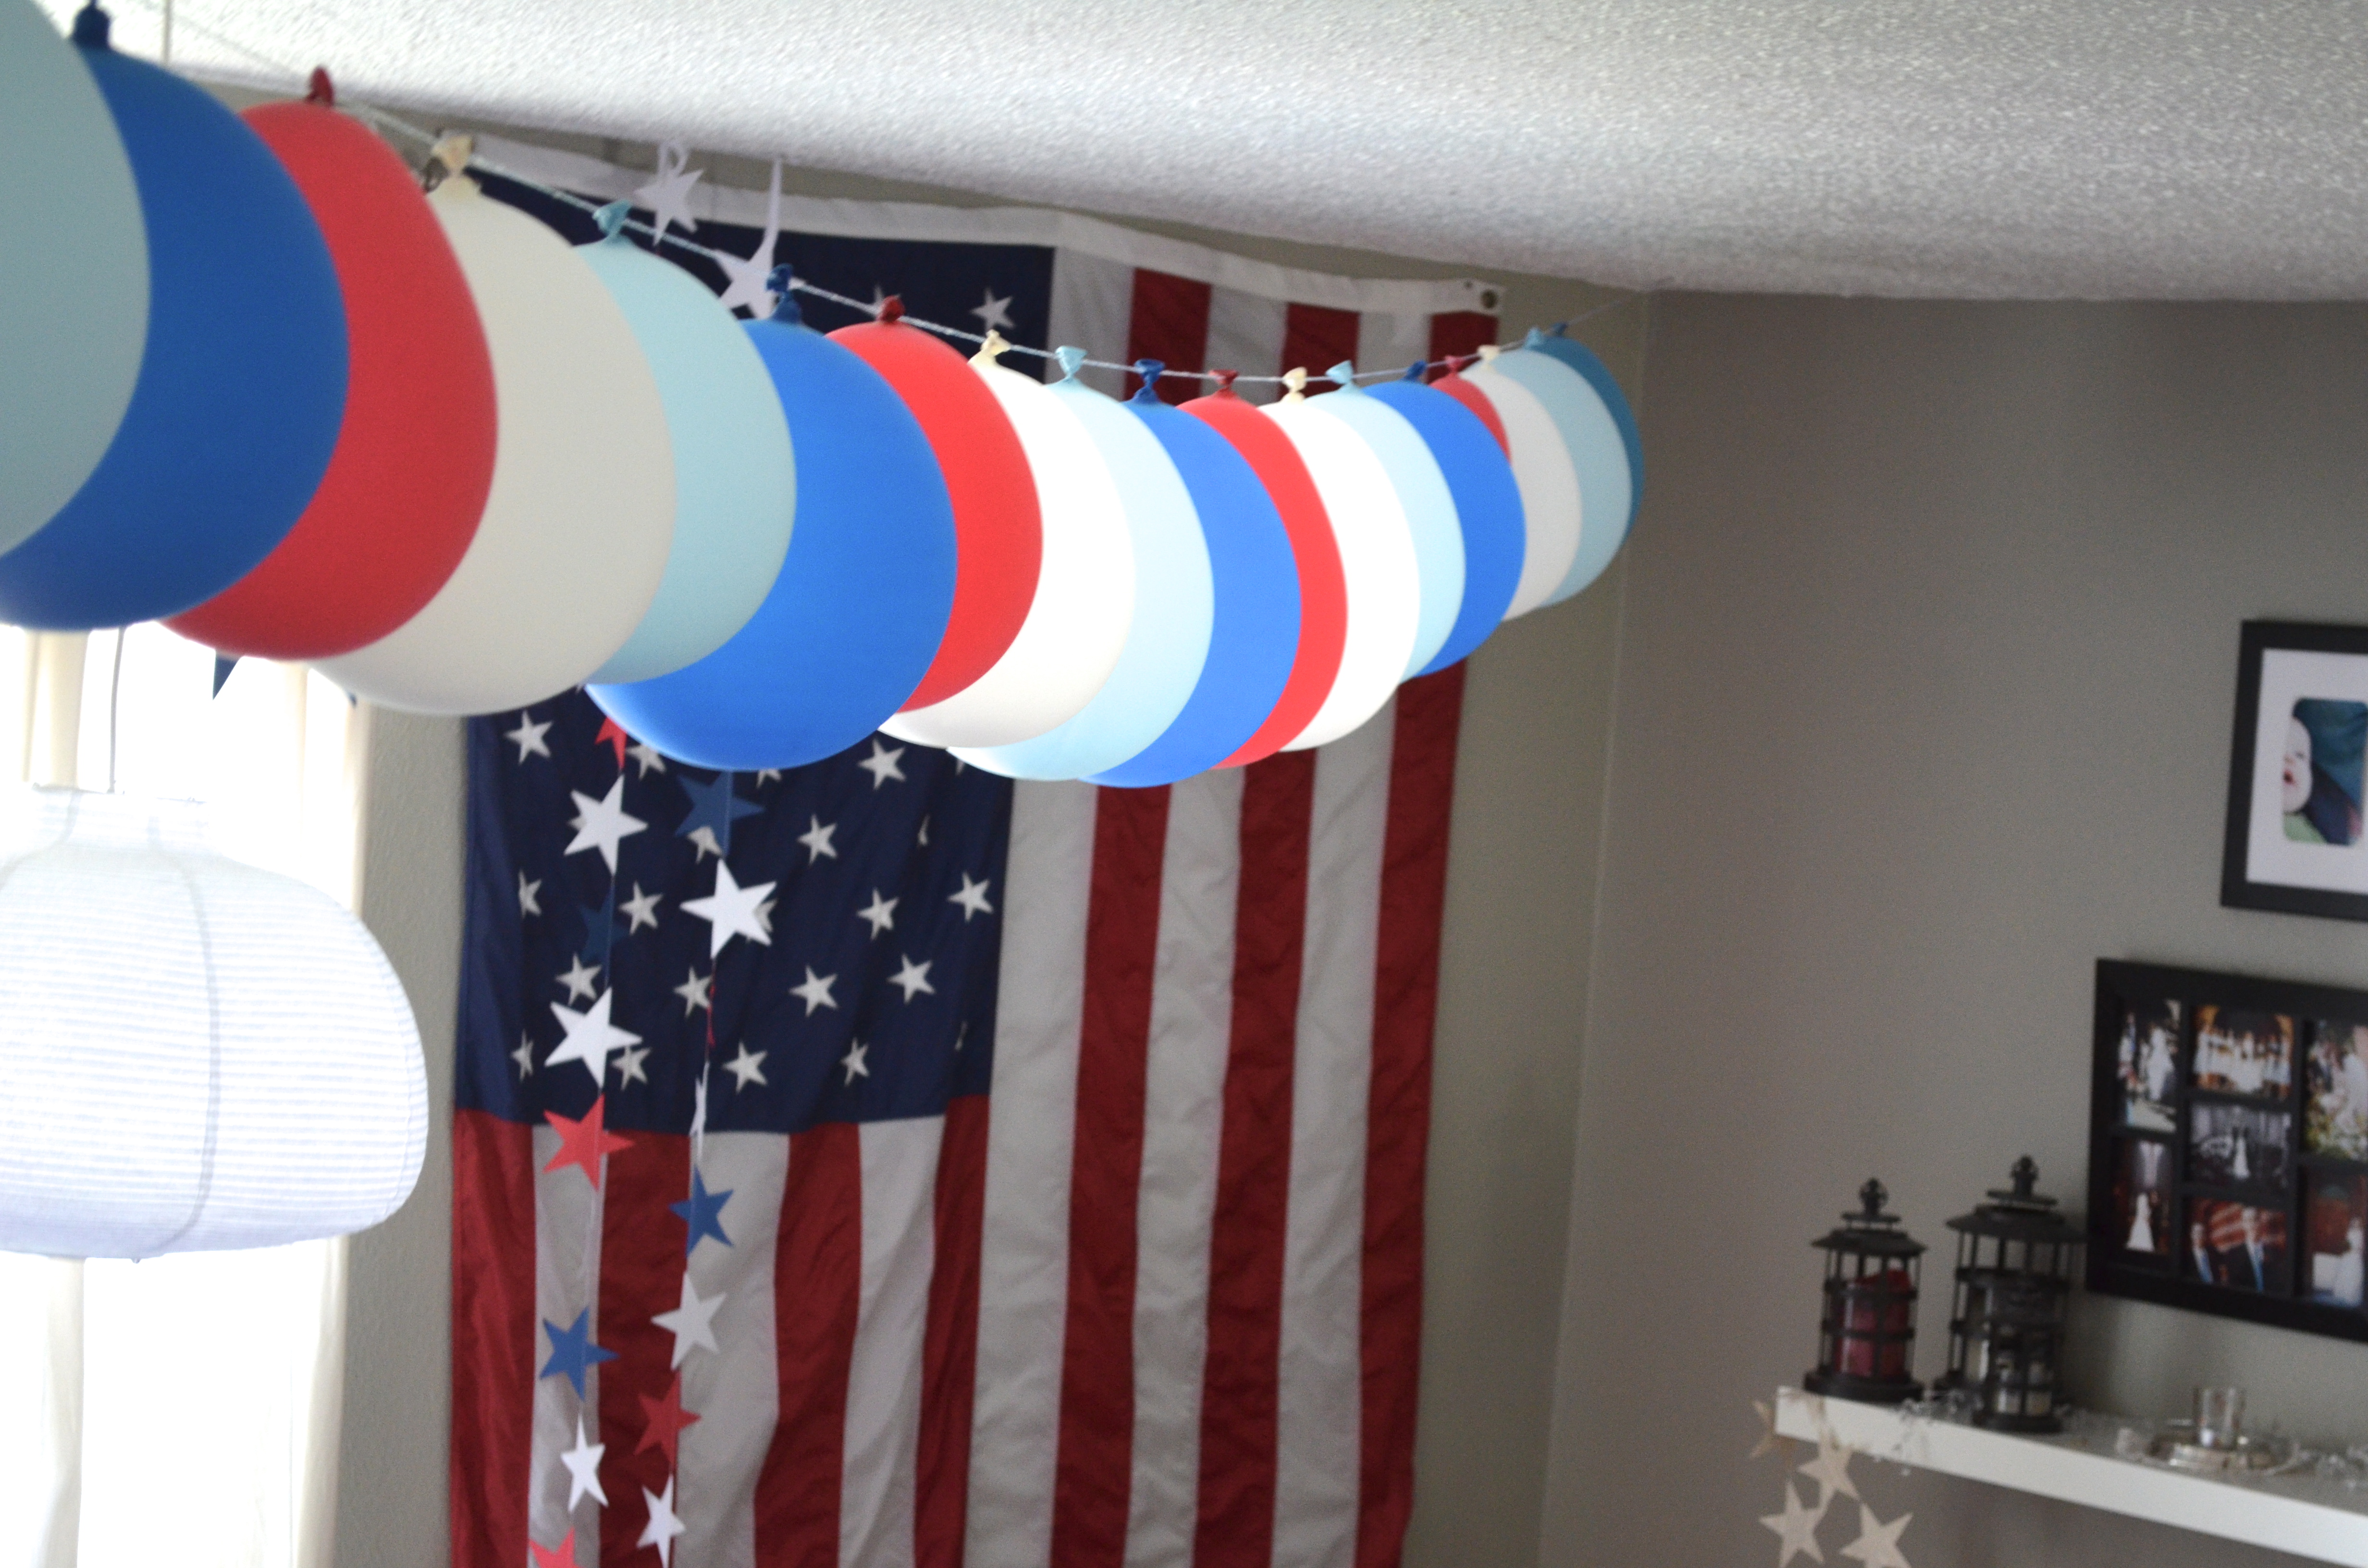
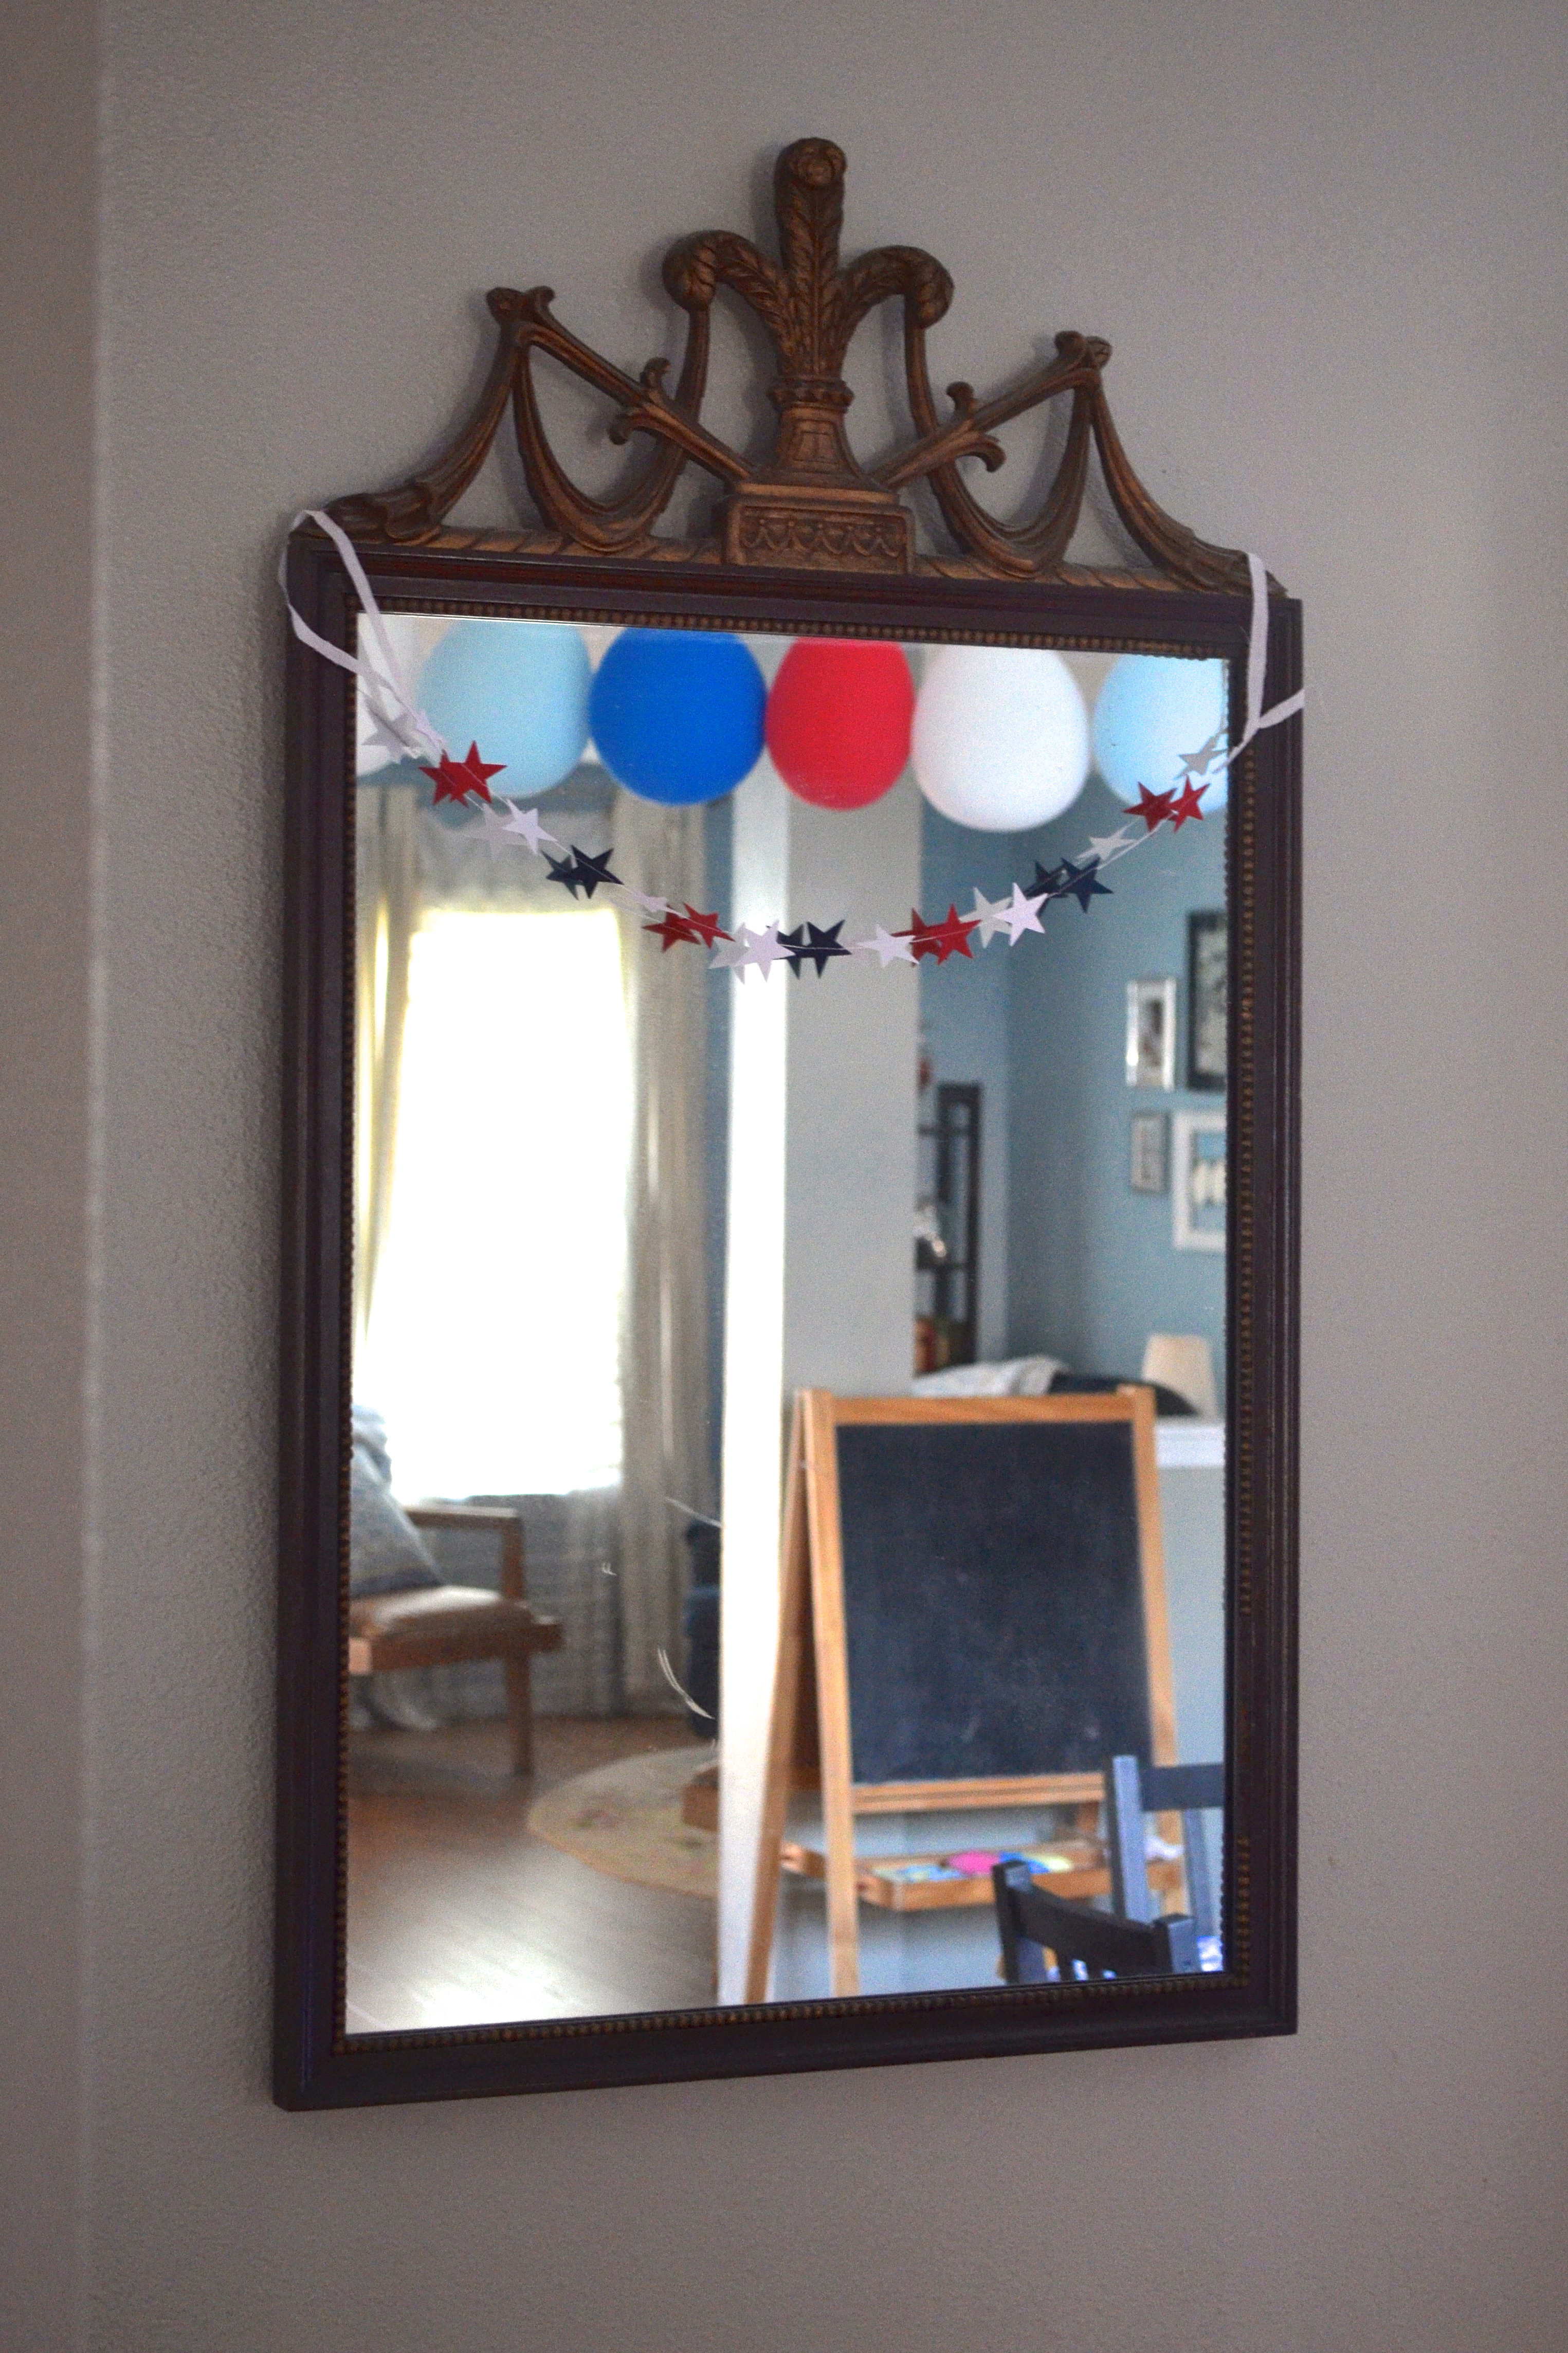
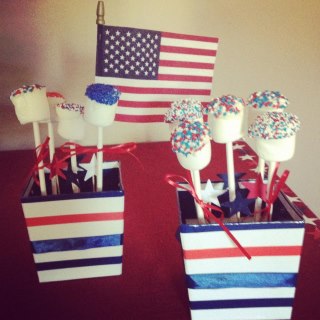
The Red, White and Blue Stars Garland added the perfect bit of color and texture to the front of the table, don’t you think?the Cars party on the Path Less Traveledthe snacks and goodies included watermelon, nuts, chips and salsa, pretzels, carrot sticks and dip, Chex mix, S’mores {the vintage blue Ball jars are perfect for serving and displaying goodies like this!}, and a variety of cold drinks {including this punch which is delicious and really easy!}.the Cars party on the Path Less TraveledDo you see the little cars and tools scattered across the table? Ian got quite a kick when he realized that I had used some of his favorite toys for his party decorations {he’s such a sweetheart!!!}
the Cars party on the Path Less Traveledthe Tow Mater sign – Ian is still holding onto this! He has it in his room now next to his bed. From a distance you can hardly tell that I whipped it out using a sheet of cardboard, a foam brush and some white acrylic paint. ;)the Cars party on the Path Less TraveledI made the Lightning McQueen sign using a free printable that I found here and some red construction paper – it turned out so cute that I ended up making several to scatter around the party!

So, there you have it – part one of the Cars party!


This is going to be a birthday themed week here on the blog! Today the world is welcoming a new royal baby {congratulations, William and Kate! And blessings upon the newest successor the British throne! <3 } and later this week my husband and three of his brothers will be having birthdays. Imagine the amount of cake that we’ll be eating! {not that I’m complaining at all!} How do you and your family celebrate birthdays? Do you have any special traditions?

<3

Follow on Bloglovin

how Tuesday: DIY Balloon Garland Tutorial!

how Tuesday: DIY Balloon Garland Tutorial!

as promised, today for how Tuesday I have a tutorial for the DIY Balloon Garland!

how Tuesday: DIY Balloon Garland Tutorial from the Path Less TraveledIt makes a big impact for an incredibly small investment, and can be customized in an almost endless array of colors! Want a rainbow? No problem. Monochromatic more your style? Again, no problem. Seriously, you can use this for any of life’s celebrations from baby showers, birthdays, graduations (school colors!}, bridal showers, casual receptions, housewarmings … even retirement parties!

how Tuesday: DIY Balloon Garland Tutorial from the Path Less Traveled materials: balloons in your preferred color{s}, a needle with a large eye {hole for the twine}, twine {or narrow ribbon}, scissors, and thumbtacks {if you’re planning on hanging it outside, you might prefer to tie the garland up and not need the tacks}how Tuesday: DIY Balloon Garland Tutorial from the Path Less Traveled step 1: measure the length you’d like your garland to be and choose your pattern – I decided to use red, white and two shades of blue for Ian’s party – {You might like a monochrome look, a random look, or some other variation!} and inflate your balloons. Having an assistant for this step can be very helpful!how Tuesday: DIY Balloon Garland Tutorial from the Path Less Traveled step 2: thread your needle with the twine – I chose to use twine for this due to it’s strength {thread just wasn’t going to be strong enough!}, but you could also choose to use a narrow ribbon or some other narrow type of cording.how Tuesday: DIY Balloon Garland Tutorial from the Path Less Traveled step 3: begin sewing the garland – poke the needle through the “tag” of the balloon, not too close to the end or it might rip out, just somewhere in the middle …how Tuesday: DIY Balloon Garland Tutorial from the Path Less Traveled…pull the needle and cording through, and continue with the rest of your balloons.

how Tuesday: DIY Balloon Garland Tutorial from the Path Less Traveledstep 4: tie a loop in the end of your cord to prepare for hanging. If you’re hanging the balloon garland outside, you might choose to skip the loop and leave a long tail {to use for tying} instead.how Tuesday: DIY Balloon Garland Tutorial from the Path Less Traveled step 5: put a tack through afore mentioned loop and stick ‘er up there!how Tuesday: DIY Balloon Garland Tutorial from the Path Less Traveled

how Tuesday: DIY Balloon Garland Tutorial from the Path Less Traveled step 6: string out the garland across your desired distance and repeat step 5 …

how Tuesday: DIY Balloon Garland Tutorial from the Path Less Traveled…while taking a moment to admire how pretty it looks hanging across your room. :)

how Tuesday: DIY Balloon Garland Tutorial from the Path Less Traveled how Tuesday: DIY Balloon Garland Tutorial from the Path Less Traveled

And that’s it! You can make several strands and hang them together, leave it to stand alone or, as you can see from the first photo, combine it with crepe streamers! Each option looks great – with a project like this, it’s hard to go wrong :)

If you haven’t taken a moment to enter the giveaway, you might want to click over and do that – it’s super easy to enter, and you might win a set of the newest red, white and blue star garland and matching cupcake toppers!

<3


sharing this on Skip To My Lou Sew Can Do and C.R.A.F.T.

Follow on Bloglovin

a little boy Cars party {sneak peek}

a little boy Cars party {sneak peek}

Well, as you’ve heard, our little boy had a birthday {he’s 3!} which, of course, means that we had a party :)

Emma Grace loves parties, and being the awesome big sister that she is, she took on helping Ian “plan” his party months in advance – “So, Ian, you like cars? Hm, you want a Cars party?!” To which he {of course} replied, “YES!!!” So we’ve been talking about the Cars party for months.

For planning purposes I had been putting the ideas I’d found all over the interwebs onto a Pinterest board, and then {just like for Em’s party} closer to the day I narrowed down what might be feasible. Here is a quick peek at how it turned out!

Cars themed party from the Path Less Traveled some DIY signage over the snack/dessert table – and lots of cars and stars!Cars themed party from the Path Less Traveleda view from the front room to the back of the house: we chose to have an evening party for family, so the kiddos needed to have a light dinner before everyone arrived – they really enjoyed waking up from their nap to a decorated home and eating dinner at the “road” table!Cars themed party from the Path Less Traveled

the back yard – we had a few showers, but all in all in was a beautiful evening for a party. I’ll be showing you a full tutorial tomorrow on how I made the balloon garland over the inside table – be sure to check back!

All in all, not too shabby for a 3rd birthday party! Especially considering that the mama had rolled in late the night before from the Hobnob Summer Market, and most of the prep happened on the morning of the party. :) I love it when a plan comes together!

Have you had a chance to enter the Red, White and Blue Giveaway yet? I hope your Monday has been lovely, and I’ll see you here tomorrow,


<3

Chair Garland Decor Ideas {a continuing series}

Chair Garland Decor Ideas {a continuing series}

Have you heard? The chair garlands in the shop aren’t just for decorating chairs!
When it comes to using these petite garlands, there are so many options that chairs are only the the start! This is a continuing series {see more posts here} where I’ll share some of my ideas with you {and, if you’d like to share some of yours, I’ll post them as well!}

DSC_0076 For the Summer holidays – Memorial Day, Ian’s birthday, Flag Day, the 4th of July, etc. – I am decorating with lots of red, white and blue. {those balloon in the reflection? they’re left over from Ian’s party :)}

This vintage mirror lightens a corner in our dining area downstairs, and as I was decorating for our little guy’s birthday I decided to see if one of the Red, White and Blue Chair Banners would fit across it to add an additional pop of color – and look at that, it fit perfectly!

DSC_0080

How about you? Have you tried using one of these sweet, short lengths of garland in an unexpected spot? Share your ideas in the comments!


<3


In other online news …

In other online news …

In other online news … our Atlas Cupcake Toppers have made it onto the Country Living website!

We're in Country Living!

Last week I was contacted by one of the editors of Country Living.

She was checking to see if I would mind submitting some photos and products to be considered for one of their web features – after a split second of thought I responded with “sure!” {of course!}

We emailed back and forth a bit, and this week the feature on hand-made wedding cake toppers went live {yay!}. Each one  of the cake toppers featured is sweet and lovely in it’s own way – I’d love to be able to use them all! I’m so thrilled and grateful to be included – God is so good and surprises me with the ways that He is growing our business on our behalf. :D

XO

Chair Garland Decor Ideas {a continuing series}

Chair Garland Decor Ideas {a continuing series}

Have you heard? The chair garlands in the shop aren’t just for decorating chairs!
When it comes to using these petite garlands, there are so many options that chairs are only the the start! This is the beginning of a continuing series where I’ll share some of my ideas with you {and, if you’d like to share some of yours, I’ll post them as well!}

Use a chair garland to decorate a frame – this has been such a fun way to add some quick, seasonally appropriate, decor to my photo wall!

For Valentine’s Day I had the Red and White Heart Garland here, and as the spring holidays approached I switched it to this sweet Doily Garland. I find that they add a perfect touch of softness and unexpected color and am in love with this idea <3


customer love – parties edition!

customer love – parties edition!

Each time a customer leaves a comment saying how much they love their purchase, it makes my day. I especially love it when they tell their friends and send me photos of how they have used the things that they have bought! Last month I shared some party photos, and this month I have a follow up one :)

Amber shared her little guy’s incredibly darling first birthday with us last month, and a few weeks later she sent me another photo to share – this time a close up of her marshmallow pop display!

Amber used the Red, White and Blue Star toppers to add the finishing touch to her super cute idea, as she says: “I put some florist foam in the boxes and stuck the cupcake toppers on the foam.” Great job, Amber! And thank you again for sharing! The star toppers were the perfect finish to your display :)

Do you have photos that you’d like to share? If so, you can either email them to me at elizabeth@pltmarket.com or tag them with #thepathlesstraveledmarket on Instagram – we’d all love to see your ideas!

{by the way, did I mention that I often send “thank you” coupons to the lovelies who let me share their photos with you? Yep, I do :)}

Happy Friday!

XO

new stuff – and a sweet giveaway

new stuff – and a sweet giveaway

So, I mentioned yesterday that there was a giveaway coming :) If you follow us on Facebook, you might have seen that we have added Dessert Garlands to the shop! To celebrate the new stuff, we’re having a sweet little giveaway for you {and any of your friends that you’d like to share this with ;D}!

Giveaway! Gold Scallop Cake Garland

One of the most versatile of our new cake garlands is this Glittery Gold Scallop Garland, and you can enter for a chance to win it! It would be perfect for so many occasions – birthdays, a wedding or anniversary, New Year, Christmas desserts, or even to dress up a dark corner of your home {did you see what I did to my fern for Easter?}. Here’s the description of it in the shop:

Creative and trend setting, these glittery gold scallop cake garlands will top your next cake beautifully. Each garland is carefully created to give your cake a custom look that shimmers in the light. Wedding, birthday, or just a special dessert, these cake garlands are a must! Each garland is made from 2 inch wide scallops, attached to a pair of ten inch tall bamboo skewers creating the bunting.

So, what do you think? Would you like to win one? ;D Or do you know someone who would be just tickled to see this show up in their mail box?

giveaway details: Giveaway open until April 24 at 11:59 pm EST. To enter, use the rafflecopter widget below. One unique winner will be emailed + announced on Thursday, April 25th at the top of this blog post. I can’t wait to see who wins! <3

a Rafflecopter giveaway


p.s. I’d LOVE it if you shared this with your friends – the more the merrier, right? :)

a little St. Patrick’s Day party

a little St. Patrick’s Day party

what do you get when you combine some green, some gold and a few cupcakes? A little St. Patrick’s Day party!

So, I’m not Irish. And we didn’t really celebrate St. Patrick’s Day growing up. But I do love a good party {and any excuse to have a cupcake} and I really enjoy the story of St. Patrick {my kids are most familiar with the Veggie Tales version}, so here’s one that I styled to celebrate!

St. Patrick's Day party via the Path Less Traveled

St. Patrick's Day party via the Path Less Traveled

St. Patrick's Day party from the Path Less Traveled

St. Patrick's Day party via the Path Less Traveled

St. Patrick's Day via the Path Less Traveled

You can find everything that I used {except for the chocolate coins and napkins – those are from Target :)} in the shop: Shamrock garland, chair garlands, party bags, shamrock cupcake toppers and book cupcake toppers

So, are you Irish? How do you celebrate? I’d love to hear!

<3

How-Tuesday: Party Ceiling Pouf

How-Tuesday: Party Ceiling Pouf

There has to be a better name for it, but for now I’m calling it “Party Ceiling Pouf” {really, any of you have suggestions? Let me know!}

image via Lindsay Meinhart on Pinterest

I found this photo on Pinterest a while back, and when we started working on the pink princess party, I knew it would have to happen. Of course, when I was making it I just winged it and didn’t click through to see if there was a tutorial for it. :) After I was finished I found out that wasn’t a tutorial {yay for figuring things out on your own!} but one of the commenters suggested cutting the table covers in half the long way to double your “streamers” – even so, I think it turned out really sweet!

Easy Party Ceiling Decor Tutorial

I picked up all the materials {except for the tissue poms which I borrowed from the kids’ bedroom :)} at the Dollar Tree, and the entire project came to $5 – a huge impact for a small price!

materials for a party ceiling pouf via the Path Less Traveled

 materials: plastic table cloth, wire star garland and thumb tacks {all pictured} tissue poms or balloons and twine or fishing line {not pictured}

instructions for party ceiling pouf via the Path Less Traveled

step one: remove the table cloths from the packaging and gather half of one end in your hand.

step two: find where you want the “center” to be, climb up on a step stool and tack it up …

instructions for party ceiling pouf via the Path Less Traveled

… like this.

step three: Gather and tack up the other side of the end, then do the same with the opposite end.

Repeat with the other three table cloths, making a “+” shape on the ceiling.

DIY Party Ceiling PoufOnce you’ve used all four table cloths, you can stop there or continue on like I did and add a touch of whimsy and sparkle {which, it turns out, thrills little 4-year old girls!} by adding strands of the star garland along the underside of the draped cloths.

Easy Party Ceiling Decor Tutorial

step four: gather your tissue pons {or balloons} and, using twine or fishing line, hang them in a bunch in the center to provide a focal point and hide the bunching :)

step five: step back and admire your work :)

that’s it! Super simple with a huge impact – and a great way to make your celebration special.

xo