how Tuesday: DIY Balloon Garland Tutorial!
as promised, today for how Tuesday I have a tutorial for the DIY Balloon Garland!
 It makes a big impact for an incredibly small investment, and can be customized in an almost endless array of colors! Want a rainbow? No problem. Monochromatic more your style? Again, no problem. Seriously, you can use this for any of life’s celebrations from baby showers, birthdays, graduations (school colors!}, bridal showers, casual receptions, housewarmings … even retirement parties!
 materials: balloons in your preferred color{s}, a needle with a large eye {hole for the twine}, twine {or narrow ribbon}, scissors, and thumbtacks {if you’re planning on hanging it outside, you might prefer to tie the garland up and not need the tacks}
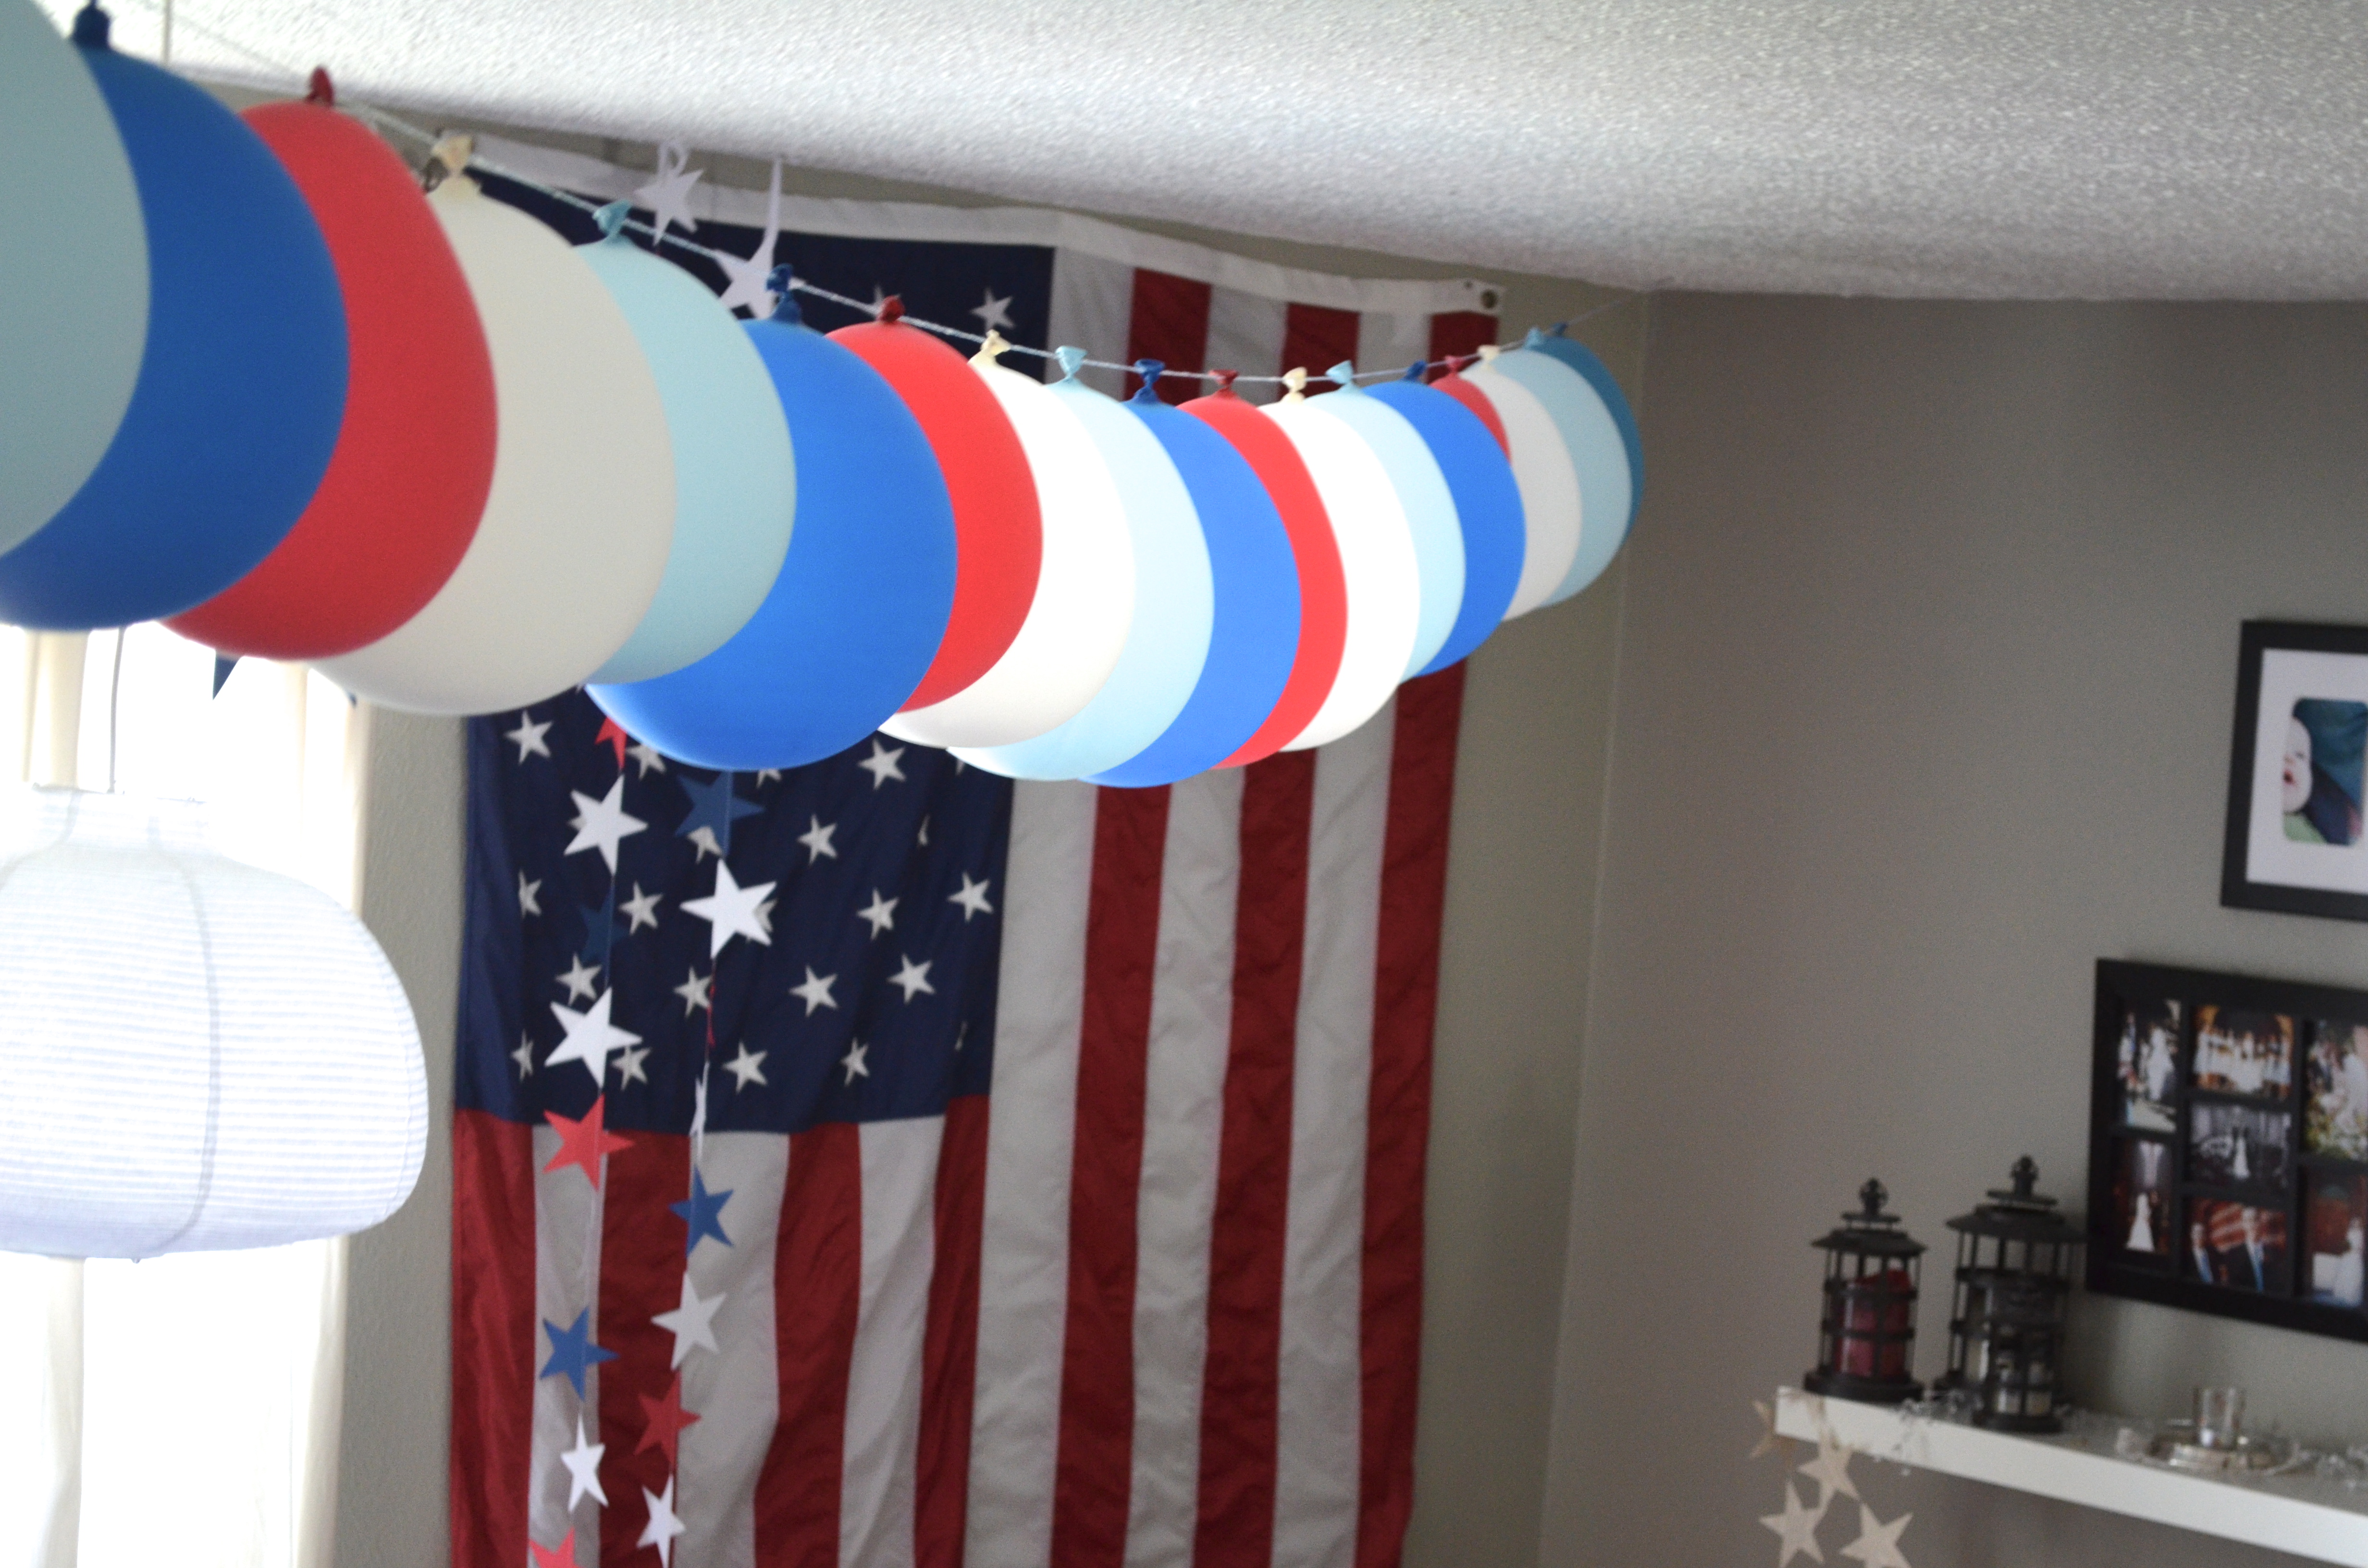
 step 1: measure the length you’d like your garland to be and choose your pattern – I decided to use red, white and two shades of blue for Ian’s party – {You might like a monochrome look, a random look, or some other variation!} and inflate your balloons. Having an assistant for this step can be very helpful!
 step 2: thread your needle with the twine – I chose to use twine for this due to it’s strength {thread just wasn’t going to be strong enough!}, but you could also choose to use a narrow ribbon or some other narrow type of cording.
 step 3: begin sewing the garland – poke the needle through the “tag” of the balloon, not too close to the end or it might rip out, just somewhere in the middle …
 …pull the needle and cording through, and continue with the rest of your balloons.
 step 4: tie a loop in the end of your cord to prepare for hanging. If you’re hanging the balloon garland outside, you might choose to skip the loop and leave a long tail {to use for tying} instead.
 step 5: put a tack through afore mentioned loop and stick ‘er up there!
 step 6: string out the garland across your desired distance and repeat step 5 …
 …while taking a moment to admire how pretty it looks hanging across your room. :)


And that’s it! You can make several strands and hang them together, leave it to stand alone or, as you can see from the first photo, combine it with crepe streamers! Each option looks great – with a project like this, it’s hard to go wrong :)
If you haven’t taken a moment to enter the giveaway, you might want to click over and do that – it’s super easy to enter, and you might win a set of the newest red, white and blue star garland and matching cupcake toppers!
<3
sharing this on  Sew Can Do and C.R.A.F.T.

2 thoughts on “how Tuesday: DIY Balloon Garland Tutorial!”
I love it! Pinning this to the Monday Funday pin board!
Thanks so much Katie! And thanks for stopping by! :D
Comments are closed.